
Turning Microsoft Forms into Actionable Cards Part I
Now that we’ve covered how Power Automate connects external triggers to Operations Center, let’s put that into action by transforming Microsoft Form submissions into work items. Instead of manually sifting through responses, we’ll set up a flow that automatically converts each submission into a properly formatted card in Operations Center—complete with all the details, priority levels, and assignments.
Think of it as giving your forms a direct line to action—no more copy-pasting, no more missed reports. Just a smooth, automated process that ensures every submitted form becomes a trackable, actionable work item. Let’s dive in!
Map Microsoft Form Fields to Work Item Fields
Now, let’s decide what information from the form gets added to the card:
- Title: Choose the form question that should appear as the work item title. (In our example, we use "What is the issue?")
- Single Select Question: Operations Center supports single select dropdown fields, but connecting them to Microsoft Forms is tricky. To simplify this, we use a Single Line Text custom field instead.
- Attach a file (coming later)
Create a Flow in Power Automate
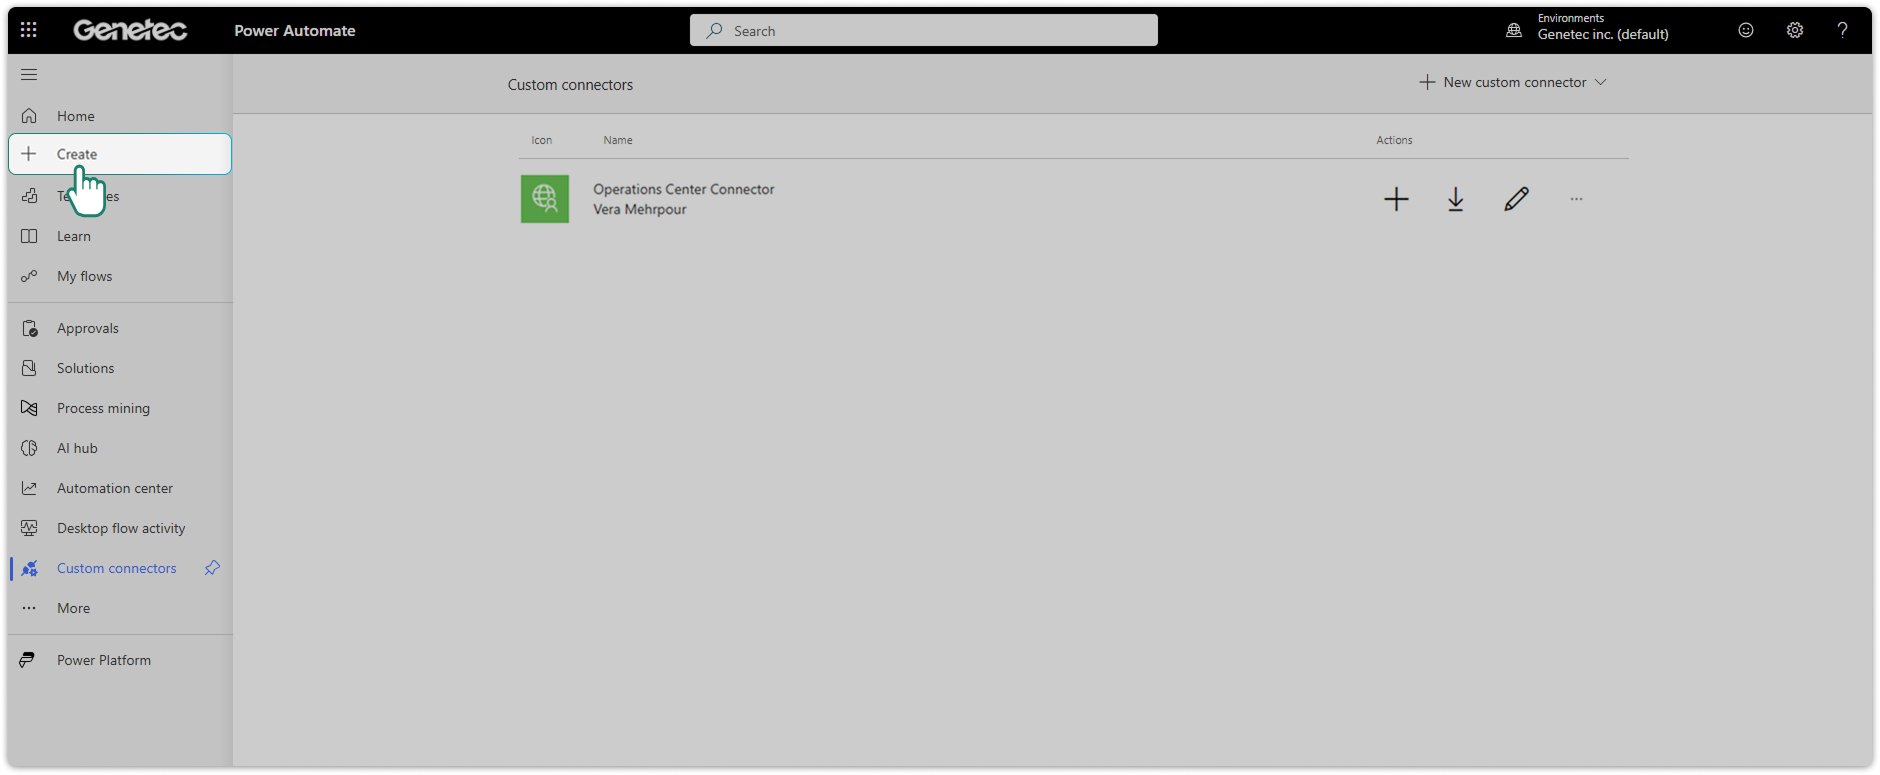
- In Power Automate, go to the + Create tab.
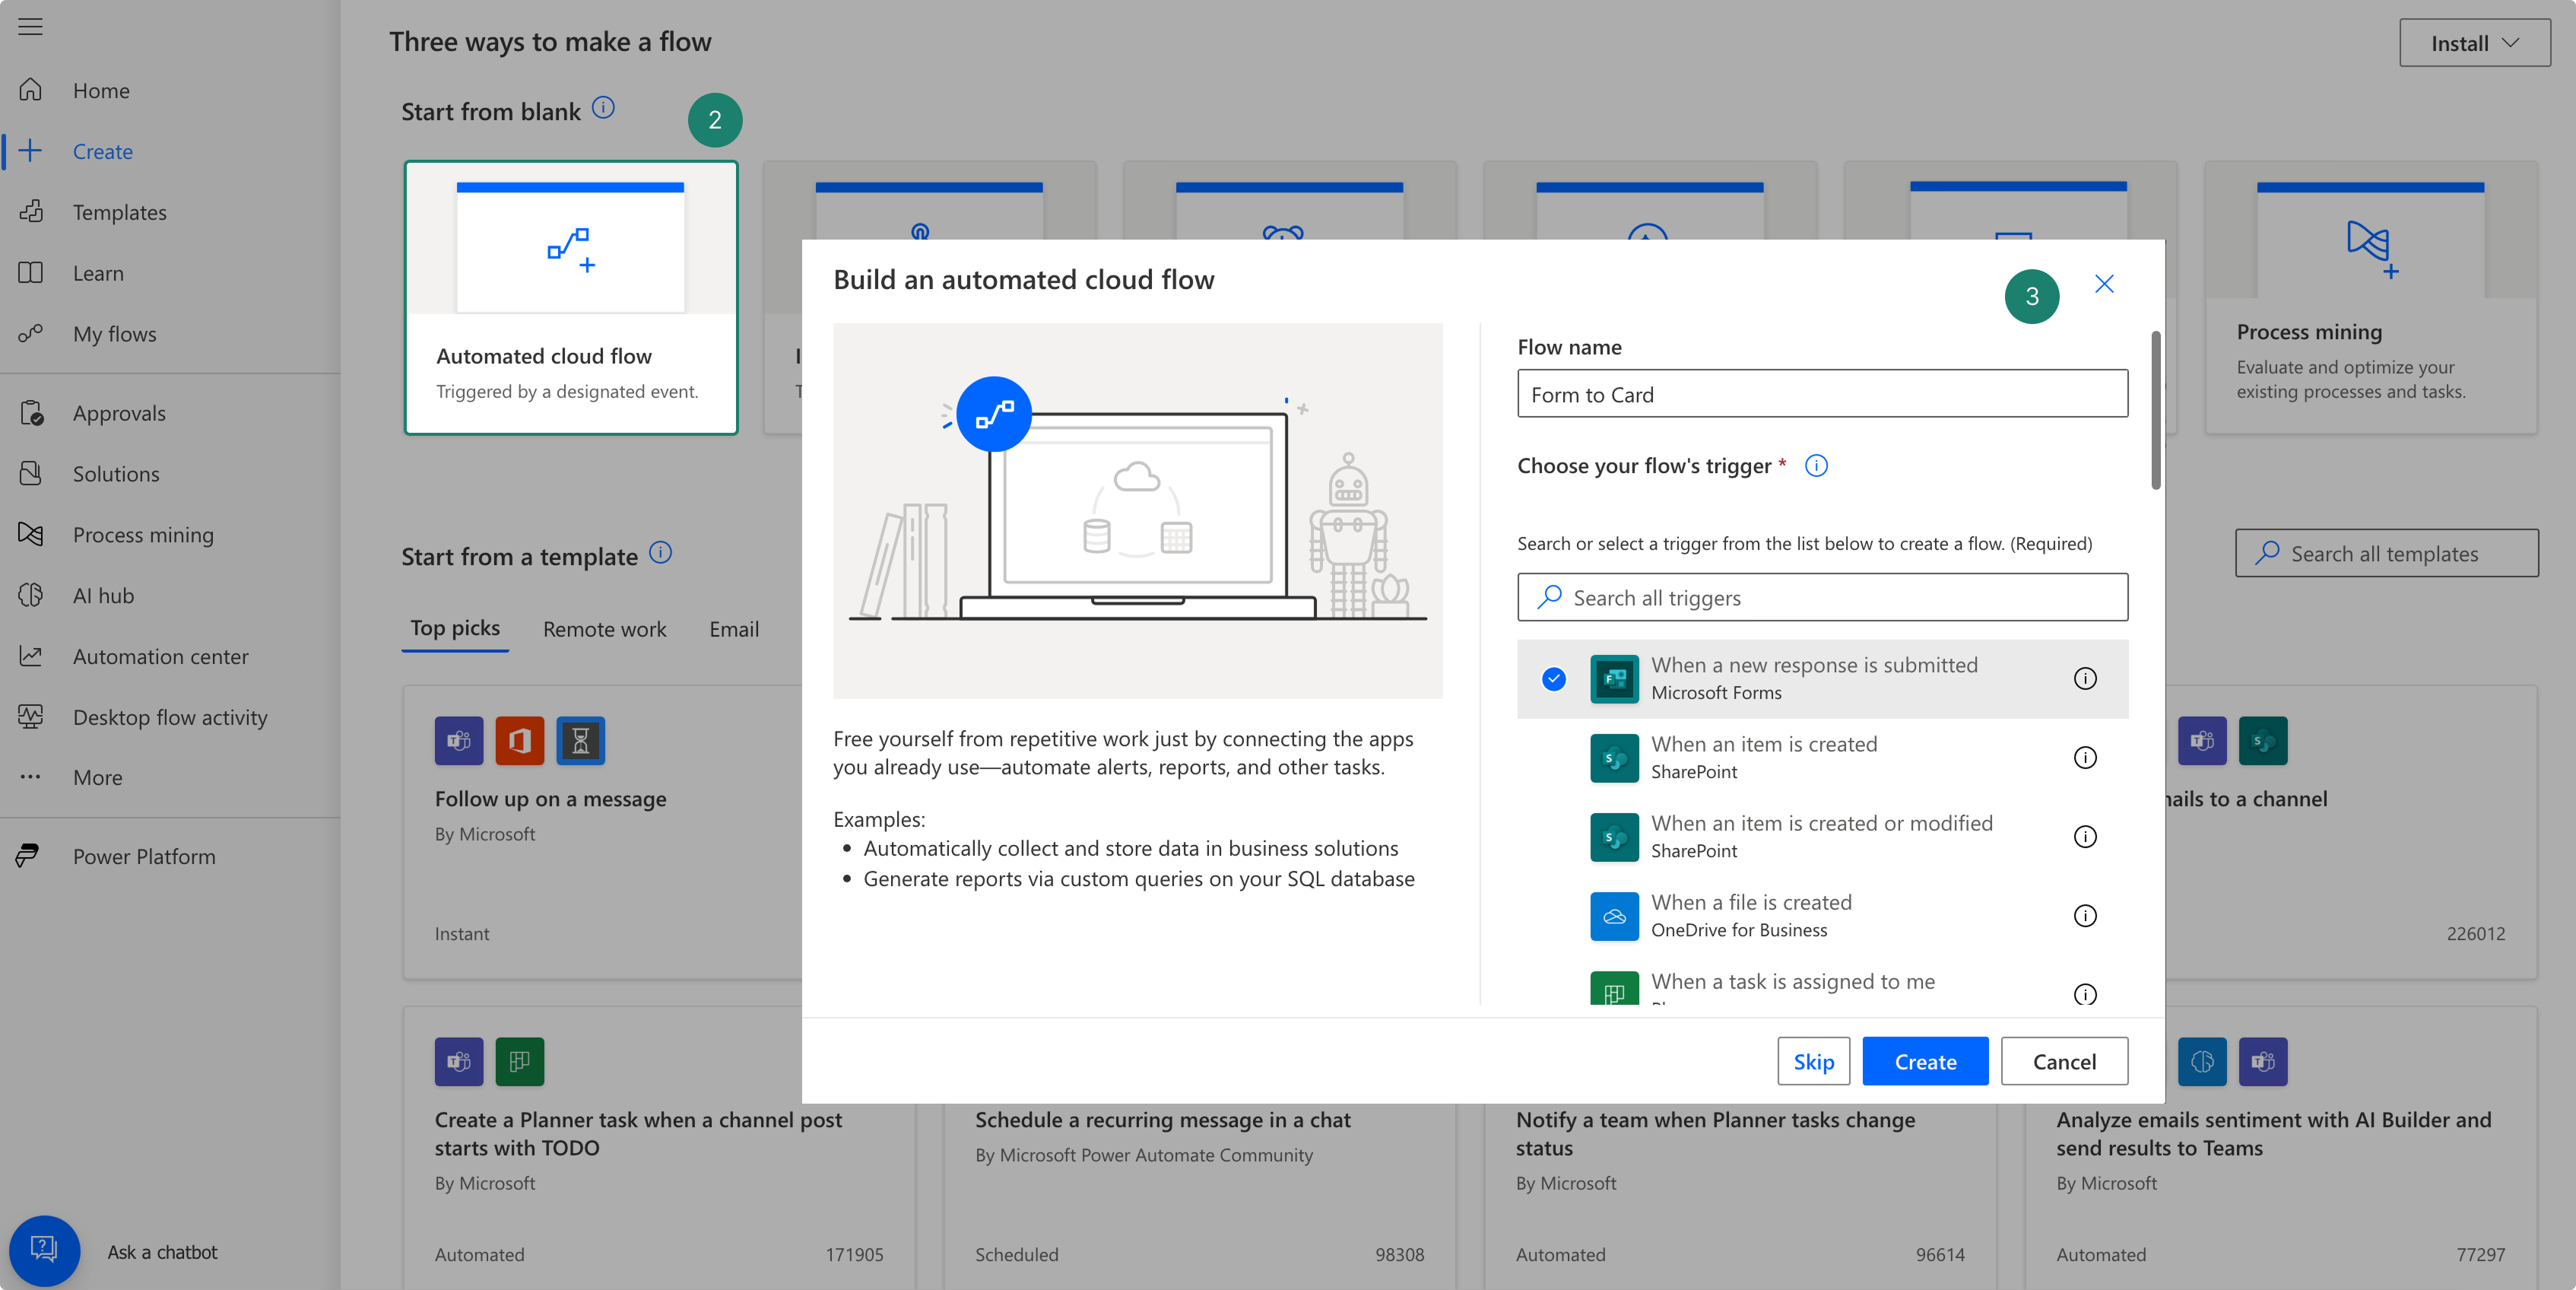
- Click 'Automated cloud flow', give your flow a name and select 'When a new response s submitted' and create.
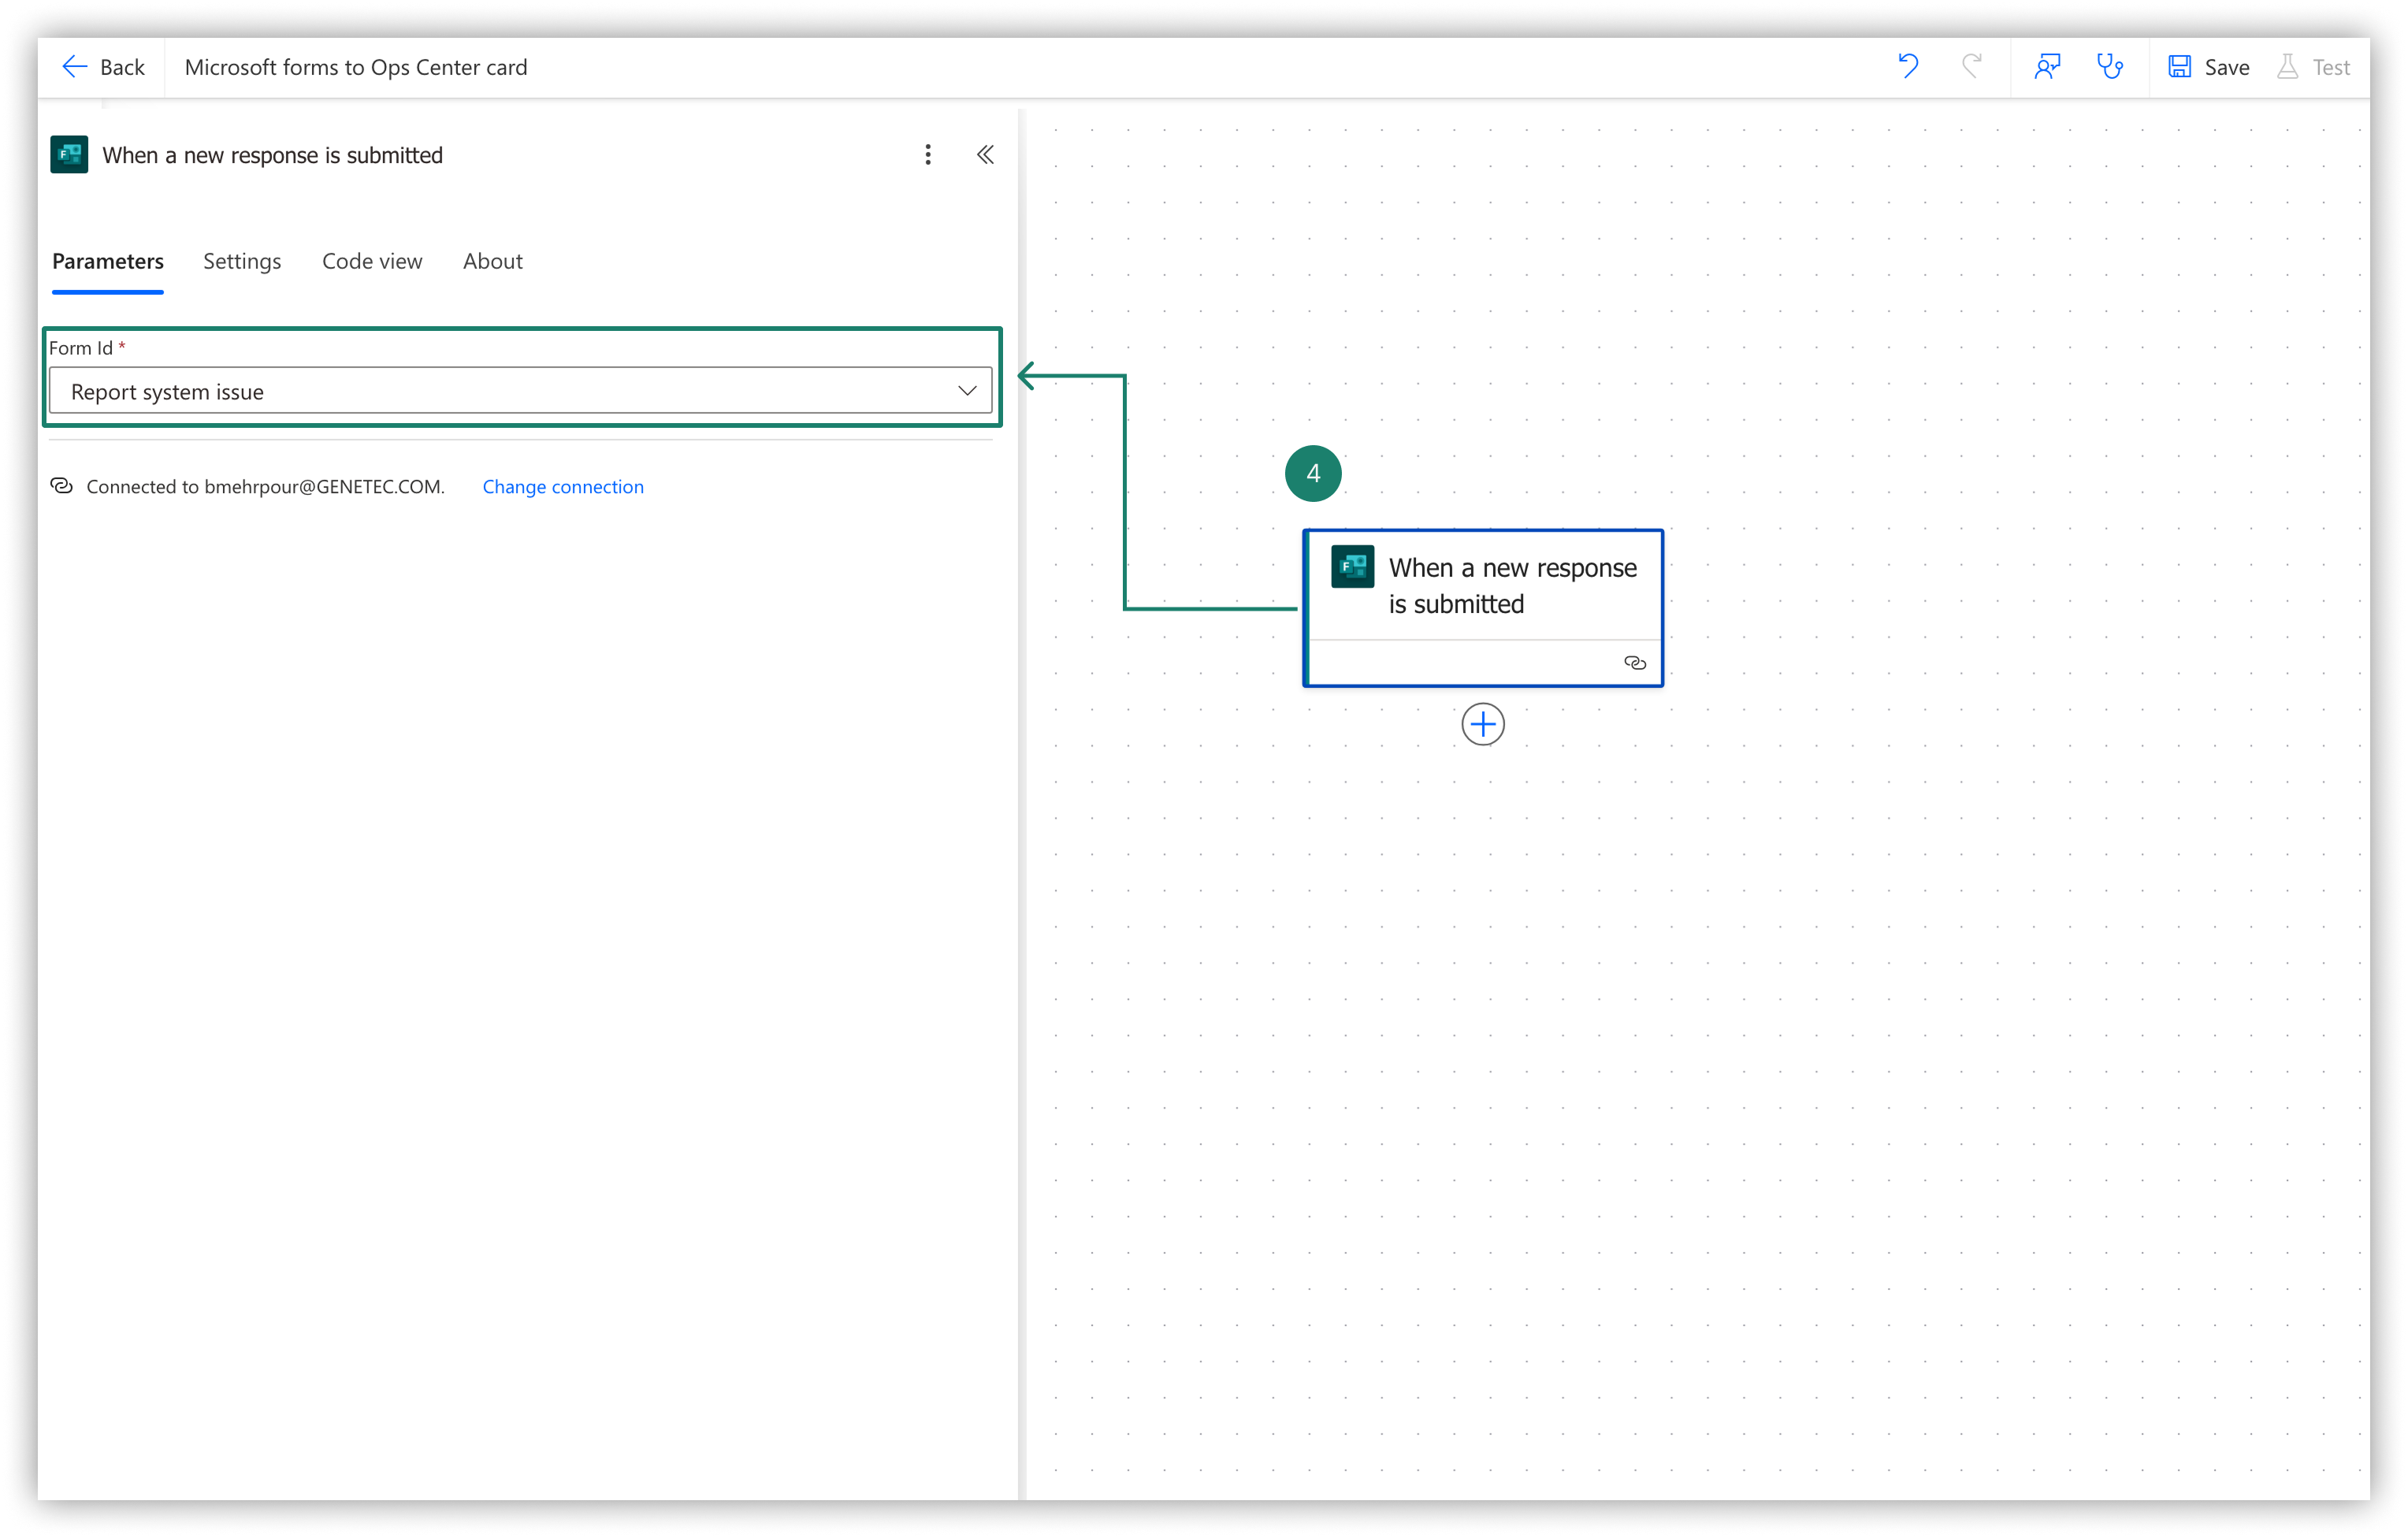
Connect to the Microsoft Form
- Click on the trigger tile and select the Microsoft Form you want to pull responses from.
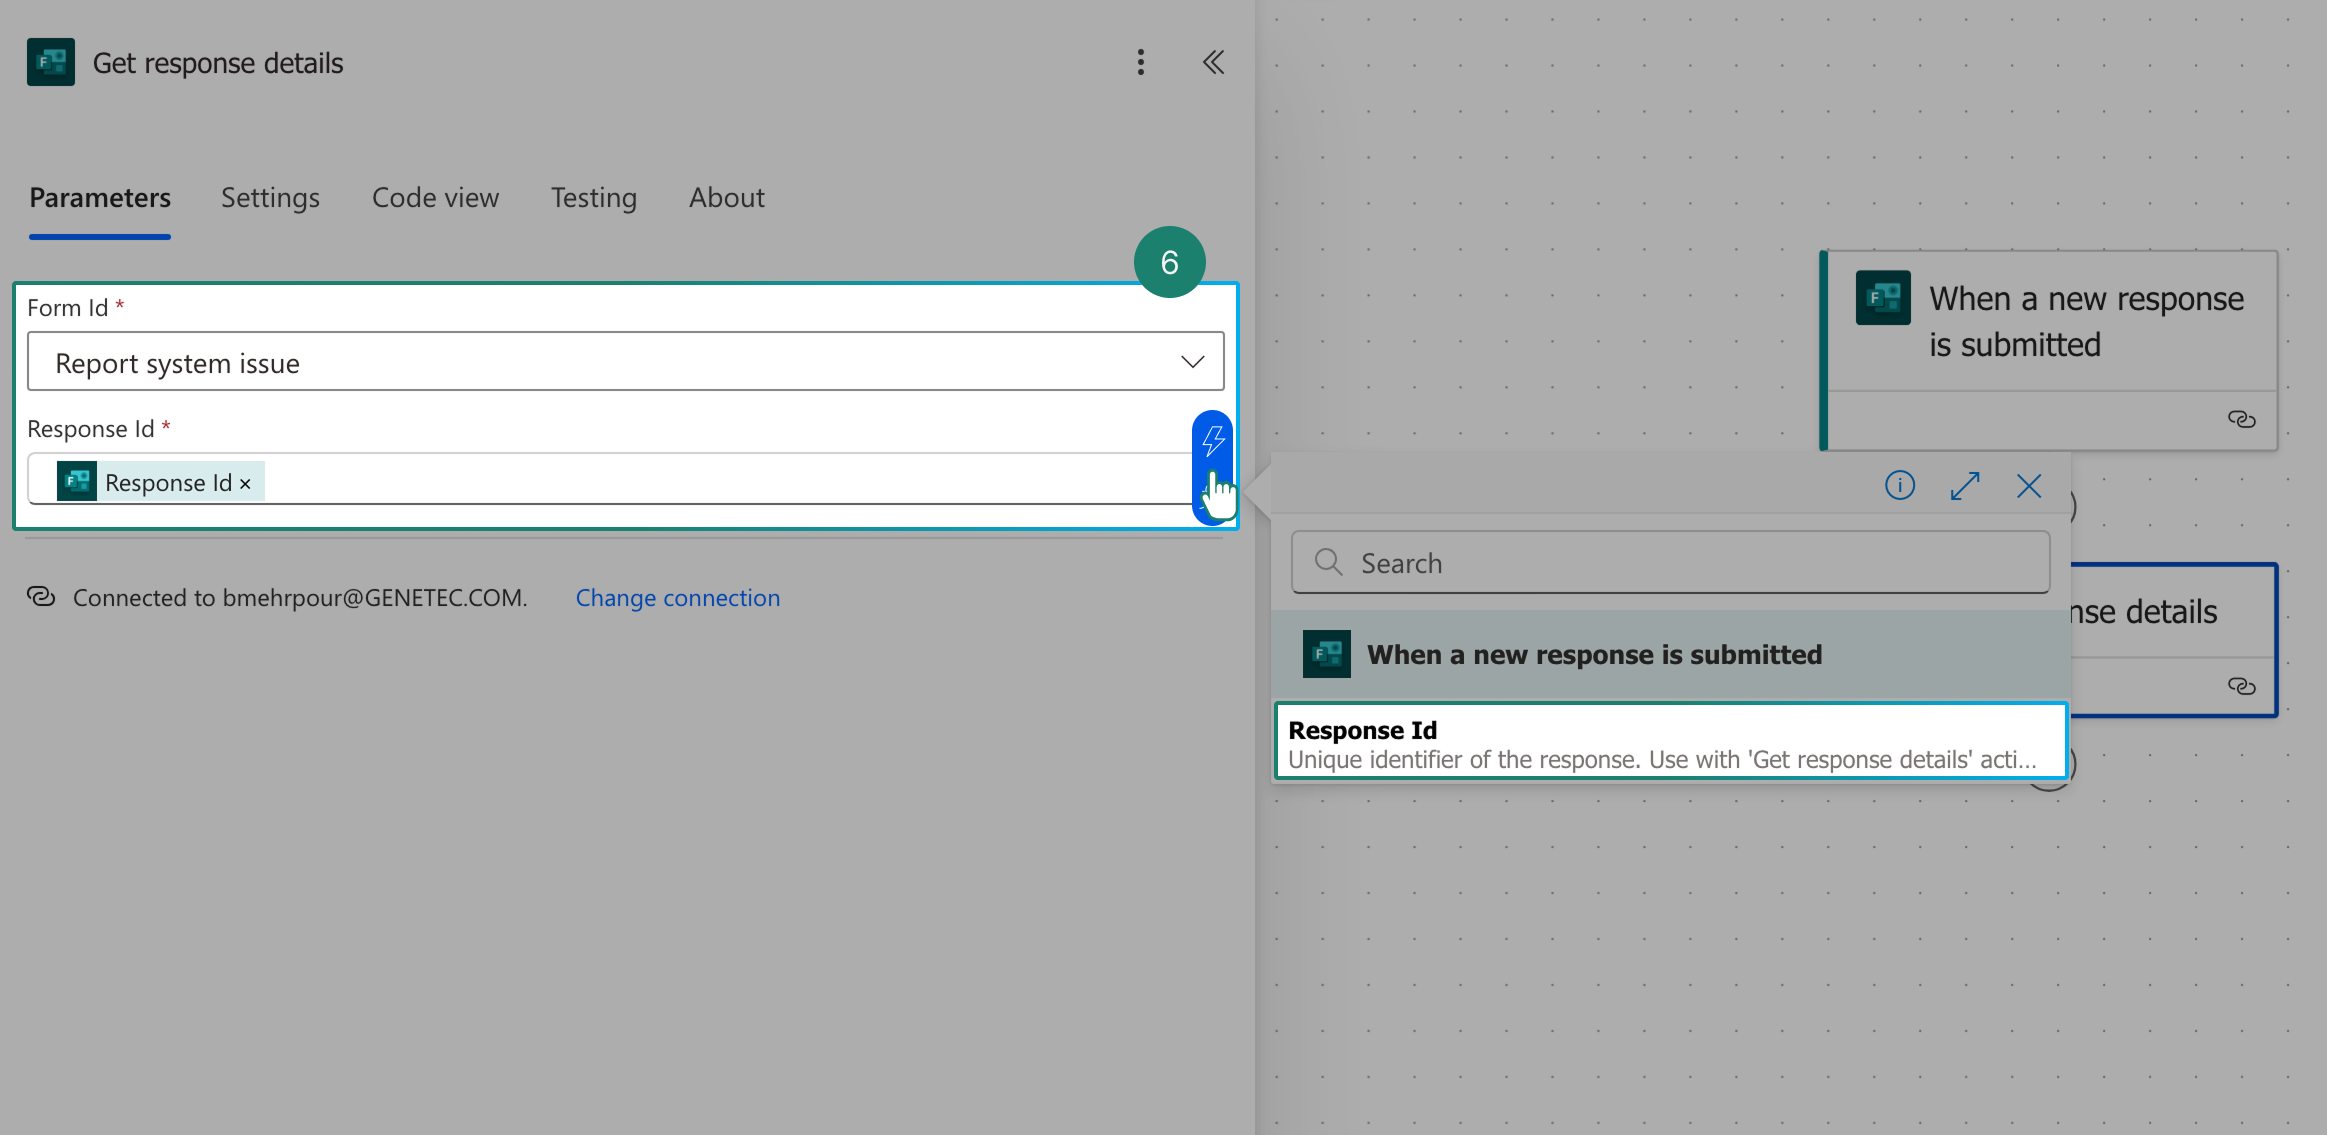
- Click the + icon to add a new action and search for Forms, then select "Get response details".
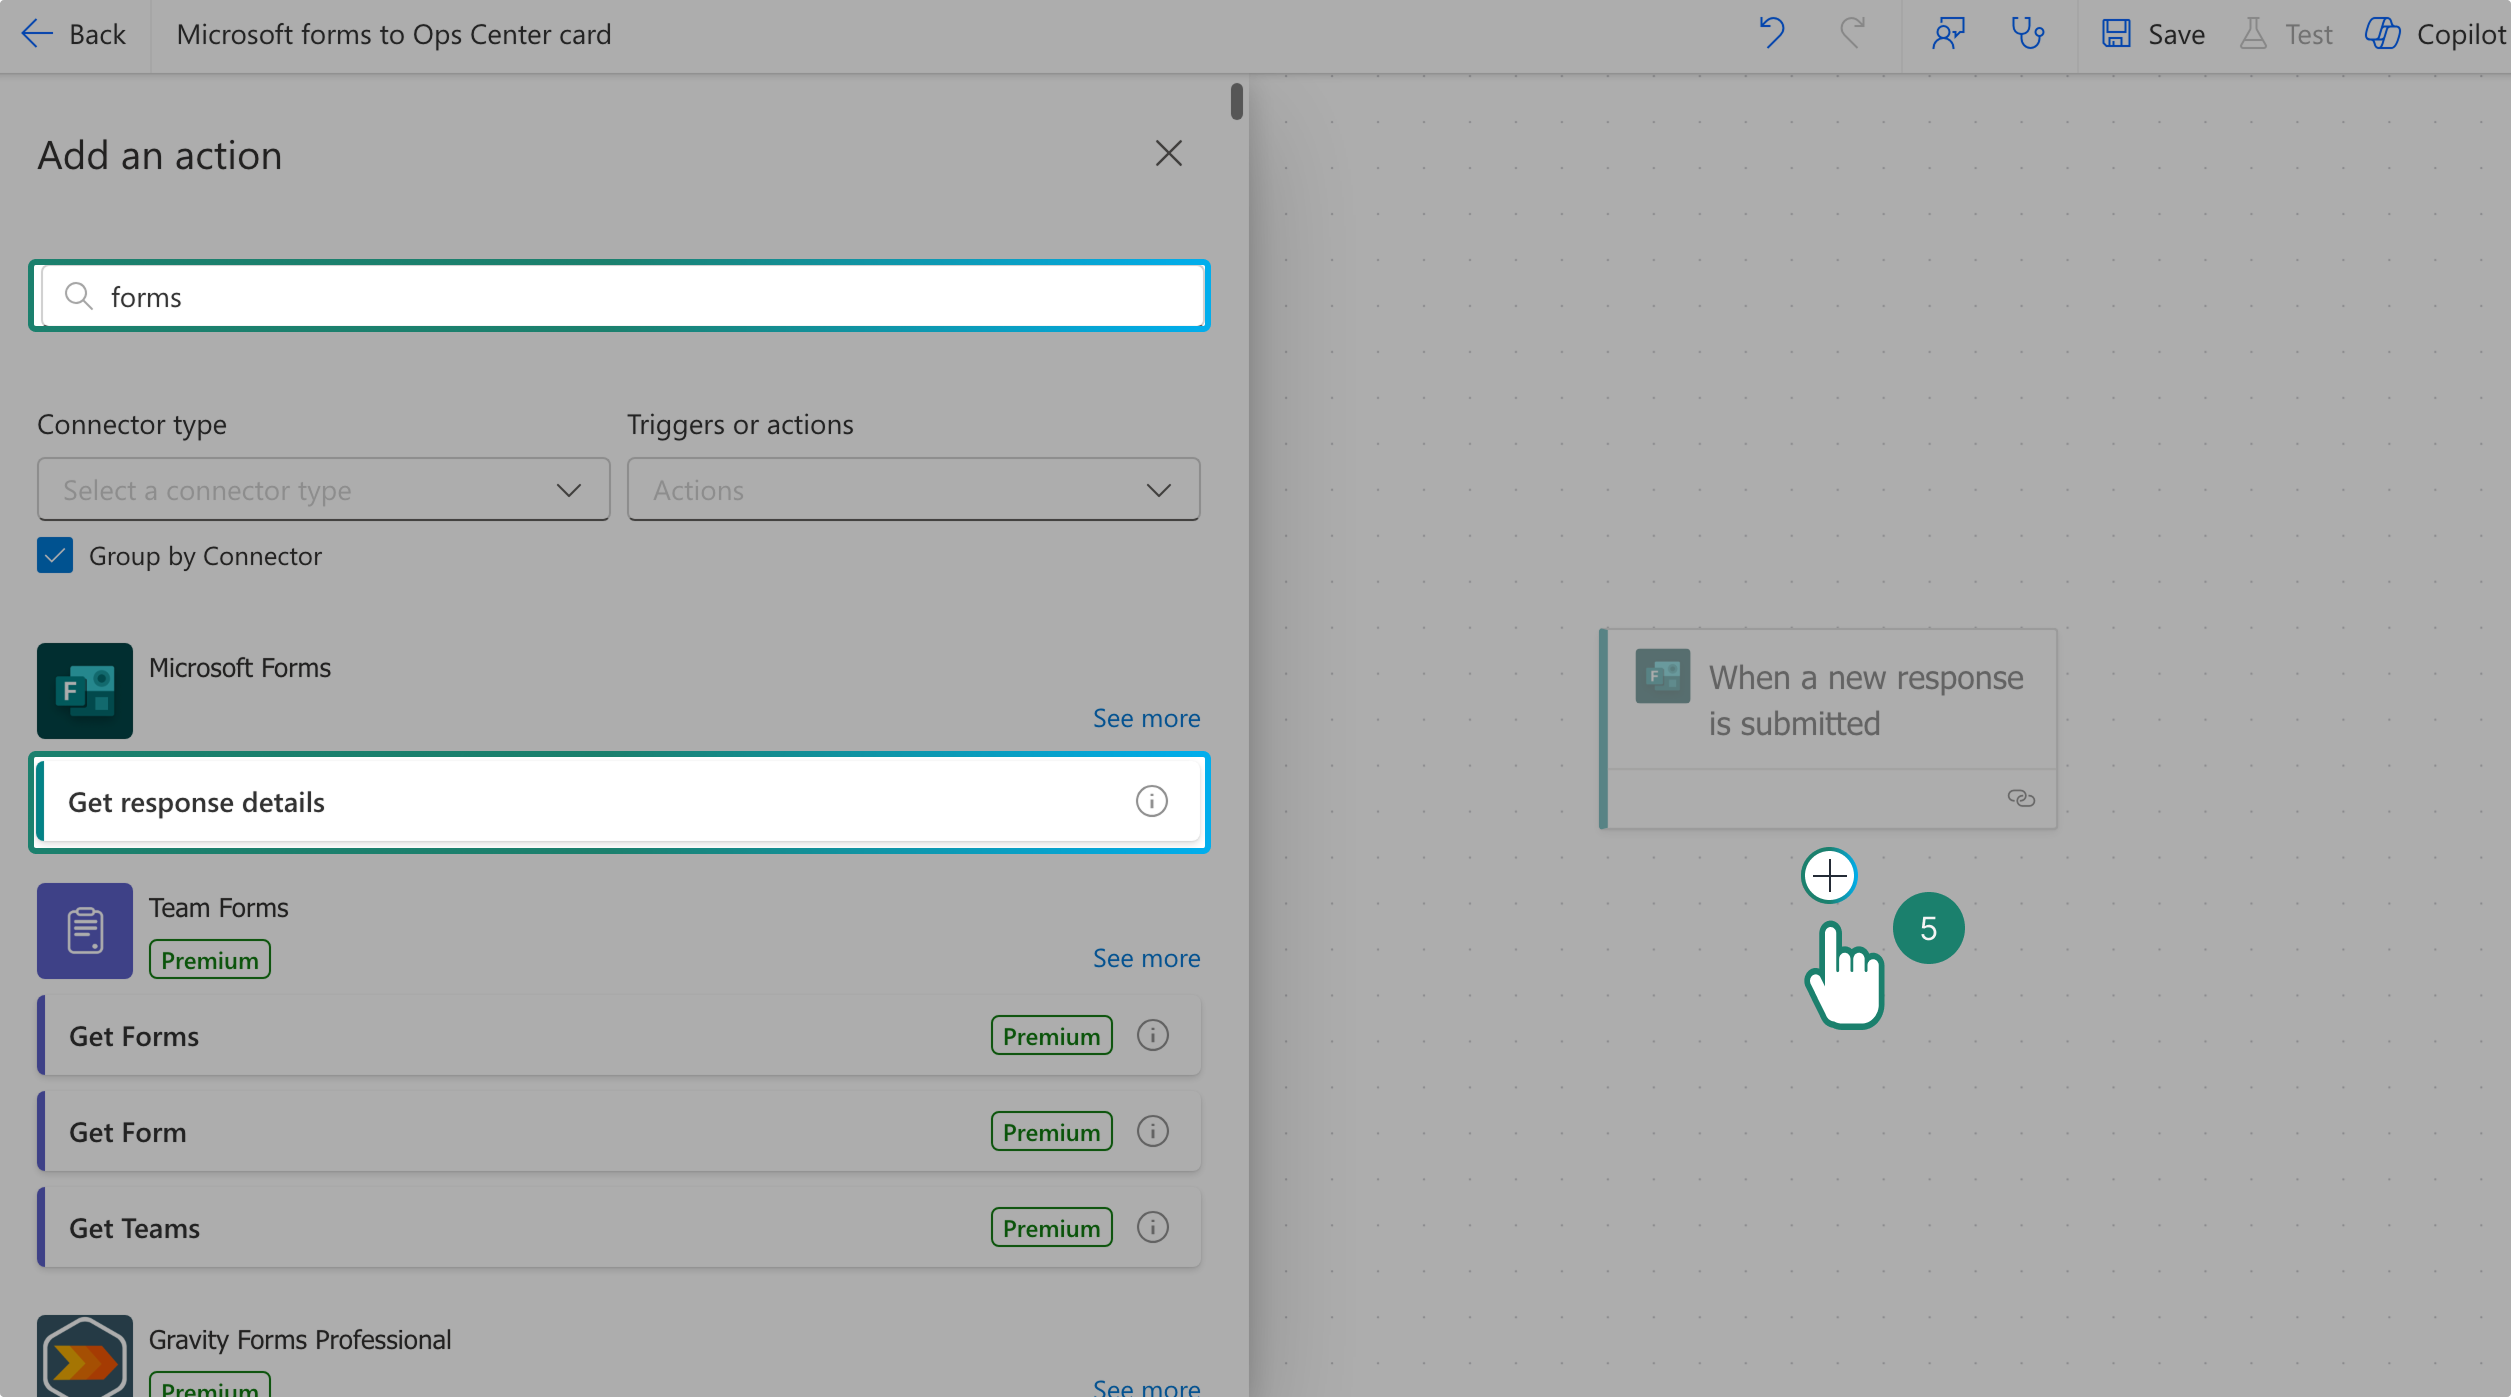
- Choose the same form and set the Response ID to "Response ID".
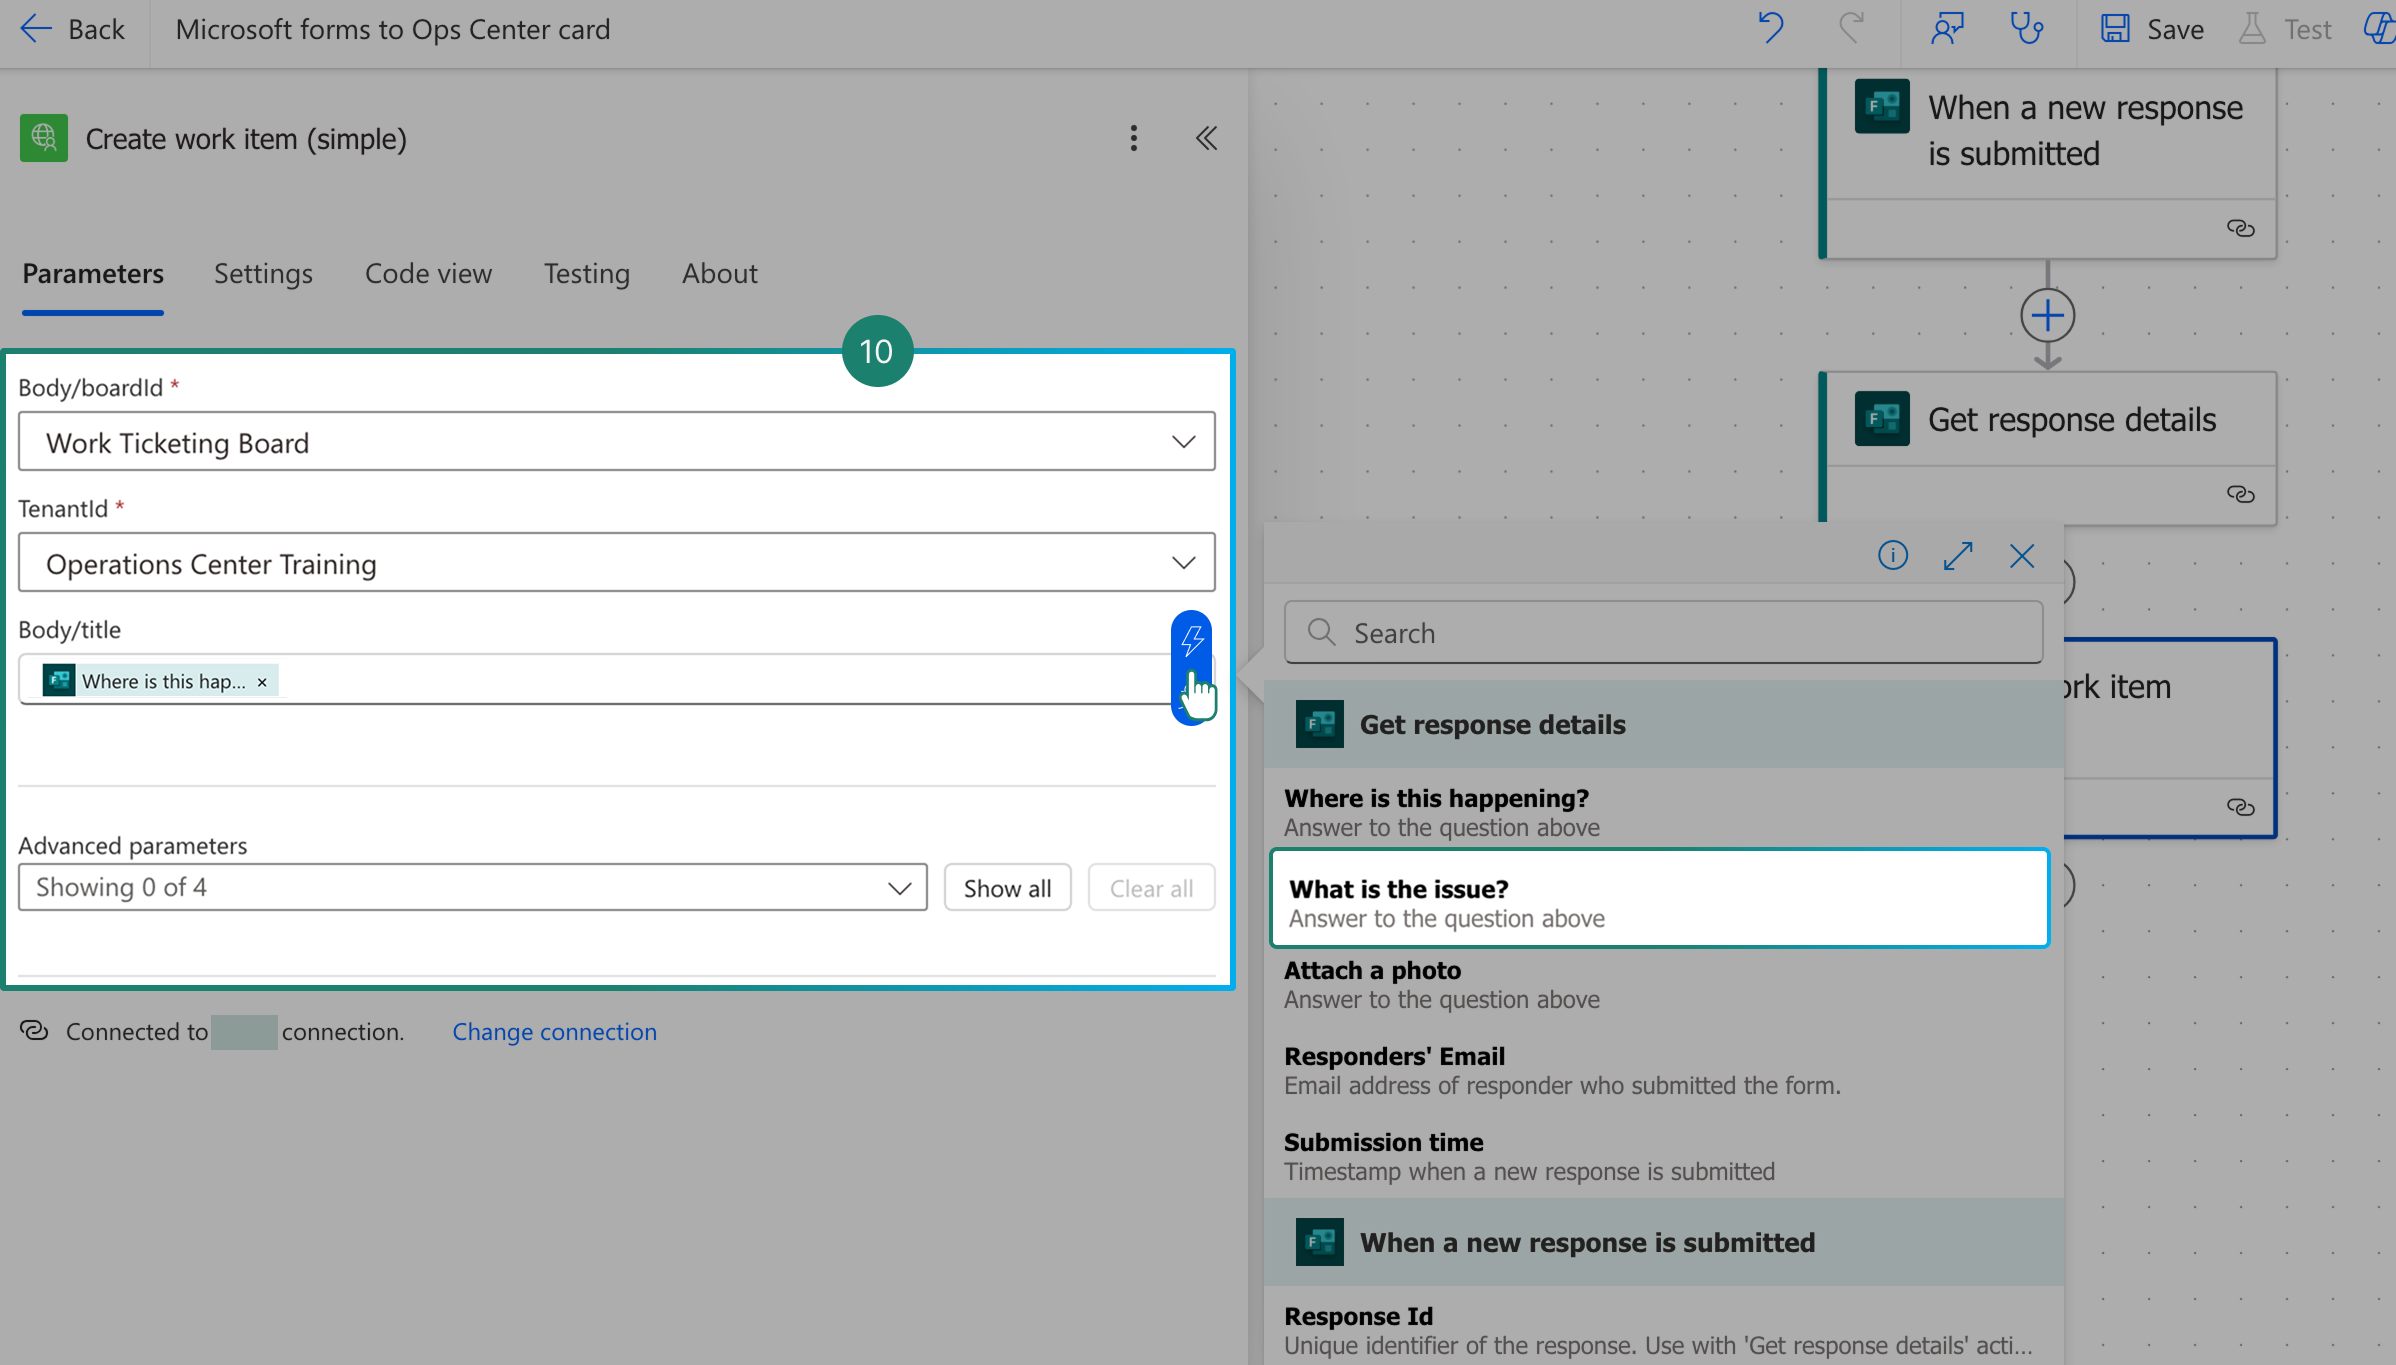
Map card's title
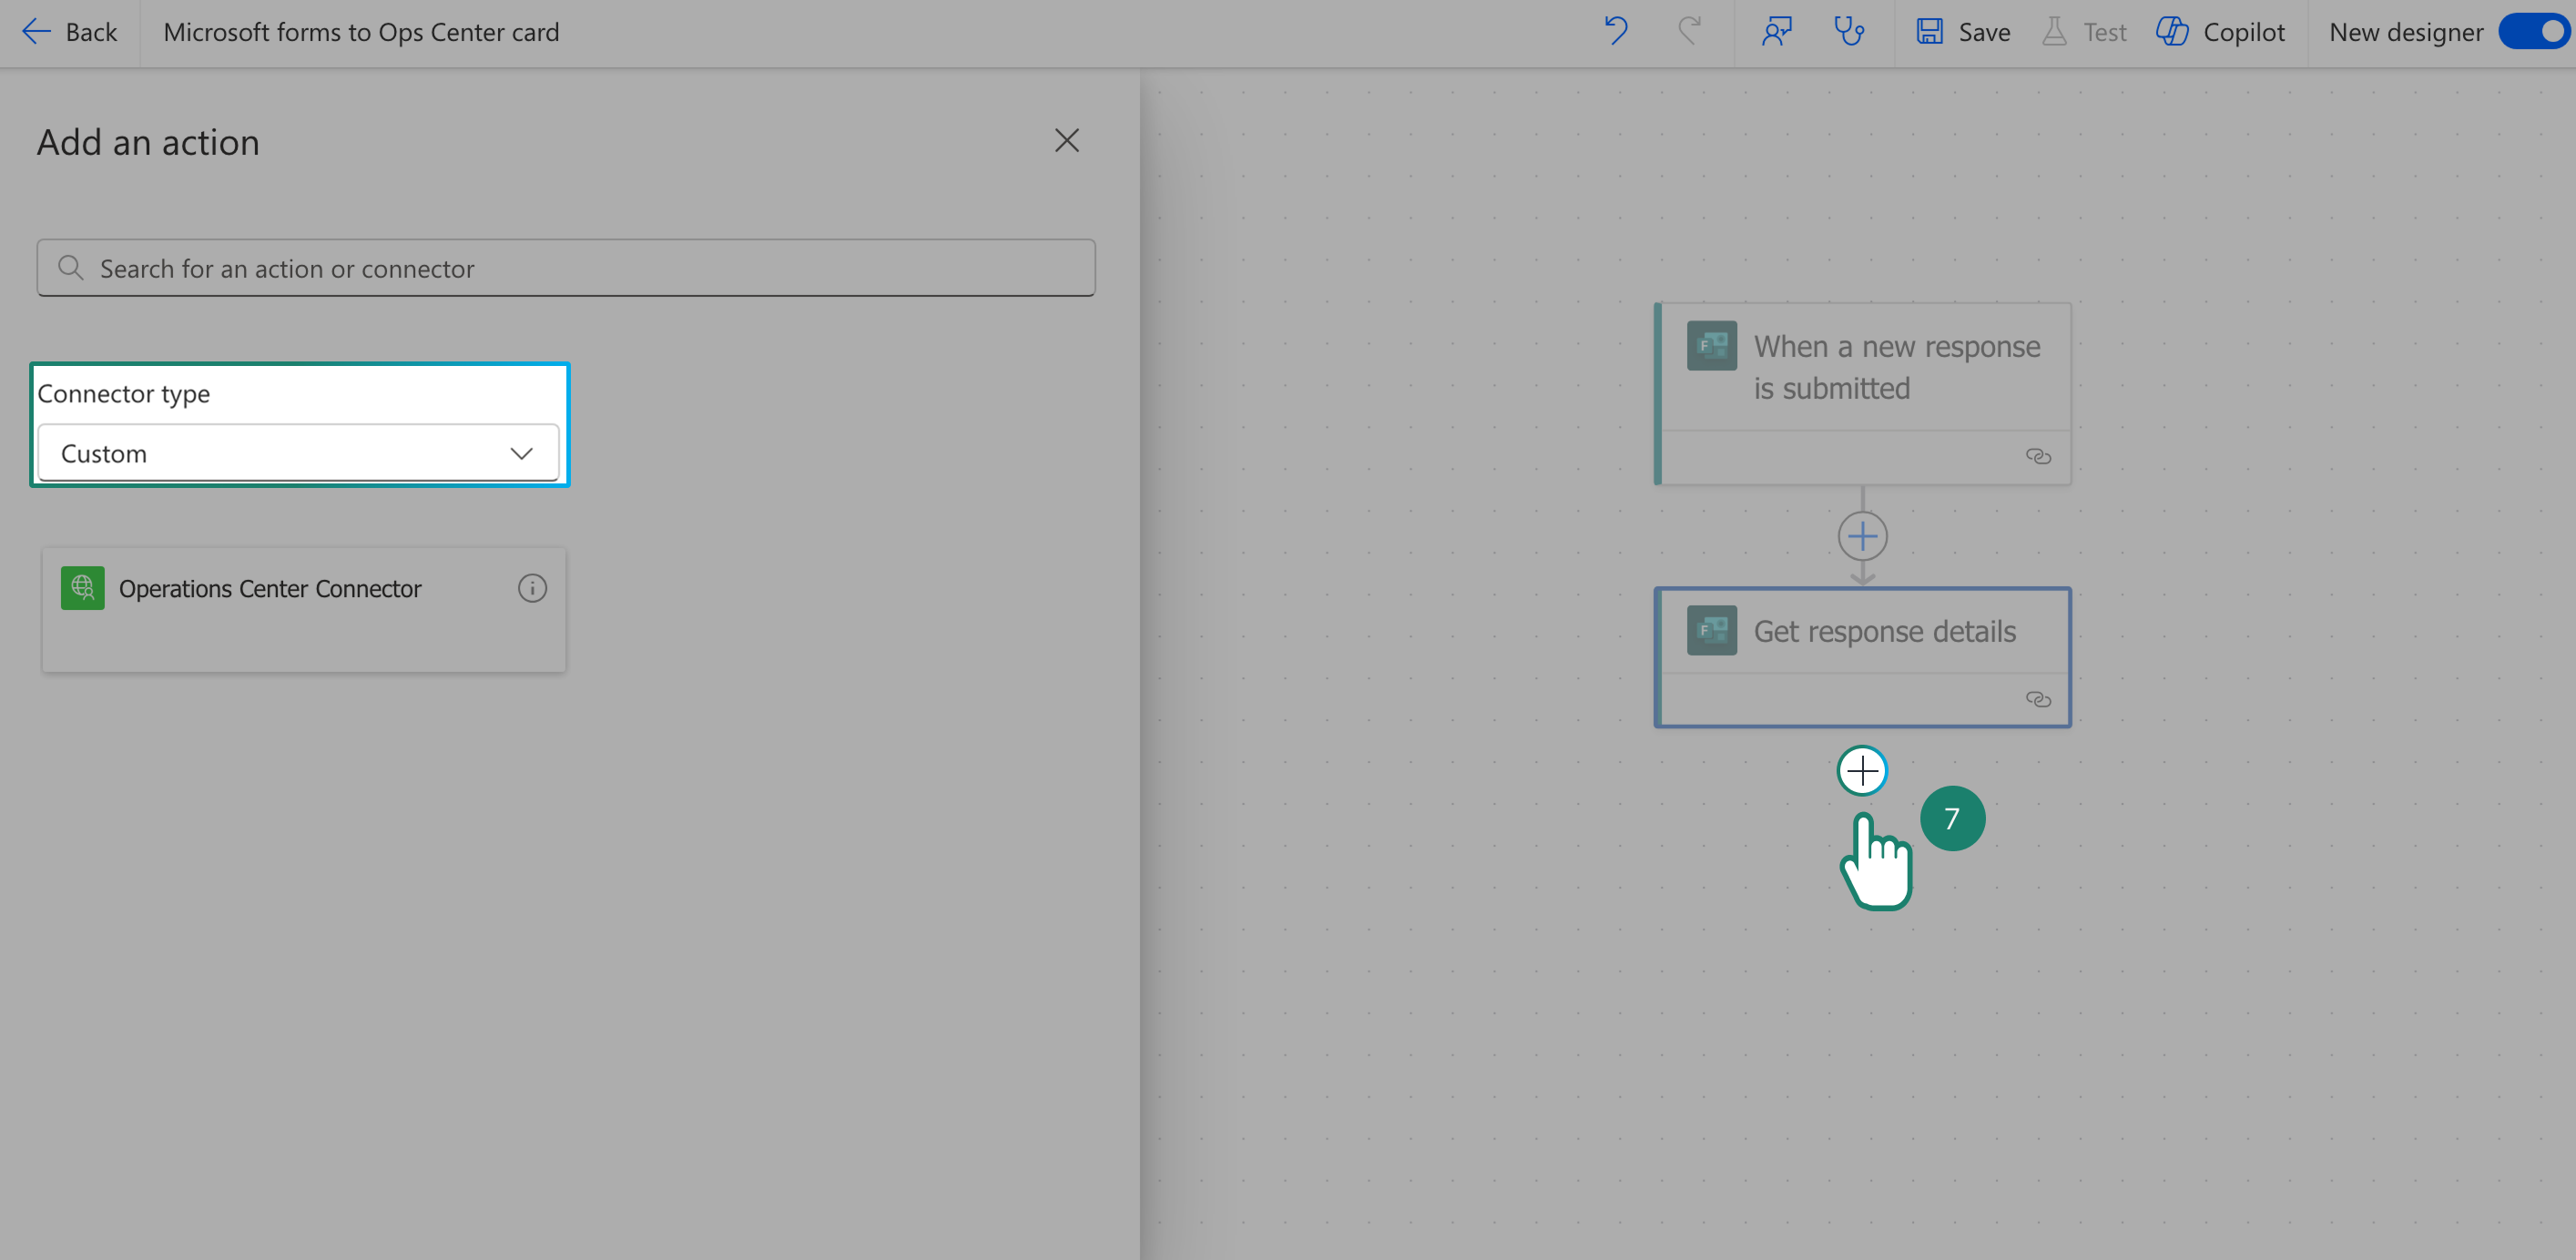
- Click the + icon to add another action and under action, select Custom for the connector type, then choose the connector you created earlier.
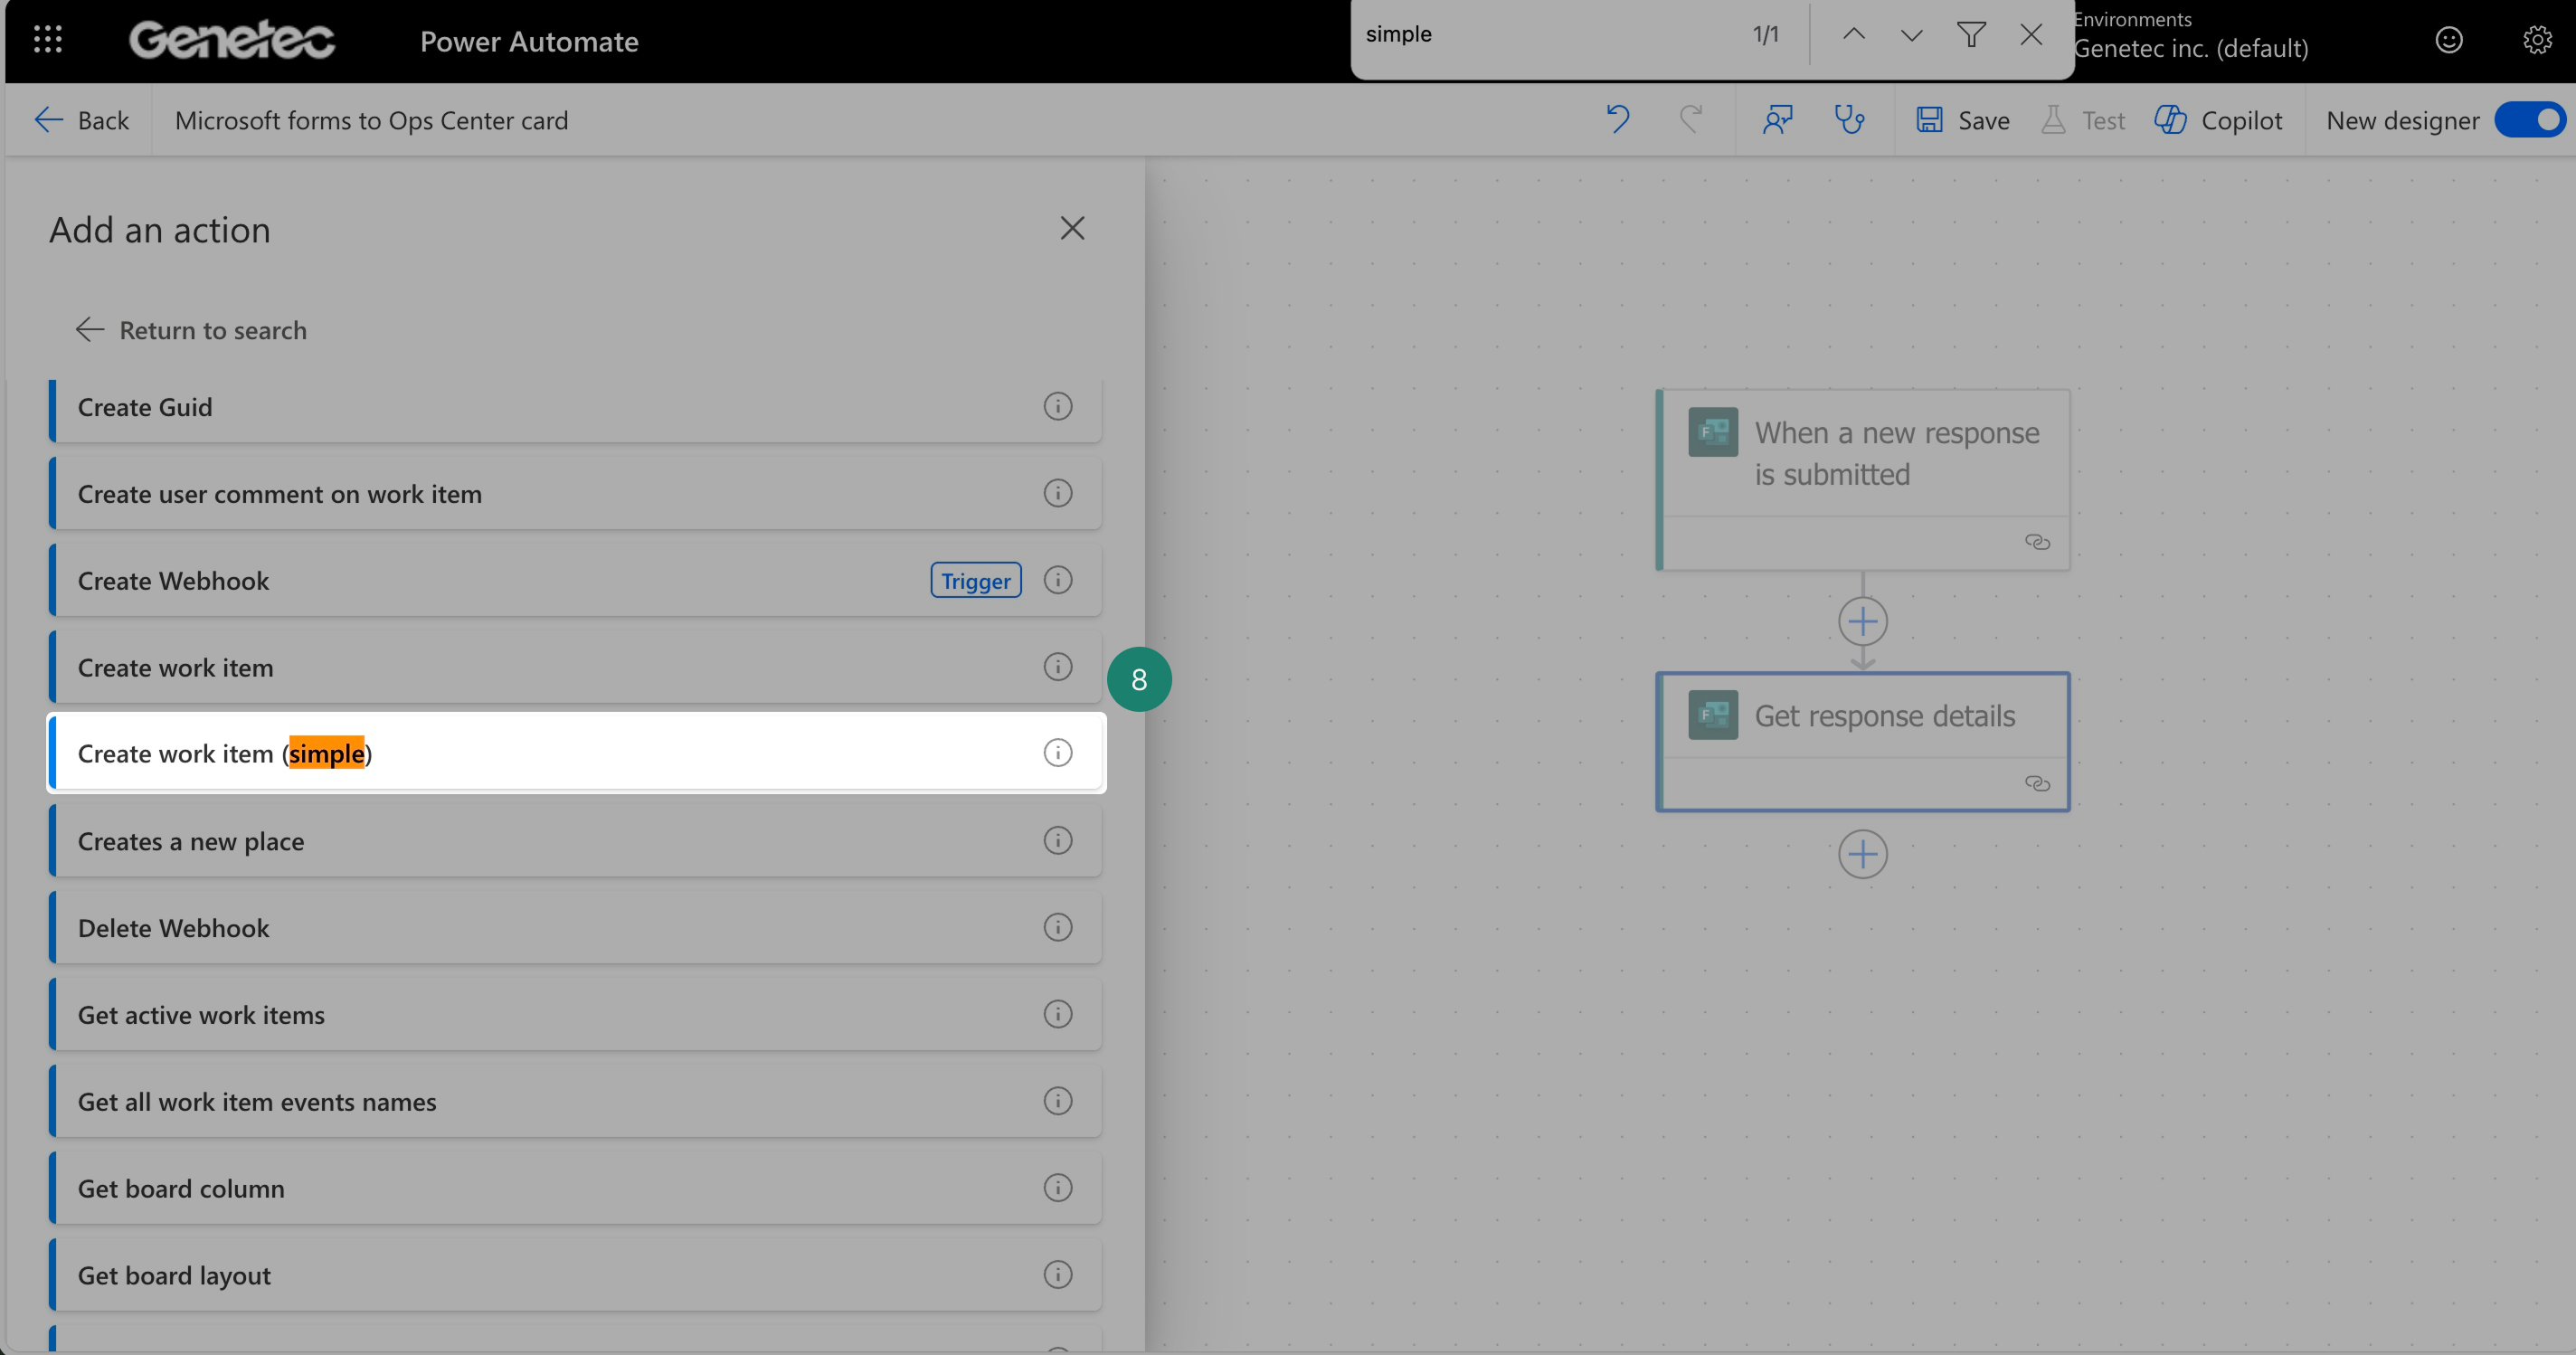
- Use the search bar to find "Create work item (simple)" and select it.
Authenticate with Operations Center
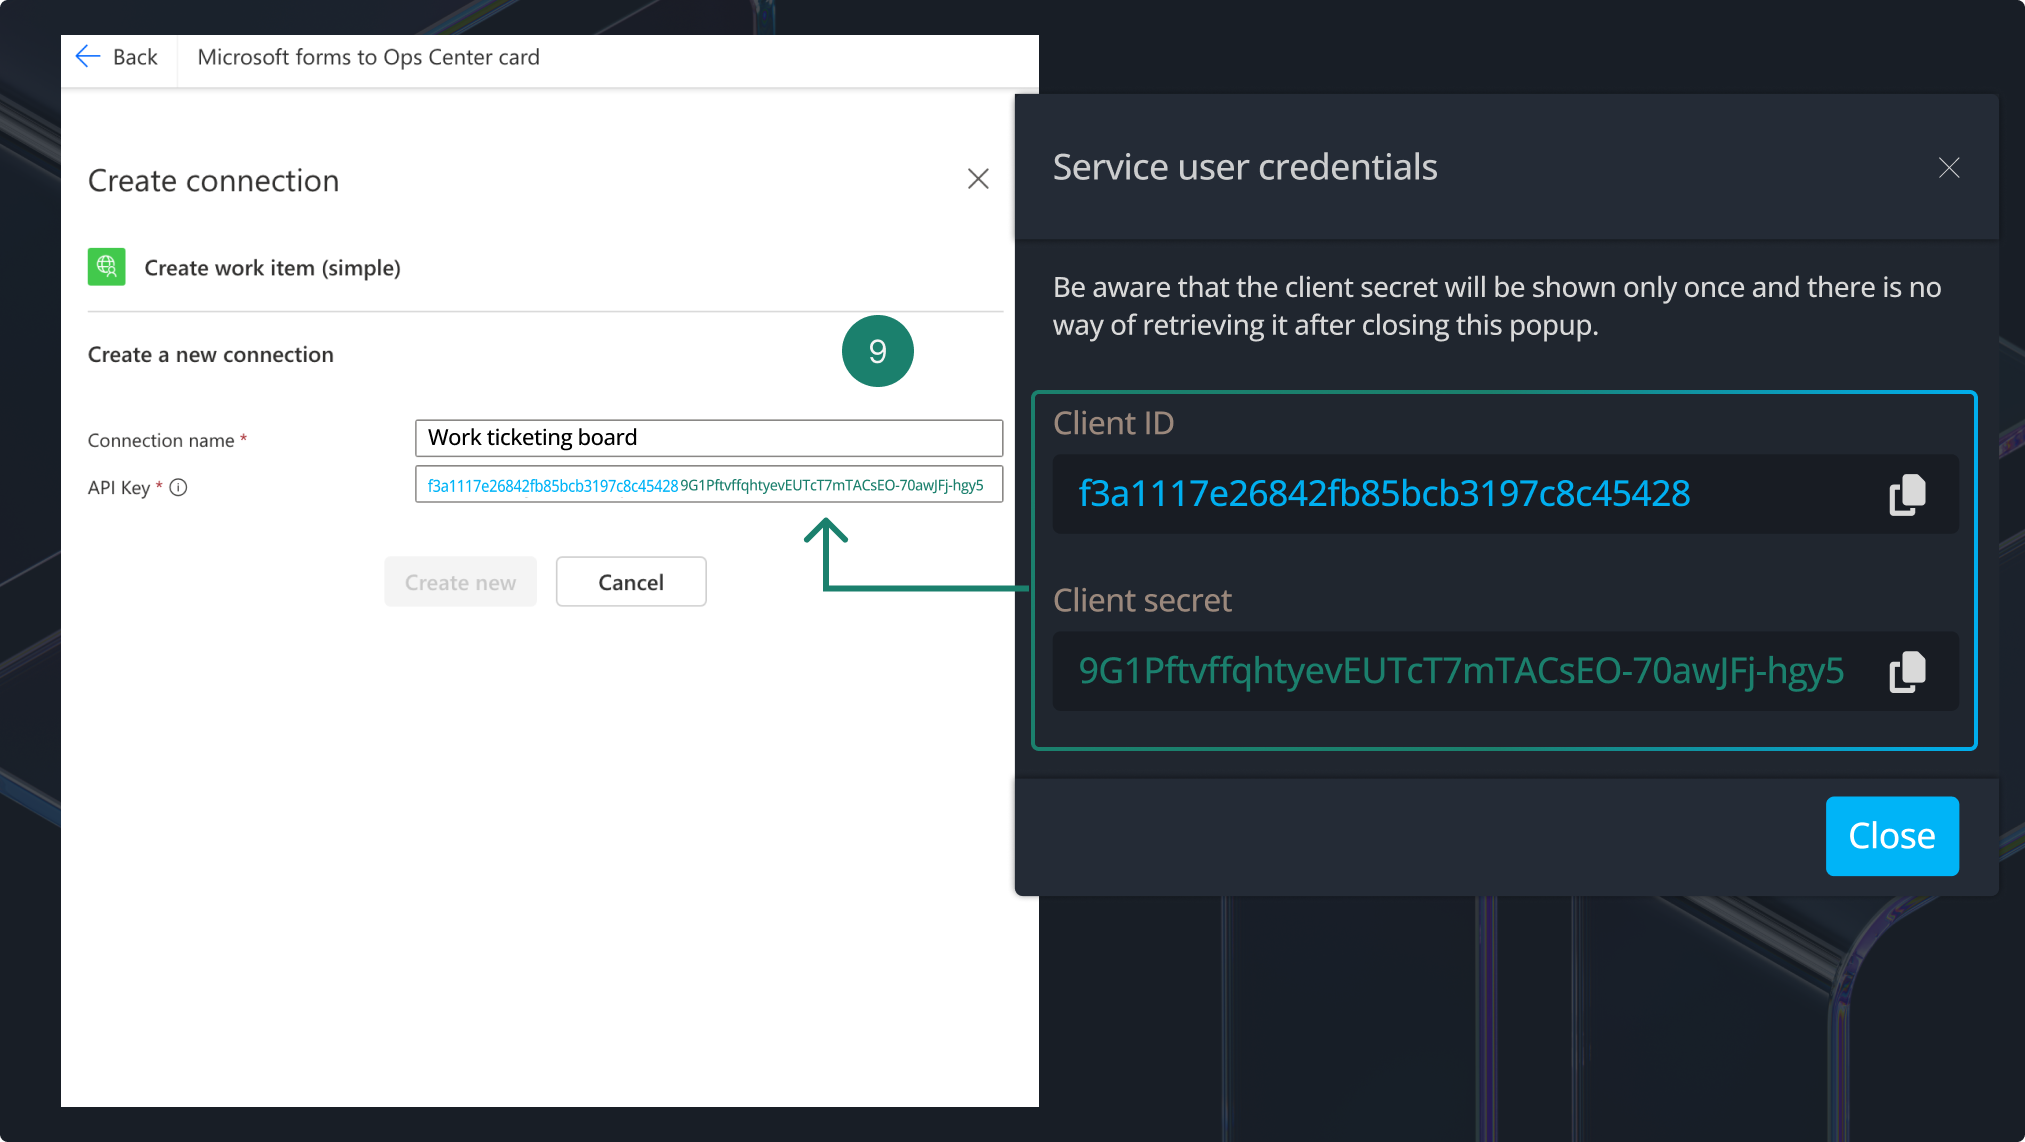
To connect to Operations Center, you’ll need the Client ID and Client Secret from the service user you created.
- Give the connection a name.
- Enter the API key in this format: ClientIDClientSecret (nospaces)
- Set the Tenant ID to fetch the available Board IDs, then select the correct board.
Map the single select question
Operations Center supports dropdown fields, but connecting them to Microsoft Forms is tricky. To simplify this, we use a Single Line Text custom field instead.
💡 Need help with custom fields? Learn more about them here and how to assign them to card layouts here.

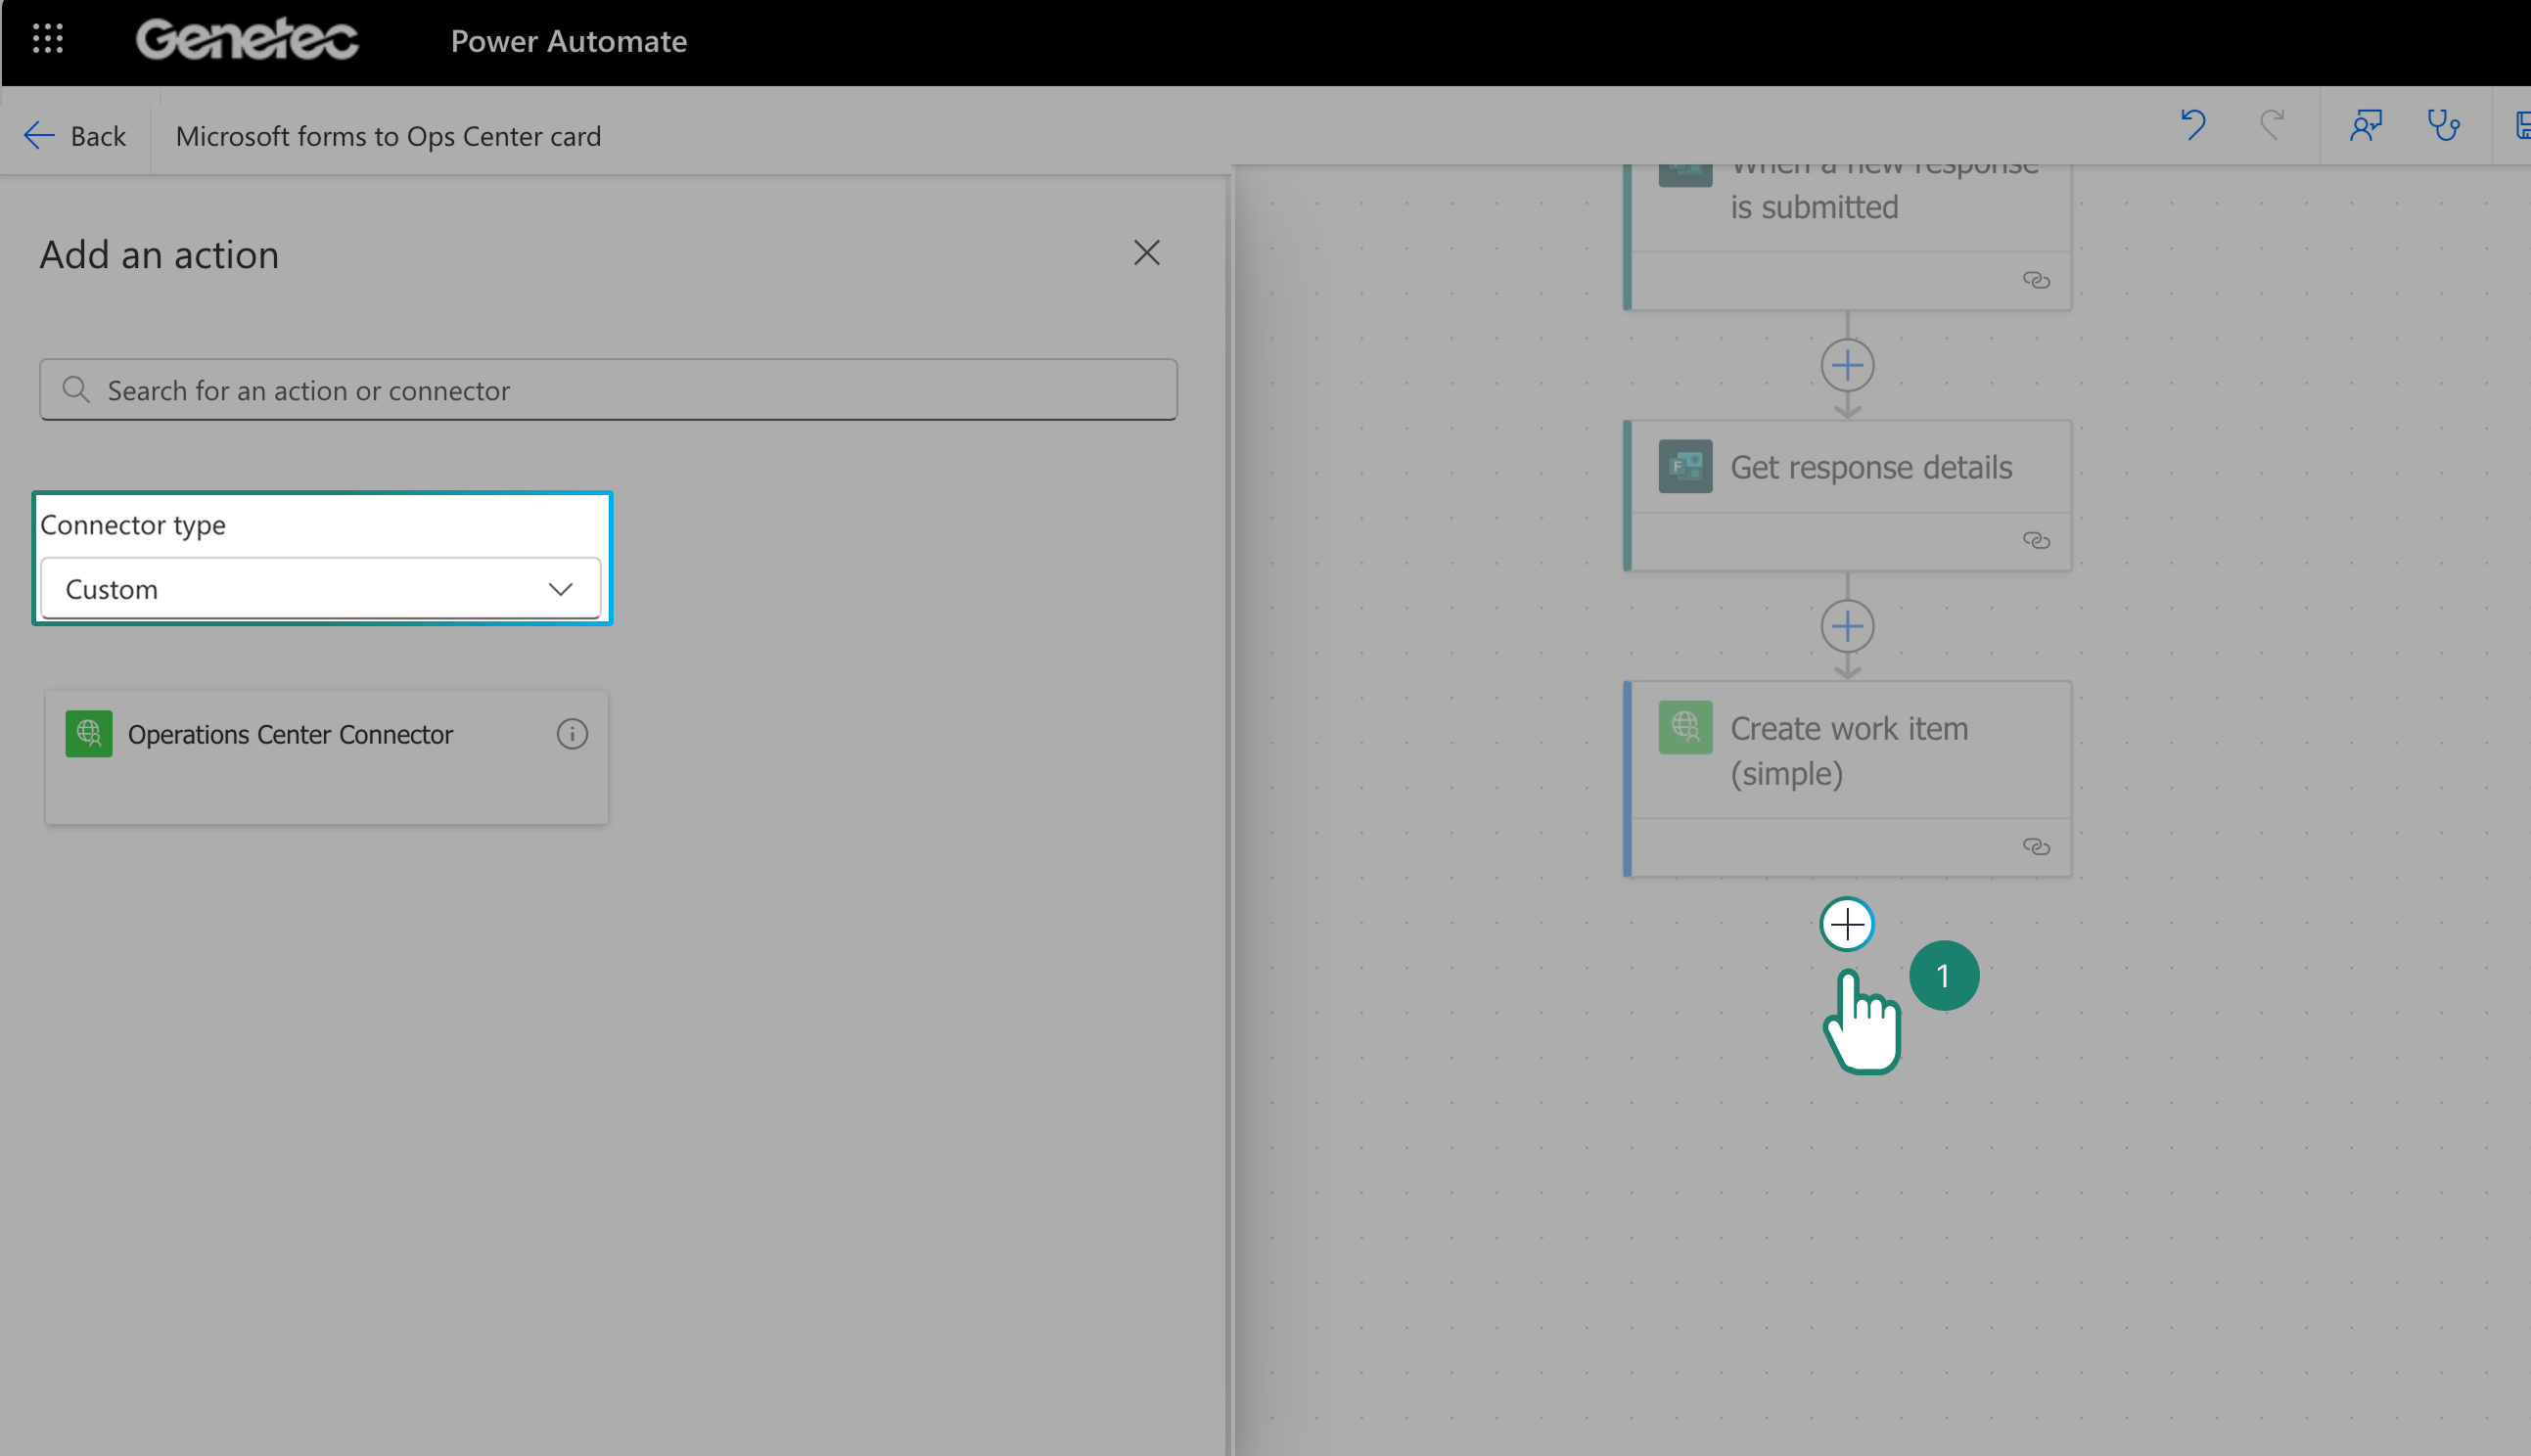
Add A New Action in Power Automate
Now, let’s continue building the automation by updating the custom fields in your Operations Center work item.
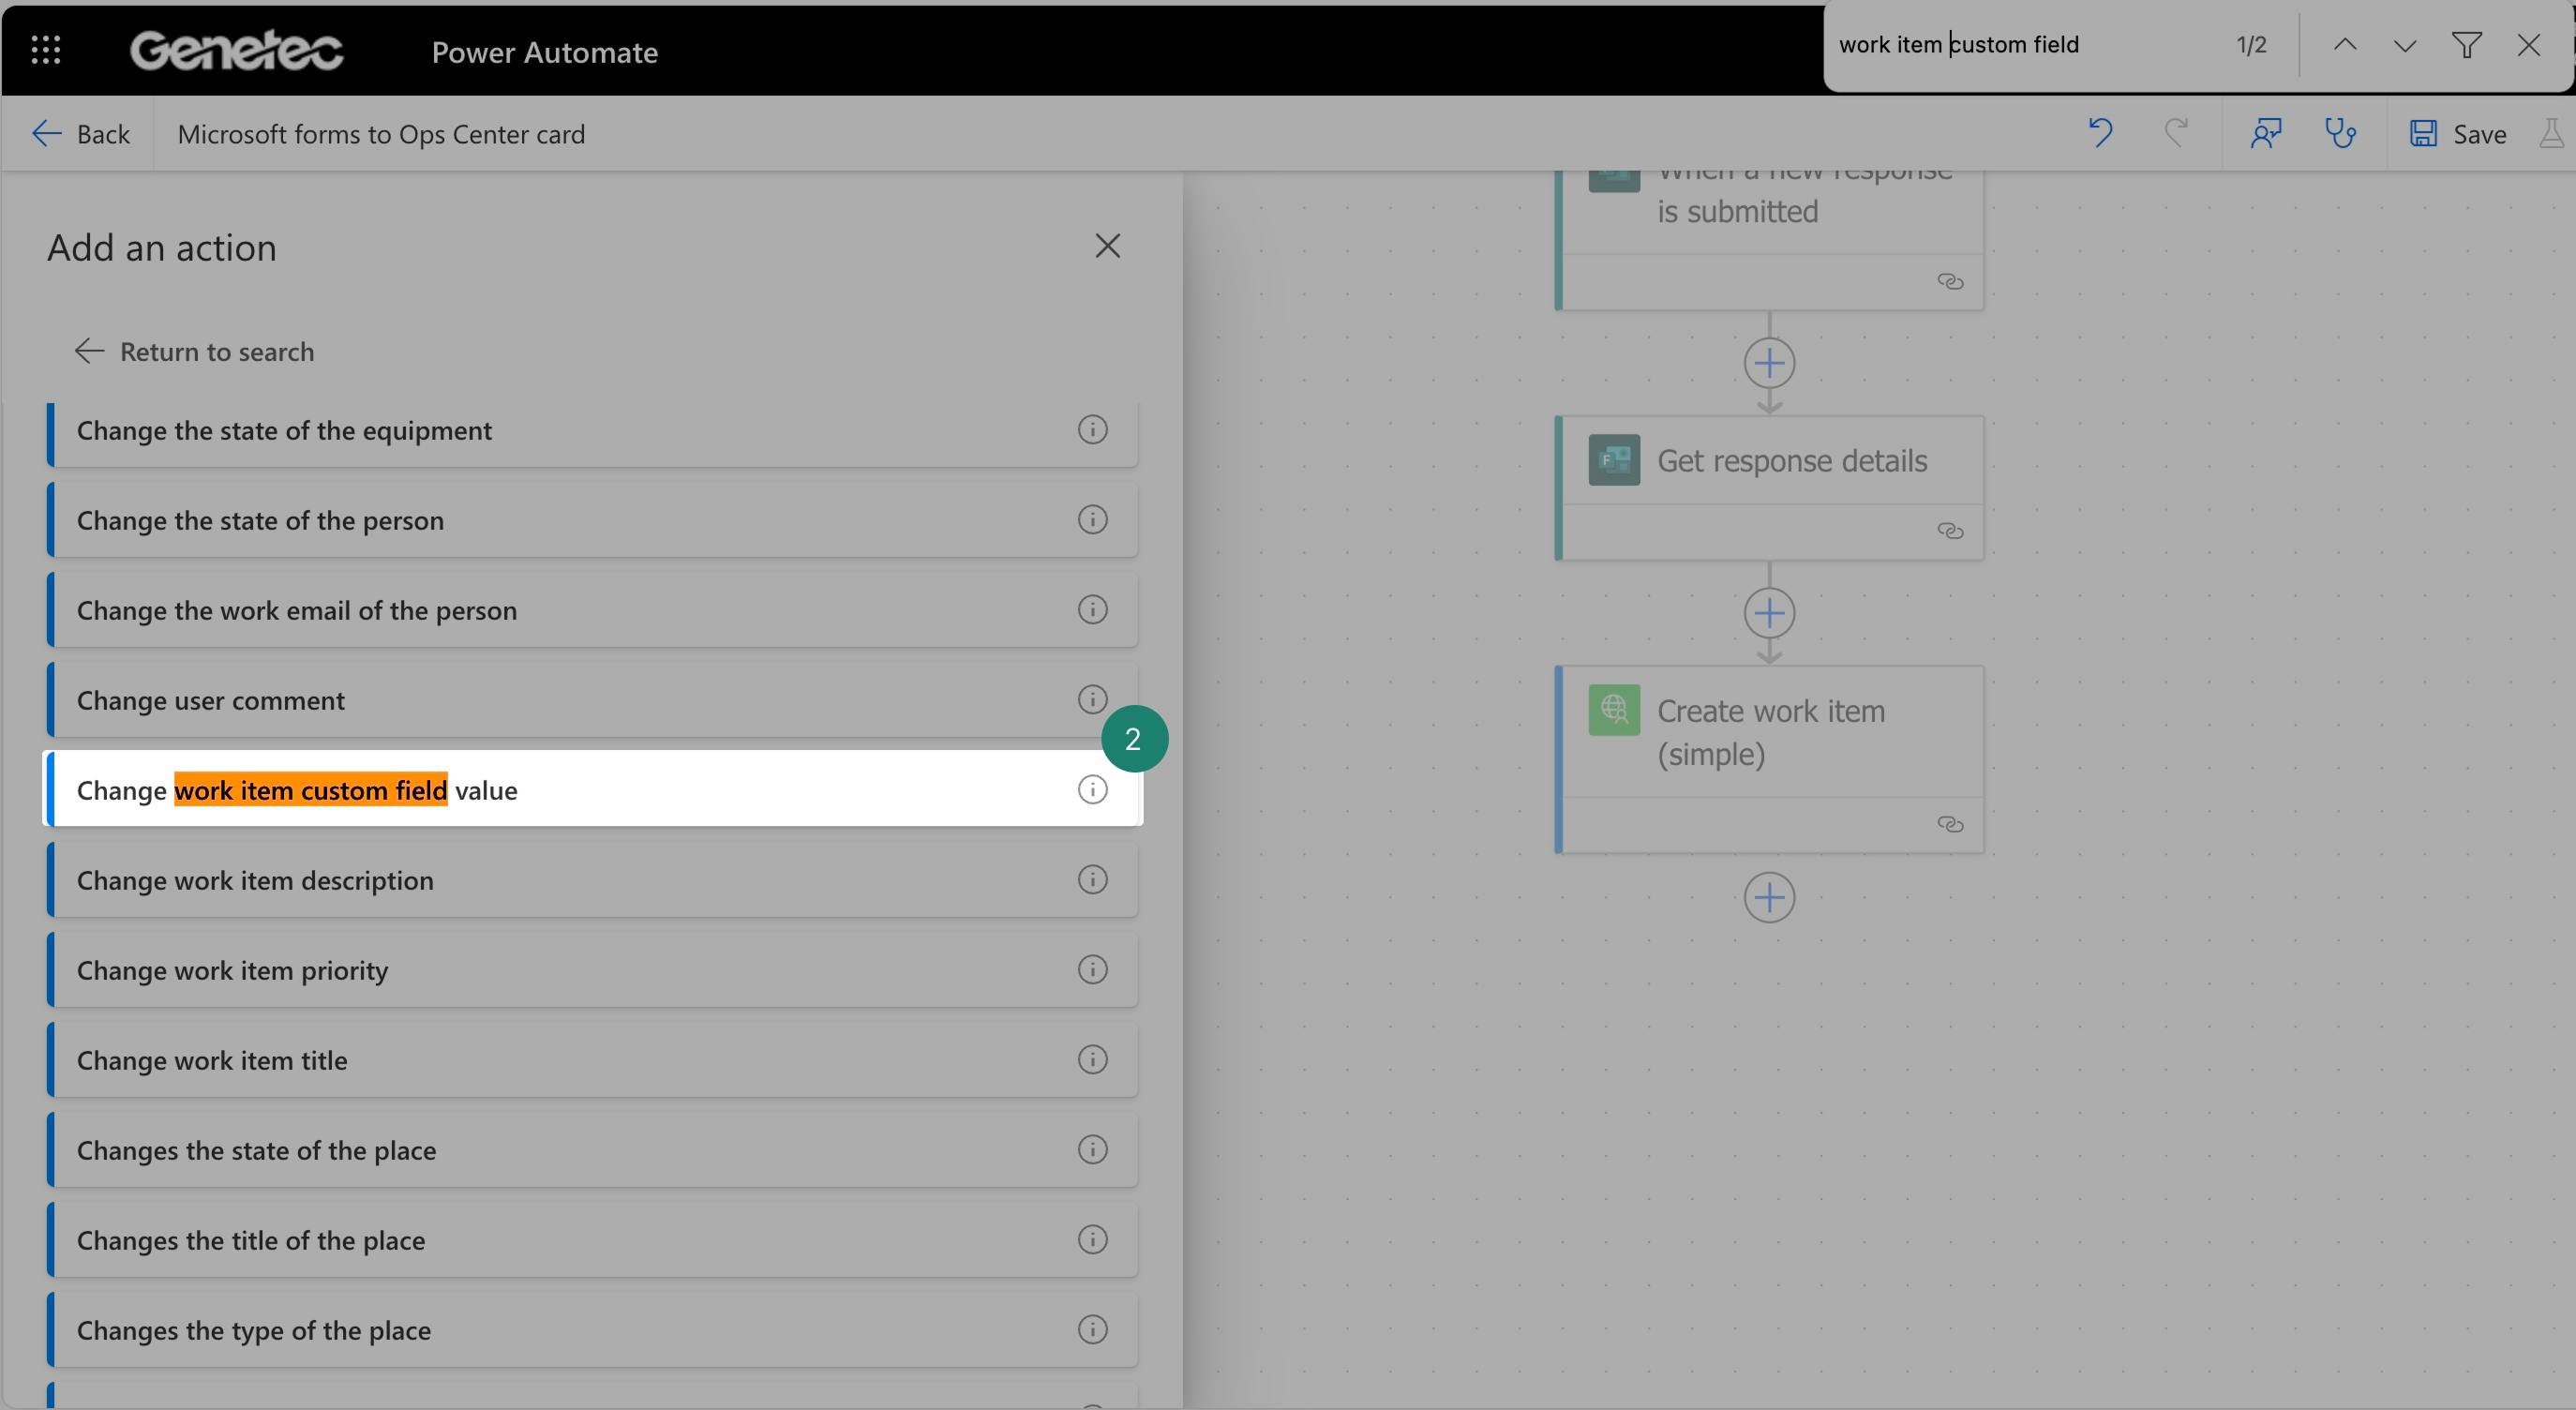
- Click + to add another action and just like before, select the custom connector and pick the Operations Center connector you created.
- Use the search bar to find and select "Change work item custom field".
Set Up the Custom Field Update
Now, this part isn’t strictly top-to-bottom like the previous steps, but don’t worry—we’ll break it down step by step so everything lands in the right place.
Select the Tenant ID
- First, choose the Tenant ID. This is necessary because Operations Center needs to know which environment you're working in before letting you access the correct board.
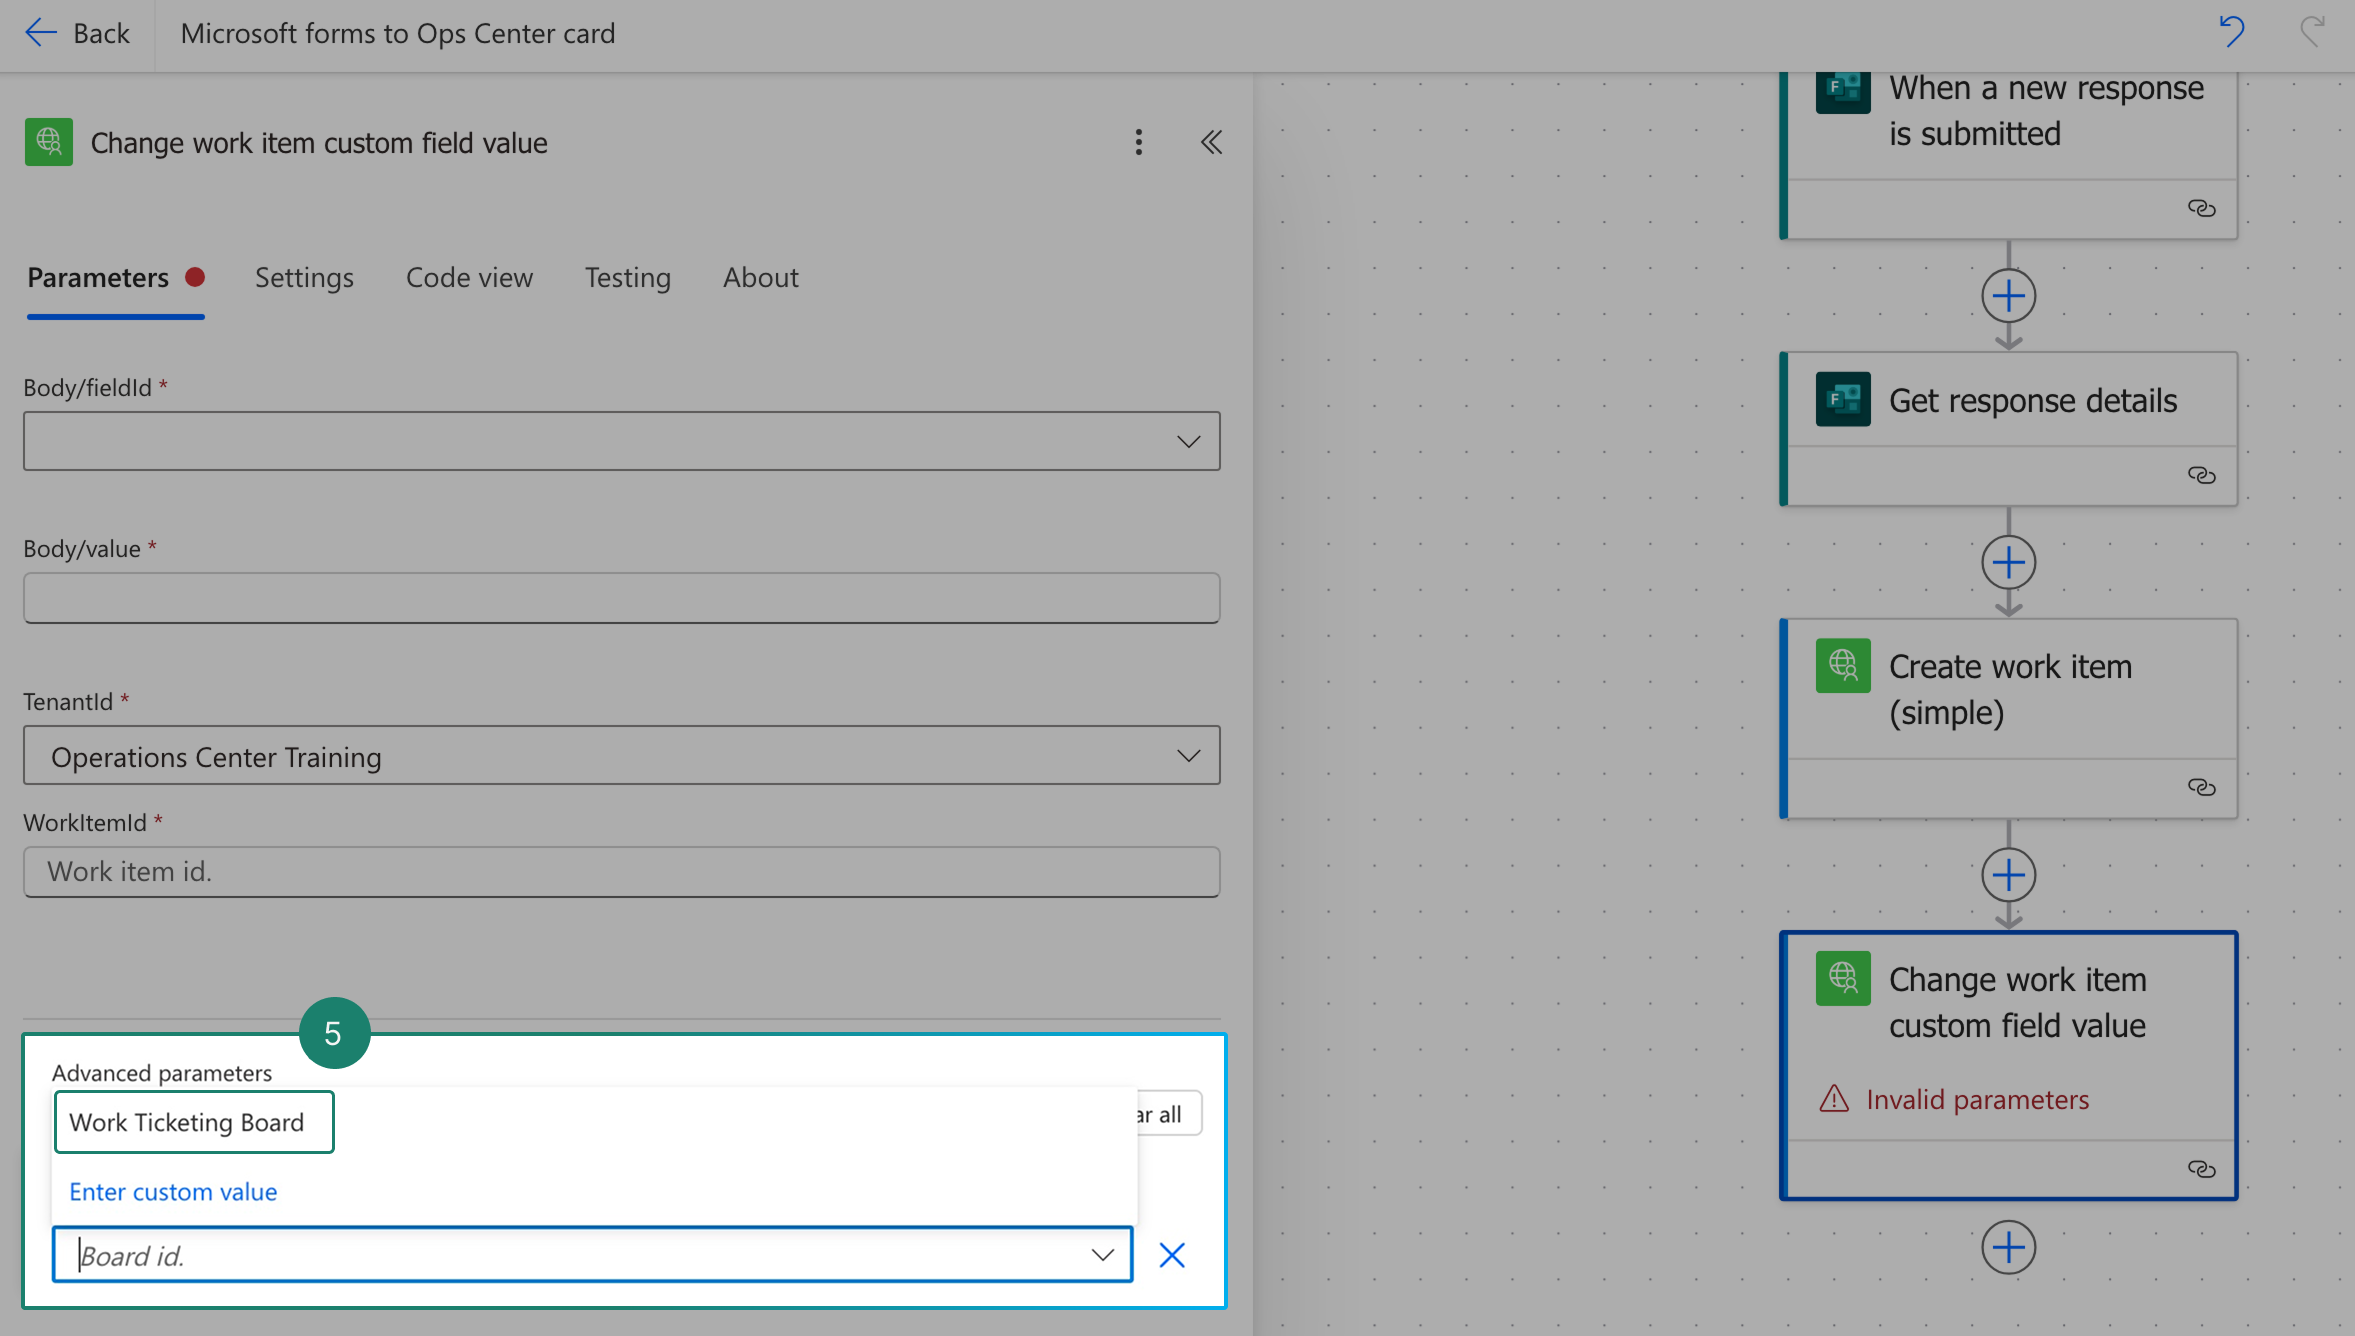
- Next under the advanced parameters, check the boardId box.
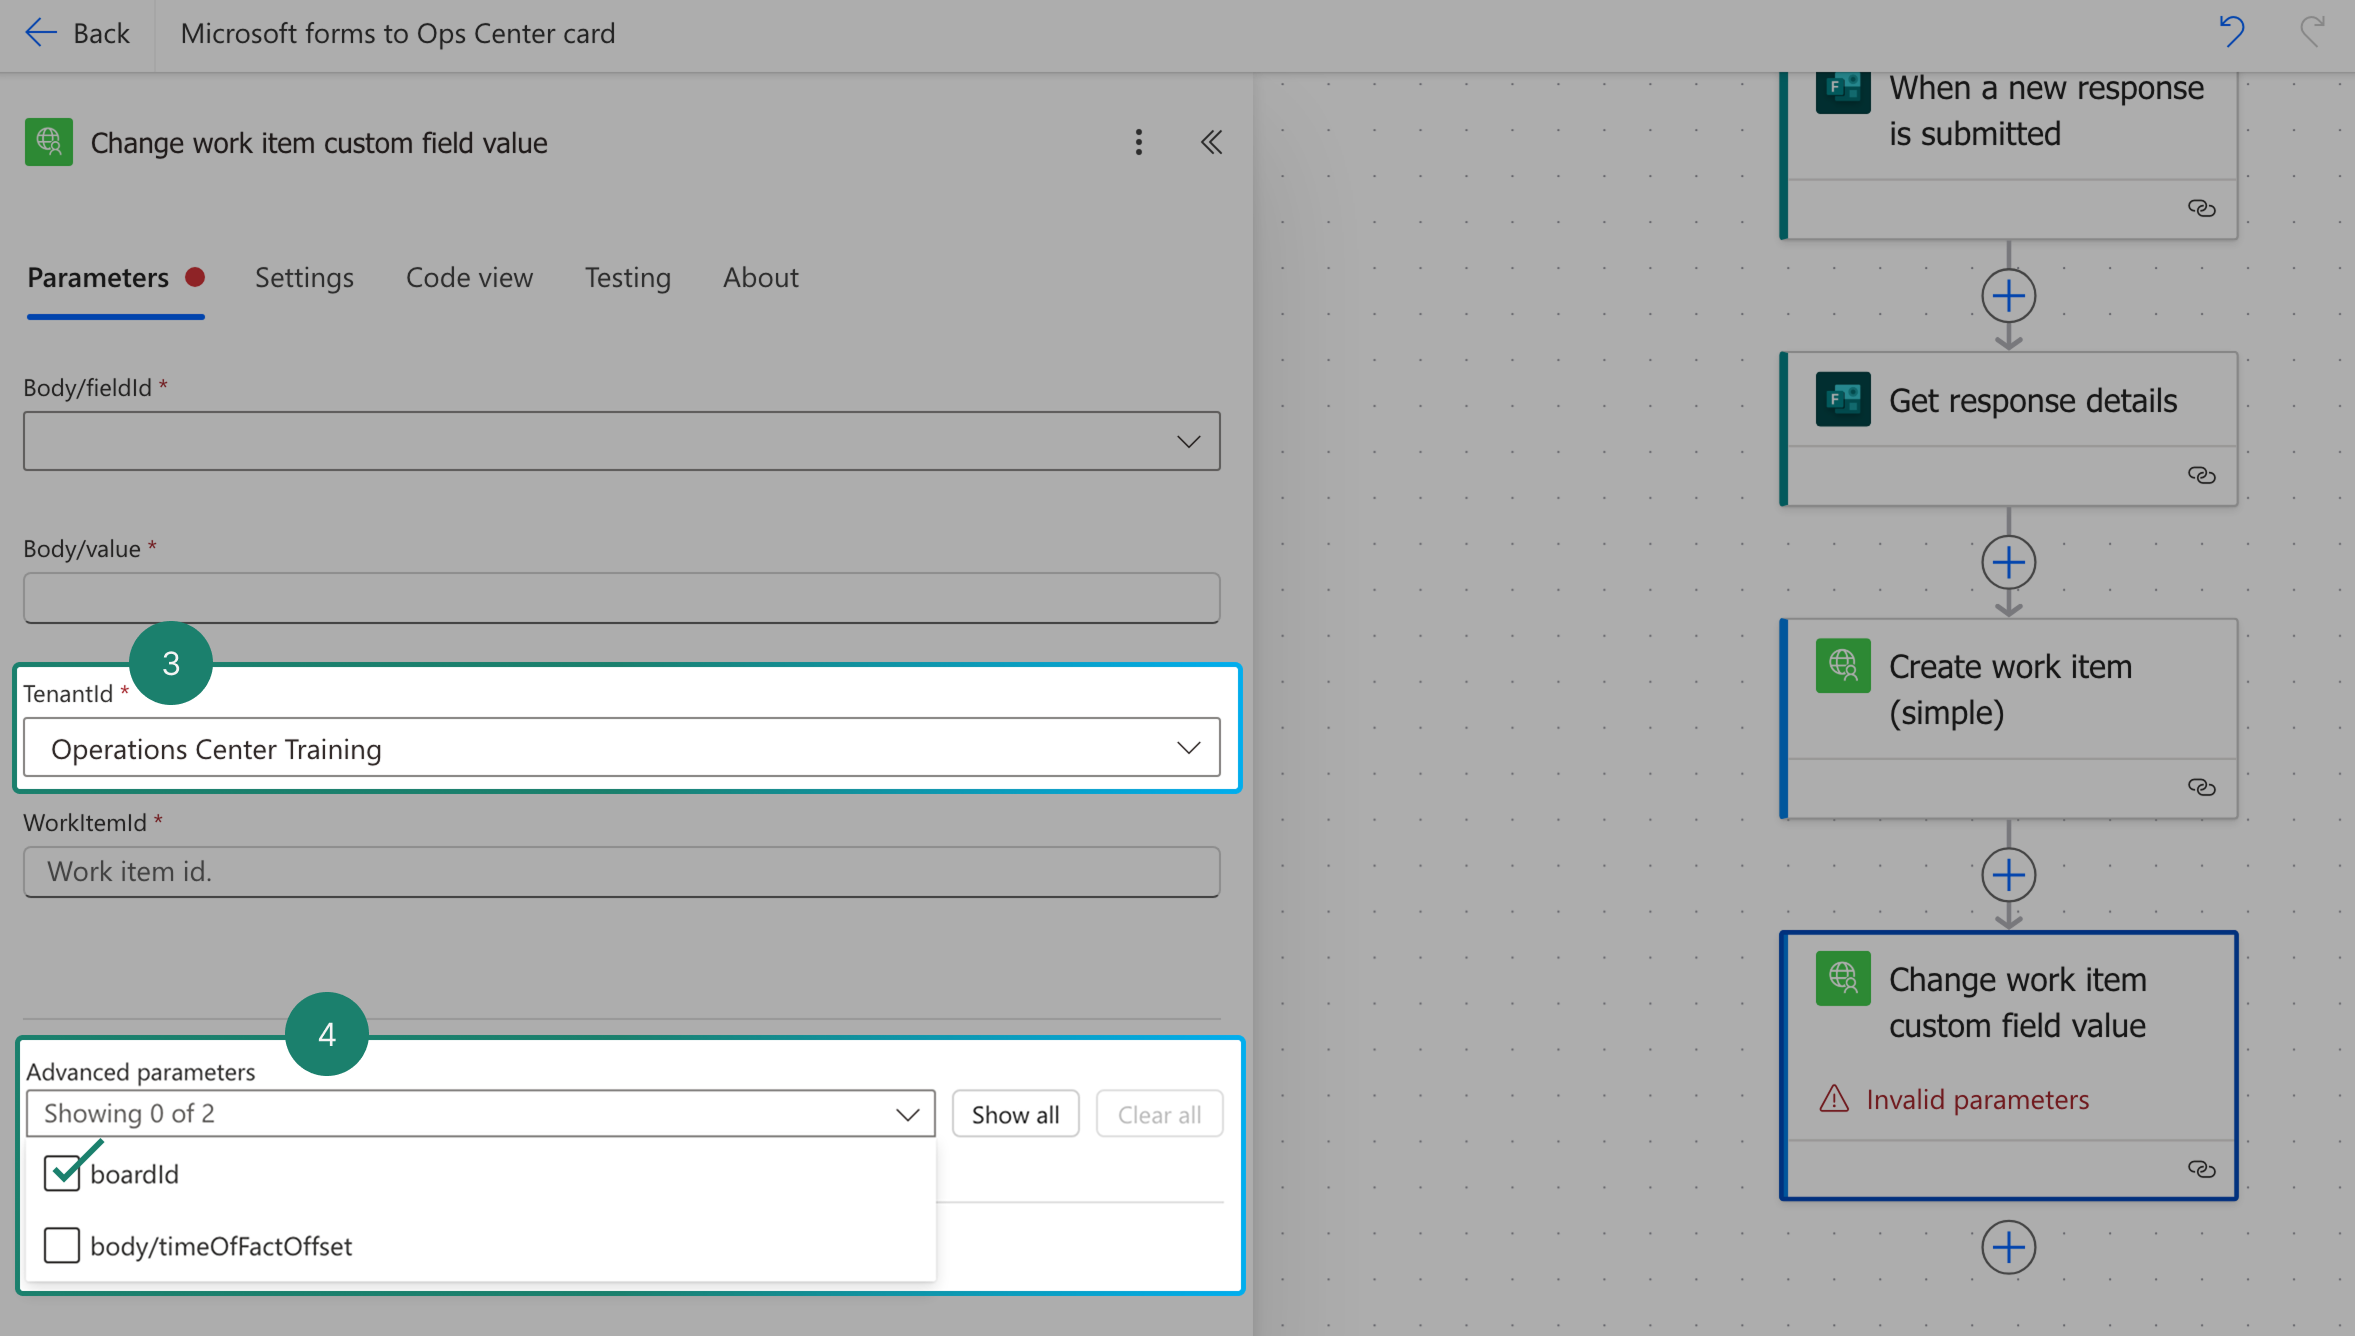
- Now that you have the boardId you can select the board:
Finalizing the Custom Field Update
Now, let’s correctly map the work item update in Operations Center:
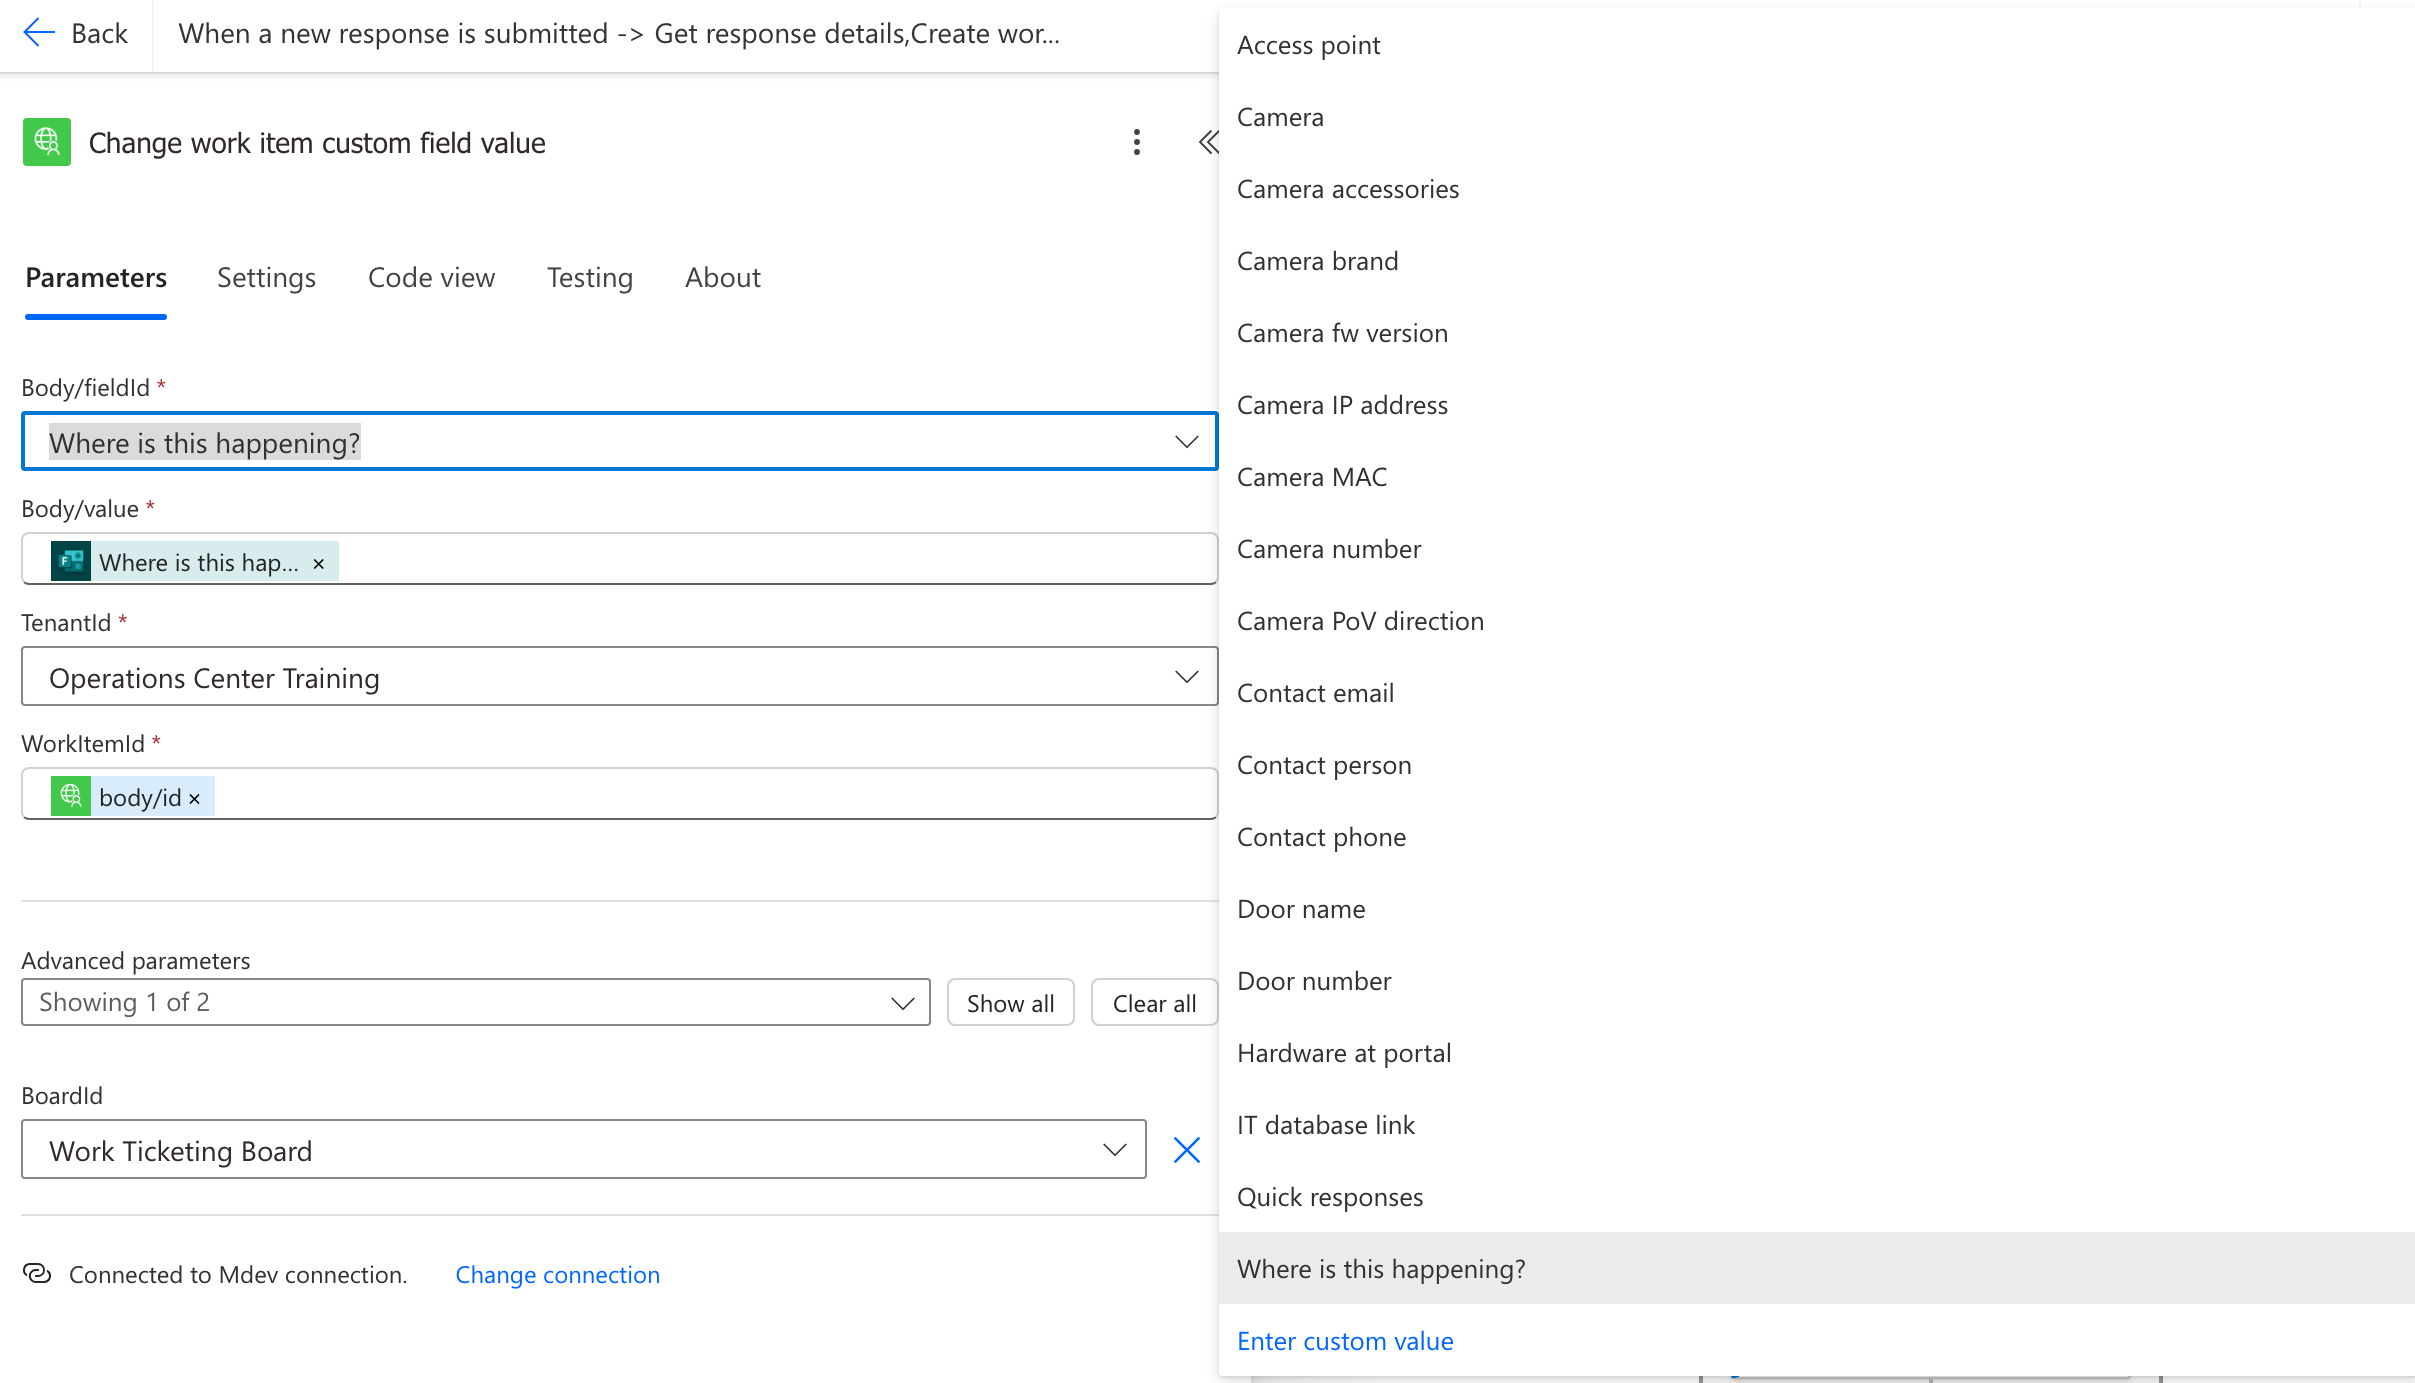
Set the Work Item ID:
- In the WorkItemID field, select Body/ID using
/or the lightning icon. This tells Operations Center which work item to update.
Map the Form Answer to the Custom Field:
- In Body/Value, use
/or the lightning icon to select the Microsoft Form response that should be stored in Operations Center. This ensures the answer is transferred correctly.
Choose the Correct Custom Field in Operations Center:
- In Body/FieldId, select the custom field from your Operations Center board. This fetches all available custom fields—make sure to pick the single-line text field that was created for this question.
🔹 Time to Save & Test!
Once these fields are set, click Save to ensure all mappings are stored. Then, test your flow to confirm everything is working as expected!