
Turning Microsoft Forms into Actionable Cards Part II
We covered the first two points in the previousepart:
- Title: Choose the form question that should appear as the work item title. (In our example, we use "What is the issue?")
- Single Select Question: Operations Center supports single select dropdown fields, but connecting them to Microsoft Forms is tricky. To simplify this, we use a Single Line Text custom field instead.
now , let’s cover how we can transfer attachments on a microsoft forms to be attached to a card in Operations Center.
Handling Attachments in Power Automate
Now that we've set up the core automation, let’s take care of attachments from the Microsoft Form. If a user uploads a file, we need to process it properly and ensure it gets attached to the right work item in Operations Center.
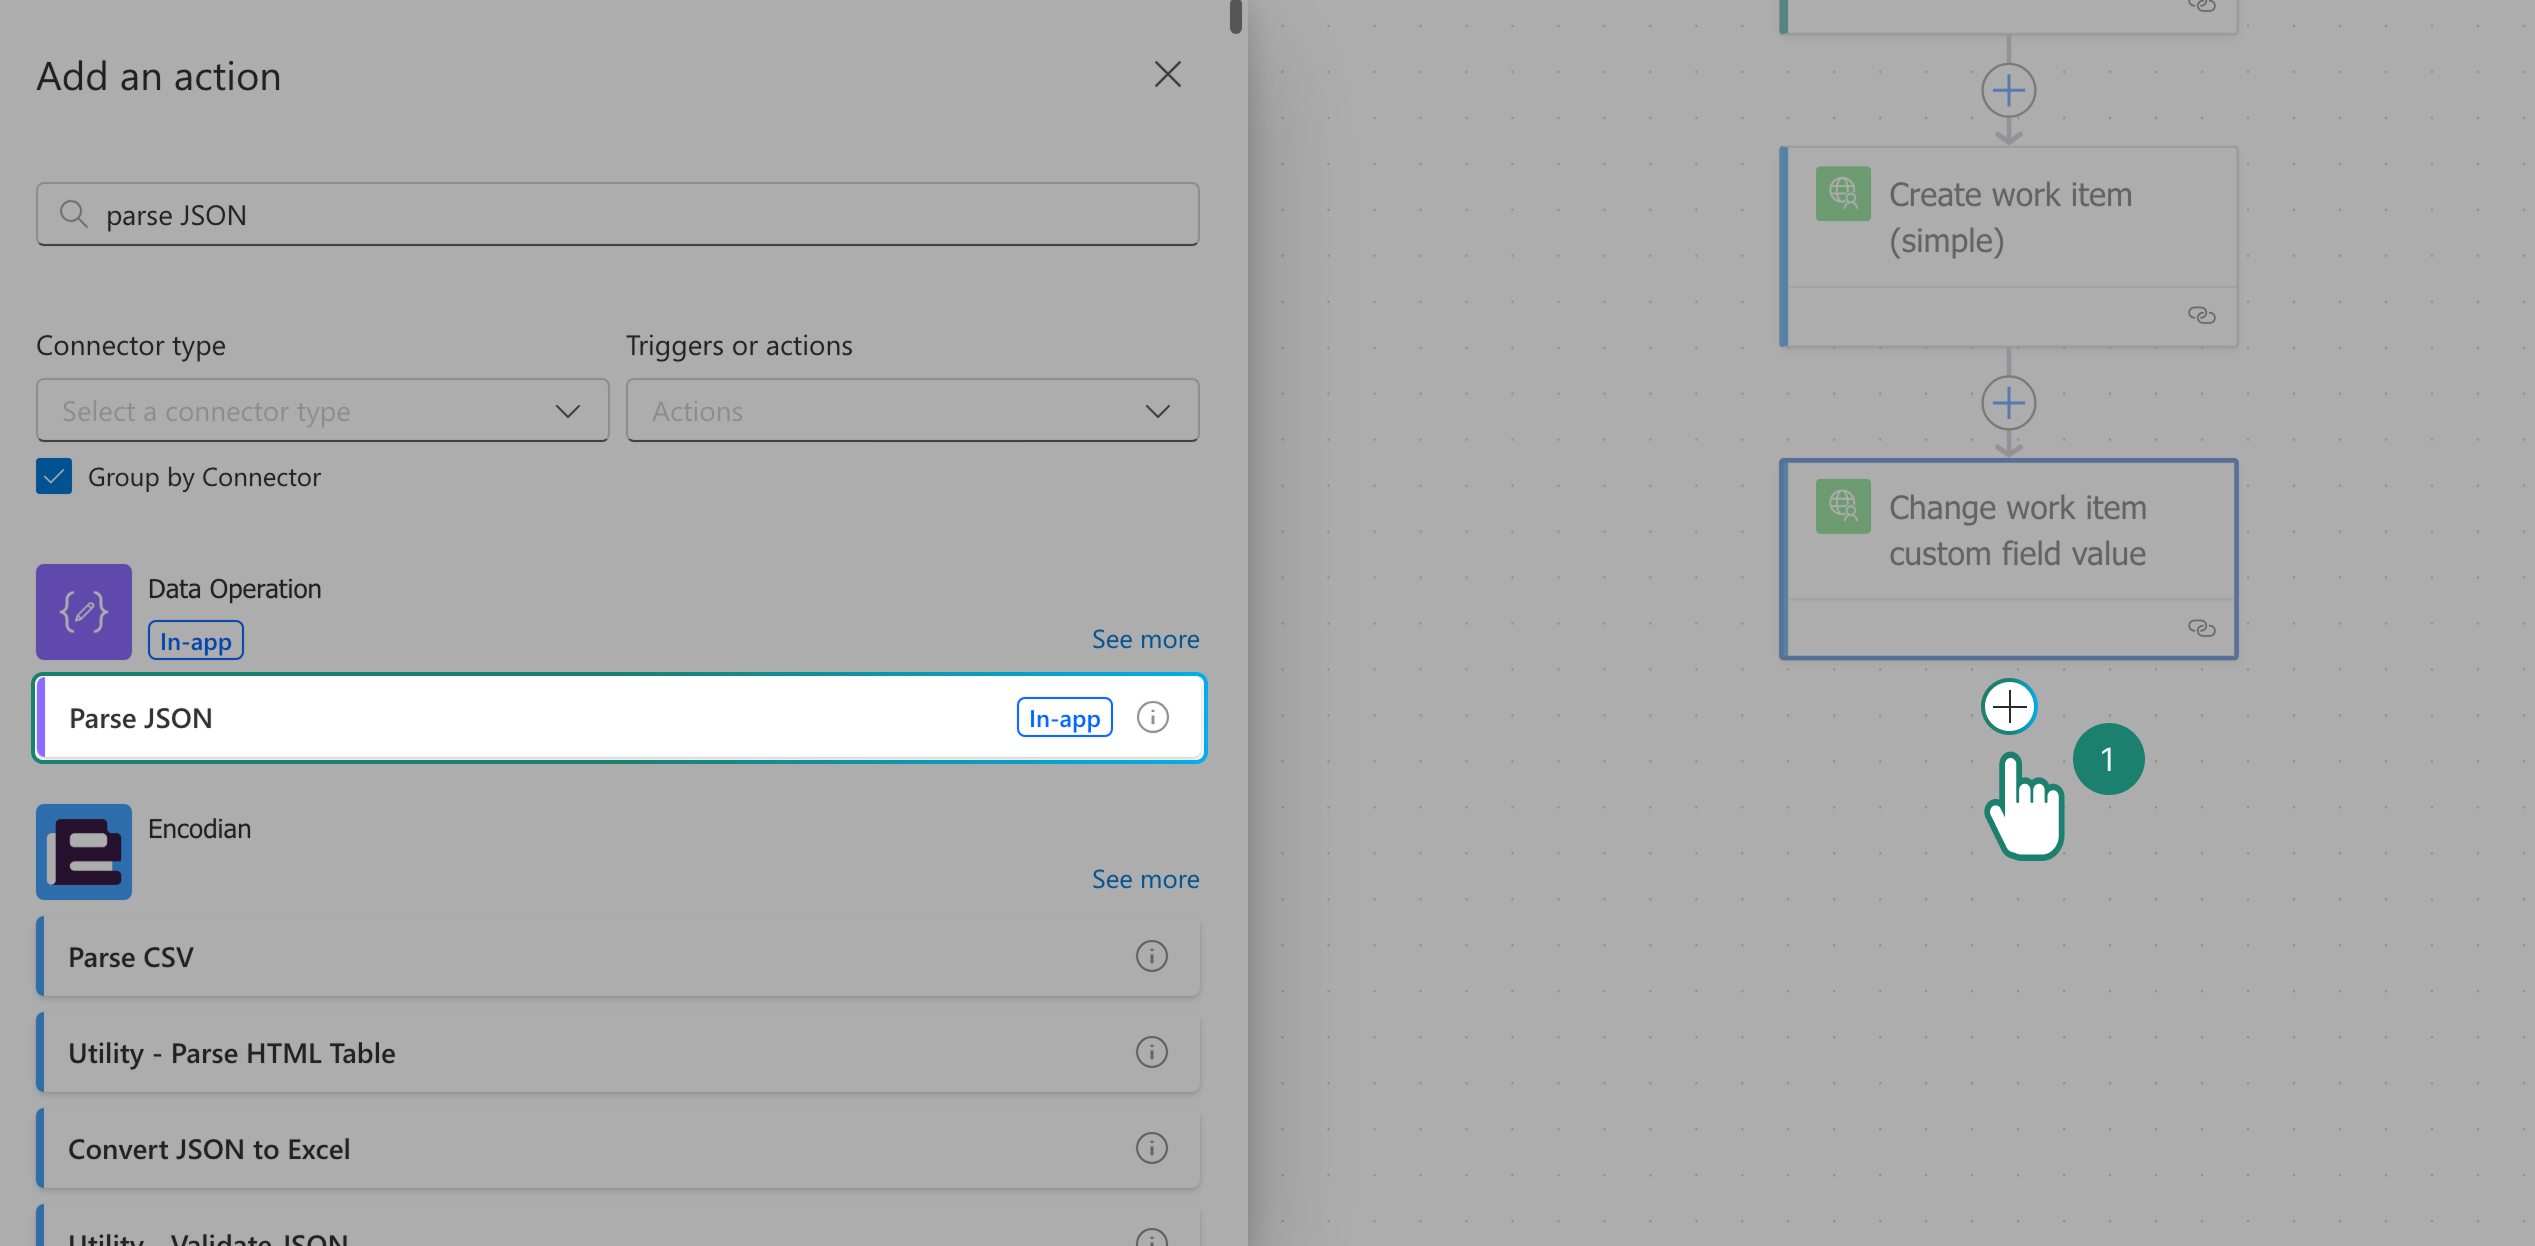
Start by adding a new action, then search for Parse JSON and select it. Inside Content, select the Microsoft Forms question where users upload attachments. In our case, the question is "Attach a file", so we select that. We need to define a schema so Power Automate knows how to handle the data. Paste this into the Schema field:
{
  "type": "array",
  "items": {
    "type": "object",
    "properties": {
      "name": { "type": "string" },
      "link": { "type": "string" },
      "id": { "type": "string" },
      "referenceId": { "type": "string" },
      "driveId": { "type": "string" },
      "status": { "type": "integer" }
    },
    "required": ["name", "link", "id", "referenceId", "driveId", "status"]
  }
}
This schema tells Power Automate how to extract the file name, link, and other necessary details from the form response.
Generate a Shareable Link
Add another action and search for "Create share link by path" under Microsoft 365 for Business.
Now, let’s set up the File Path correctly:
Click the folder icon and follow this path:
- Root
- Apps
- Microsoft Forms
- Select your form (e.g., "Report a System Issue")
- Select the attachment question
After selecting the question, remove the file name, so you are left with this path:
/Apps/Microsoft Forms/Report a System Issue/Question/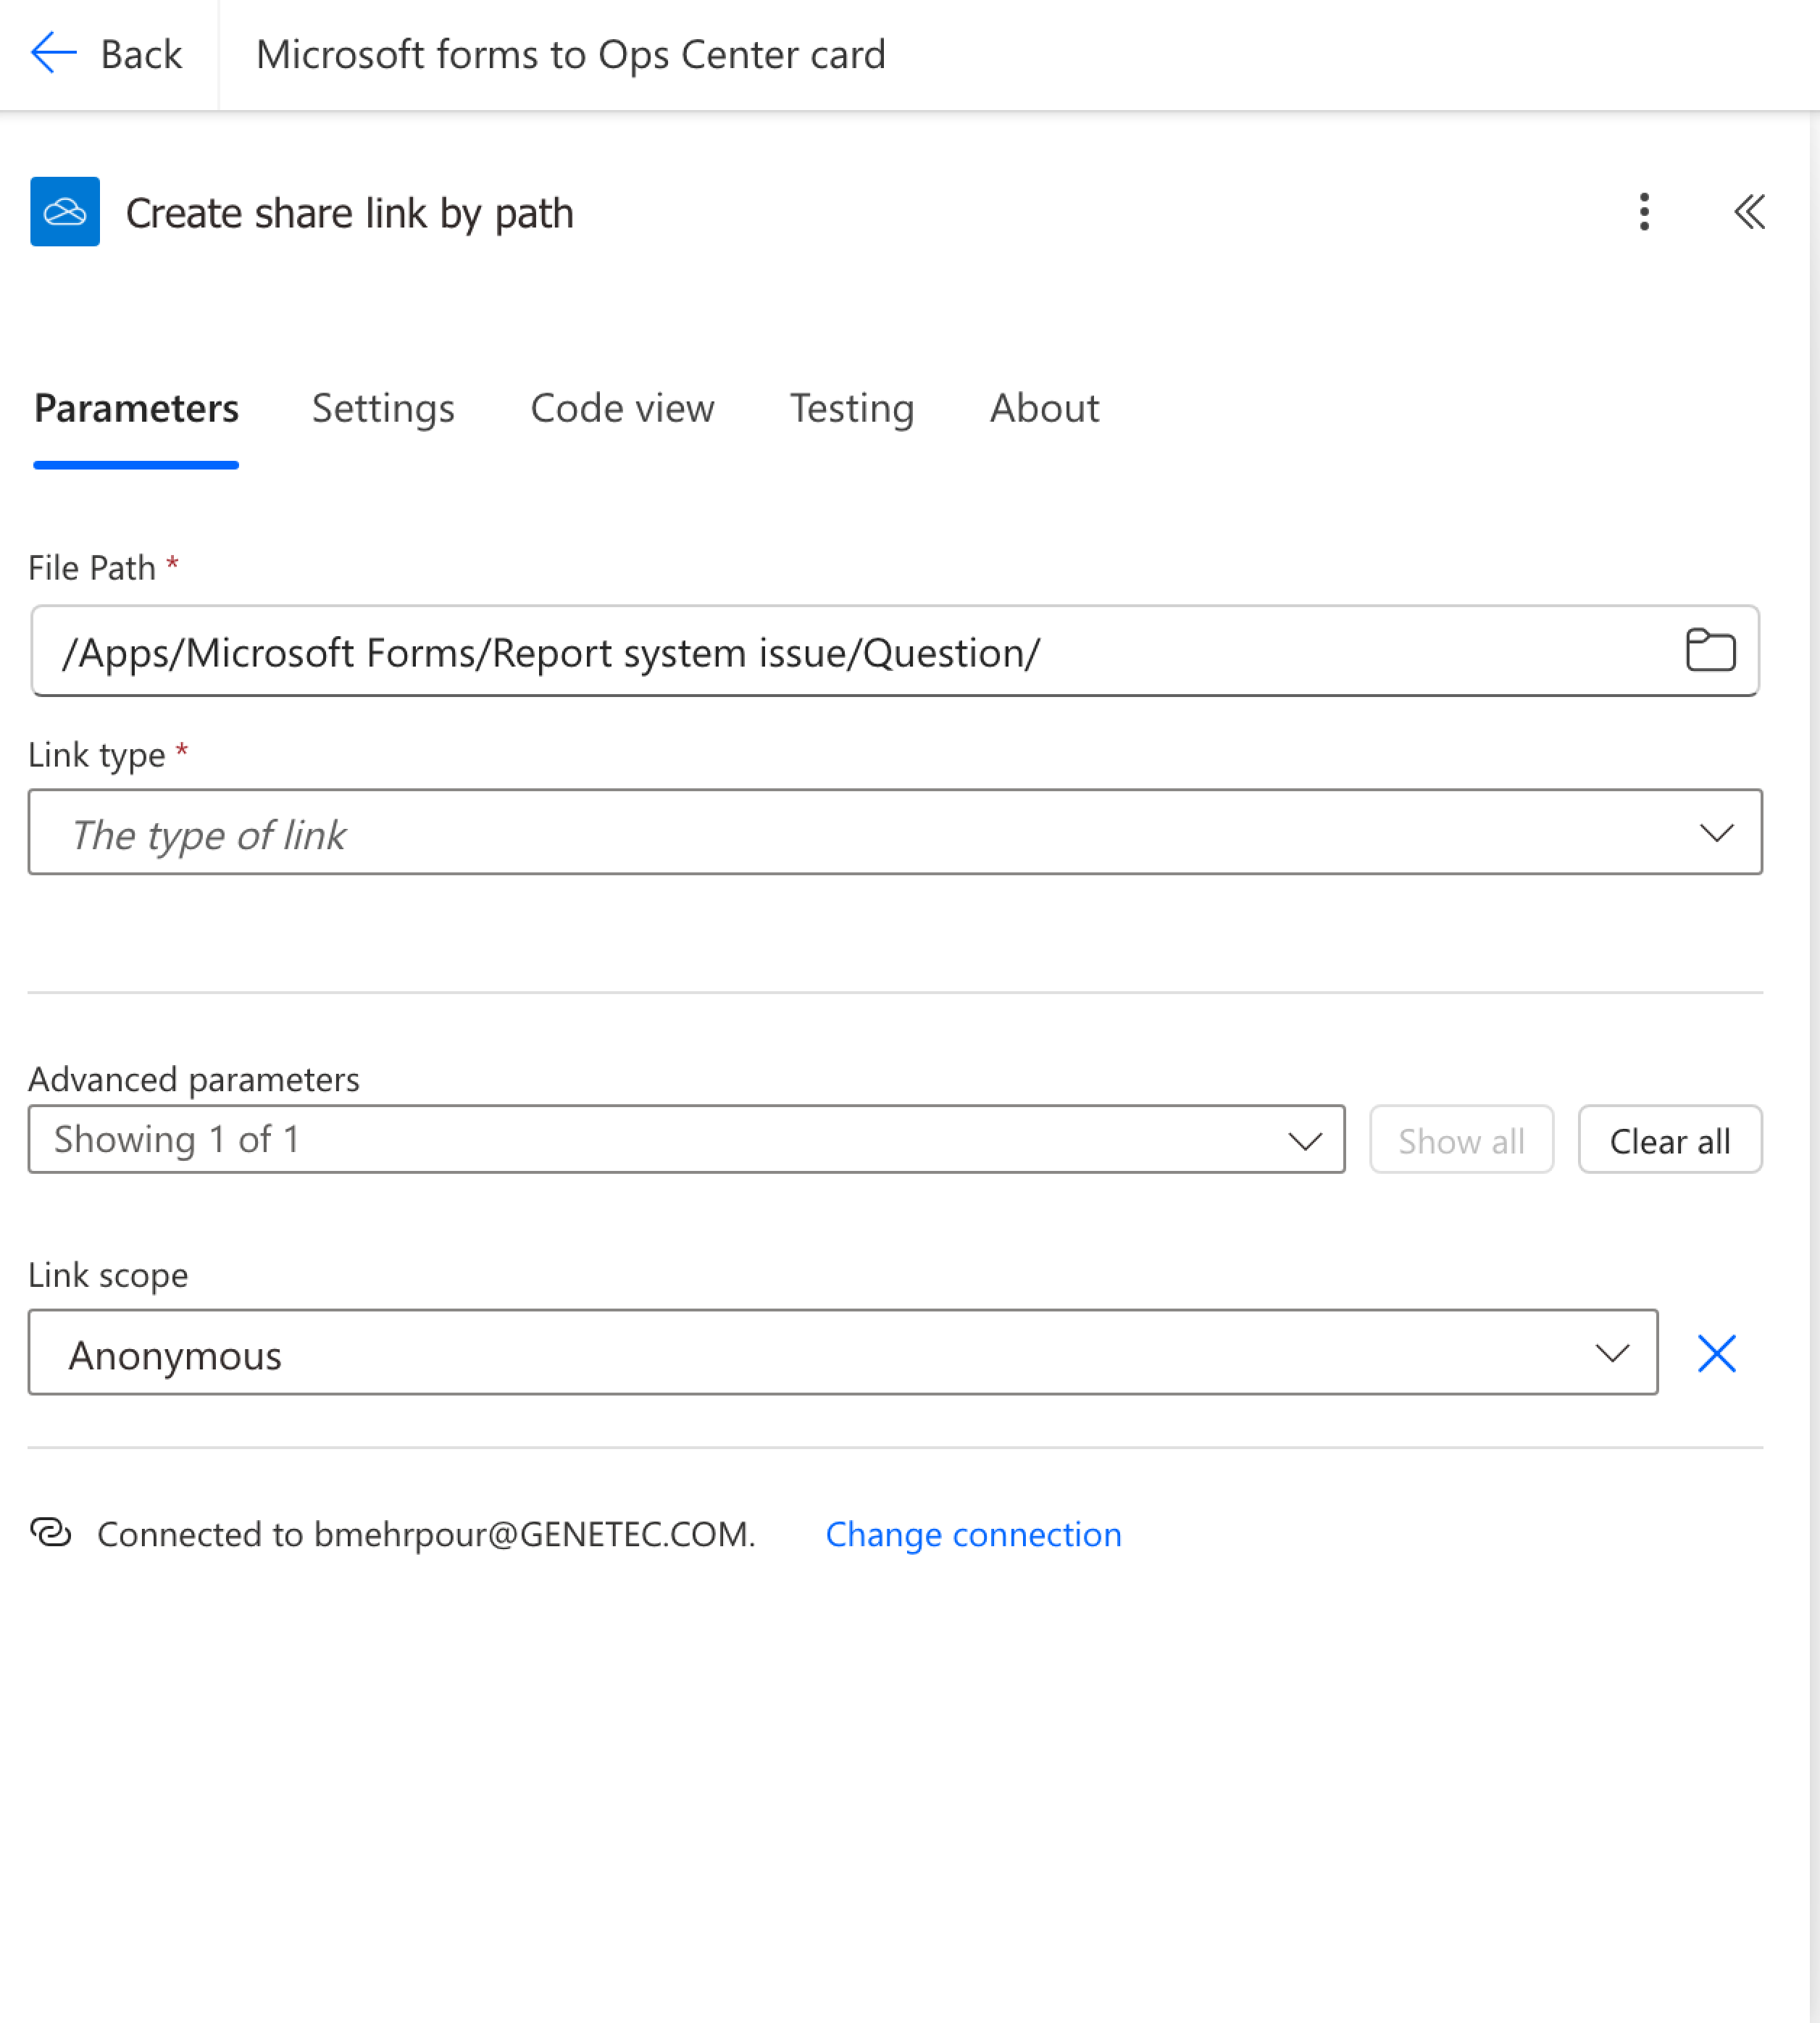
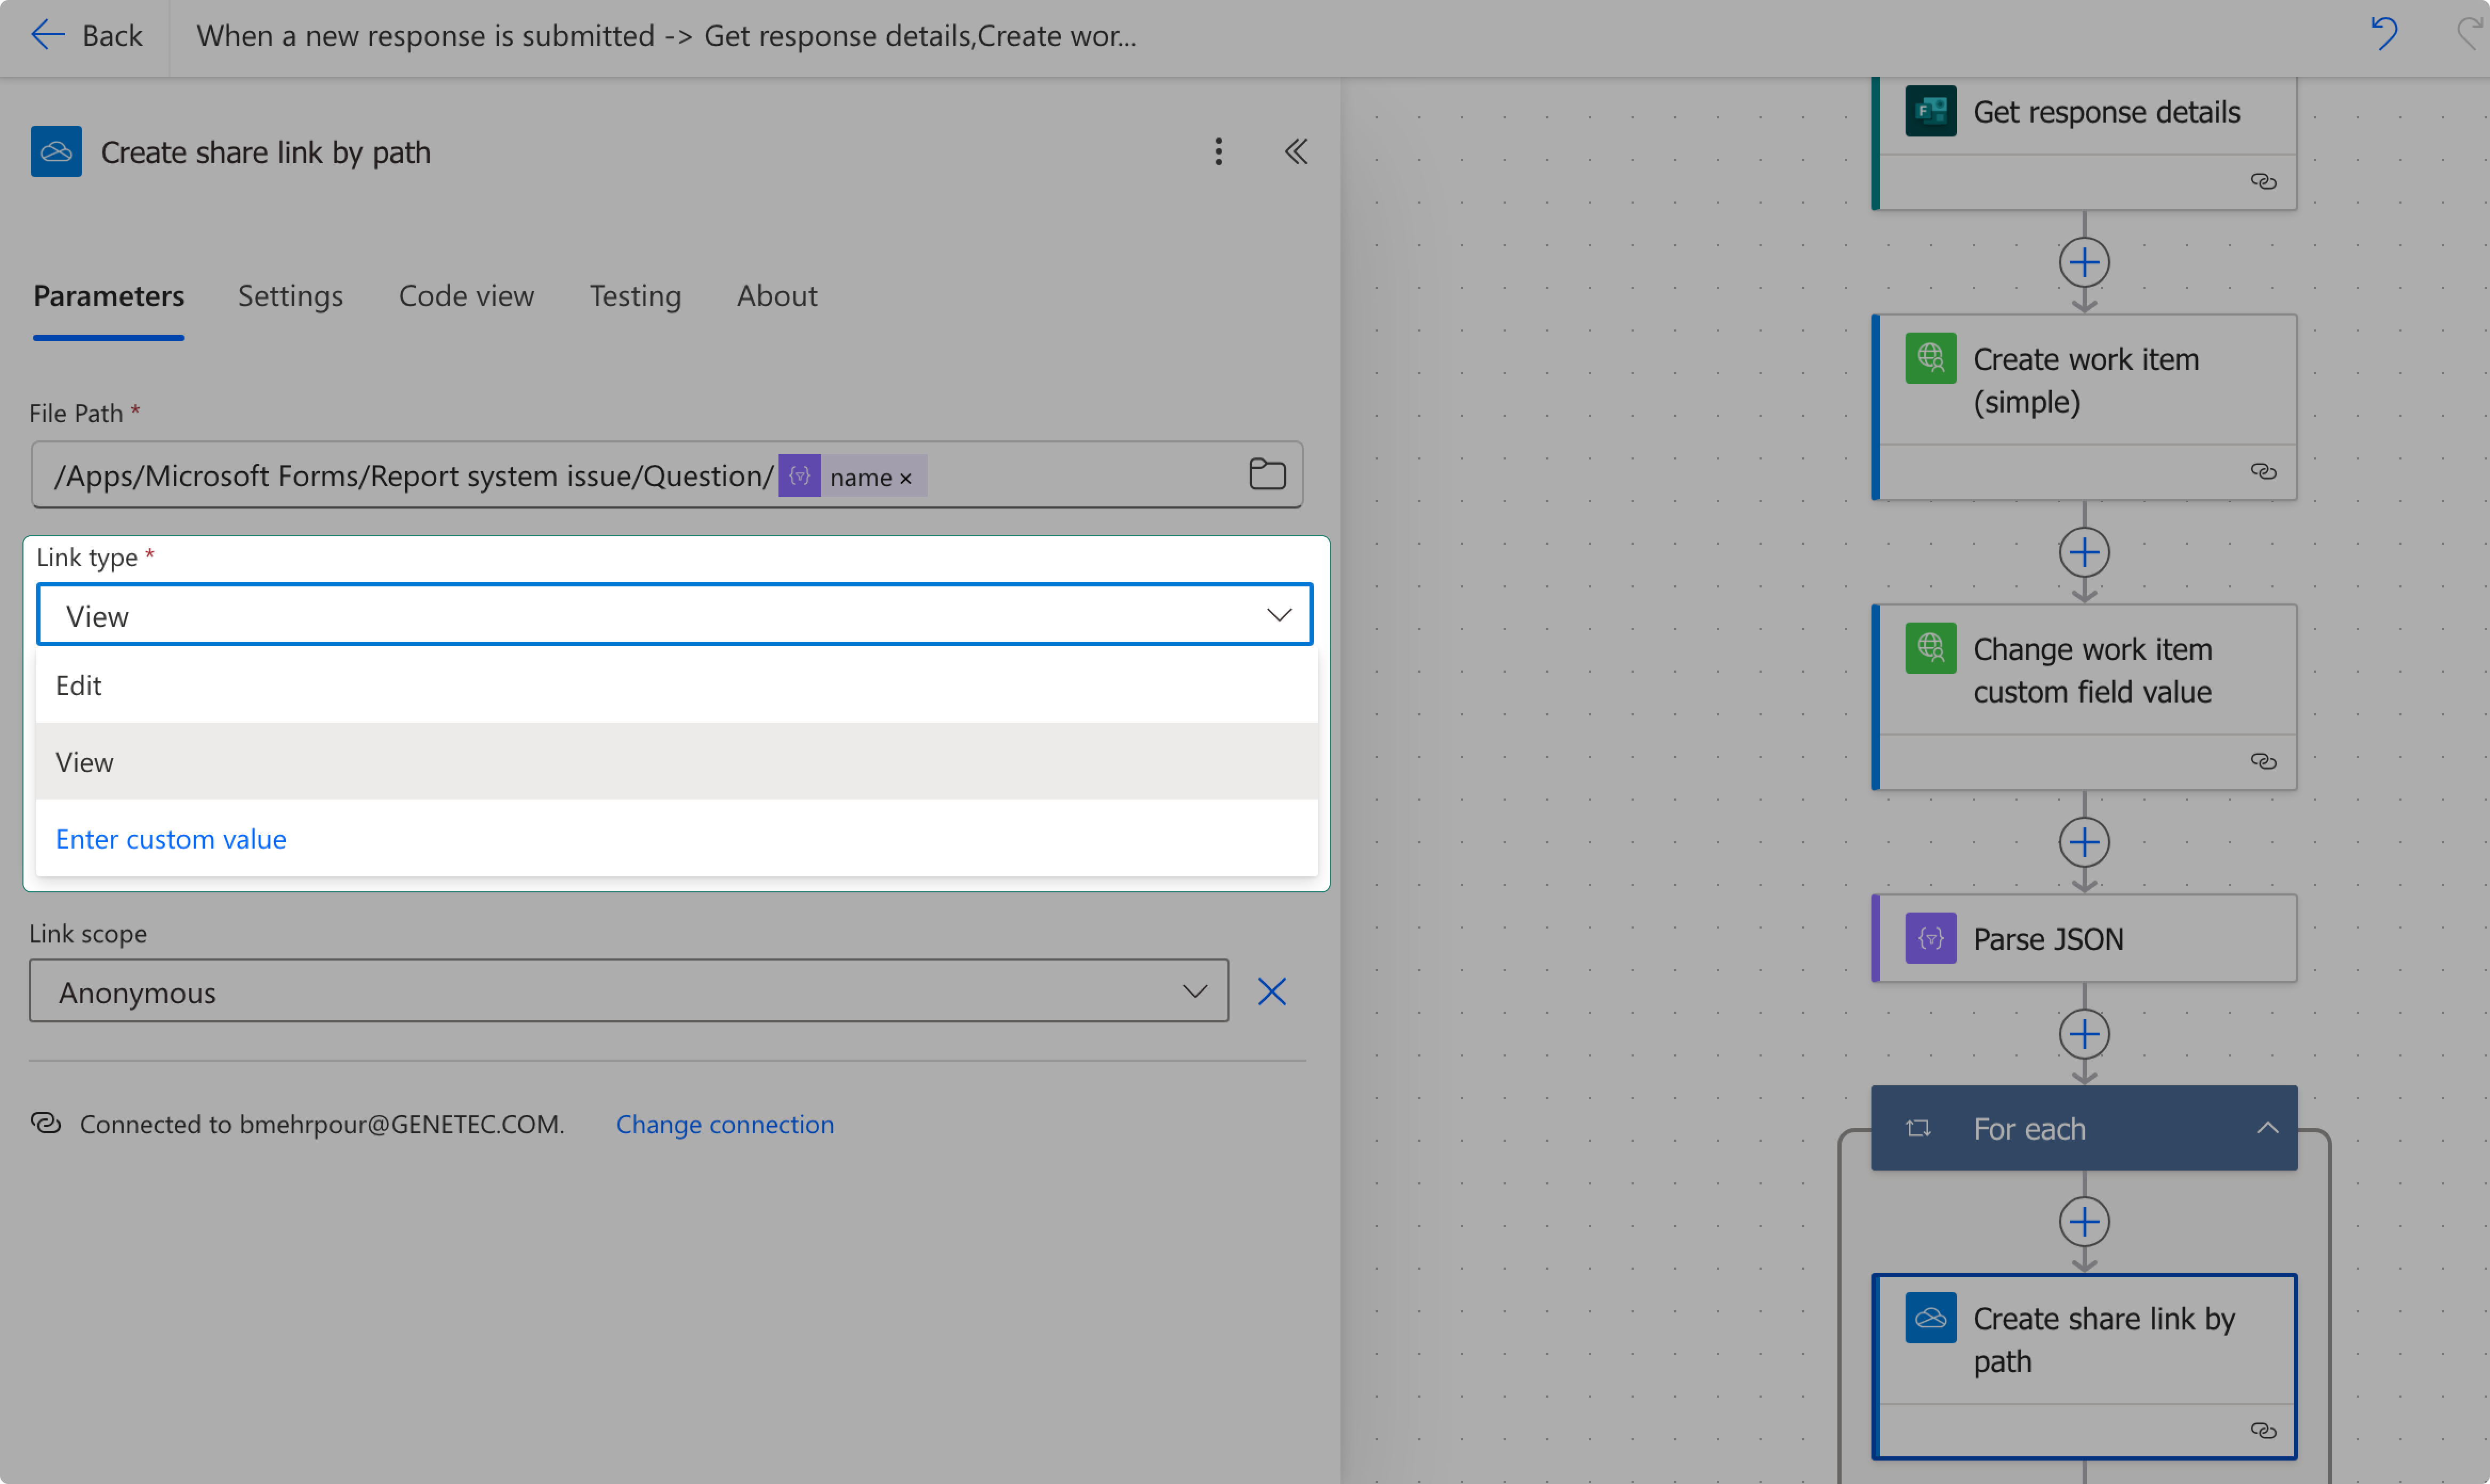
Now, type another / to bring up the dynamic content menu, then select "Body/Name".

Set Show Link Type to View so Operations Center can access the file.
Upload the File to Operations Center
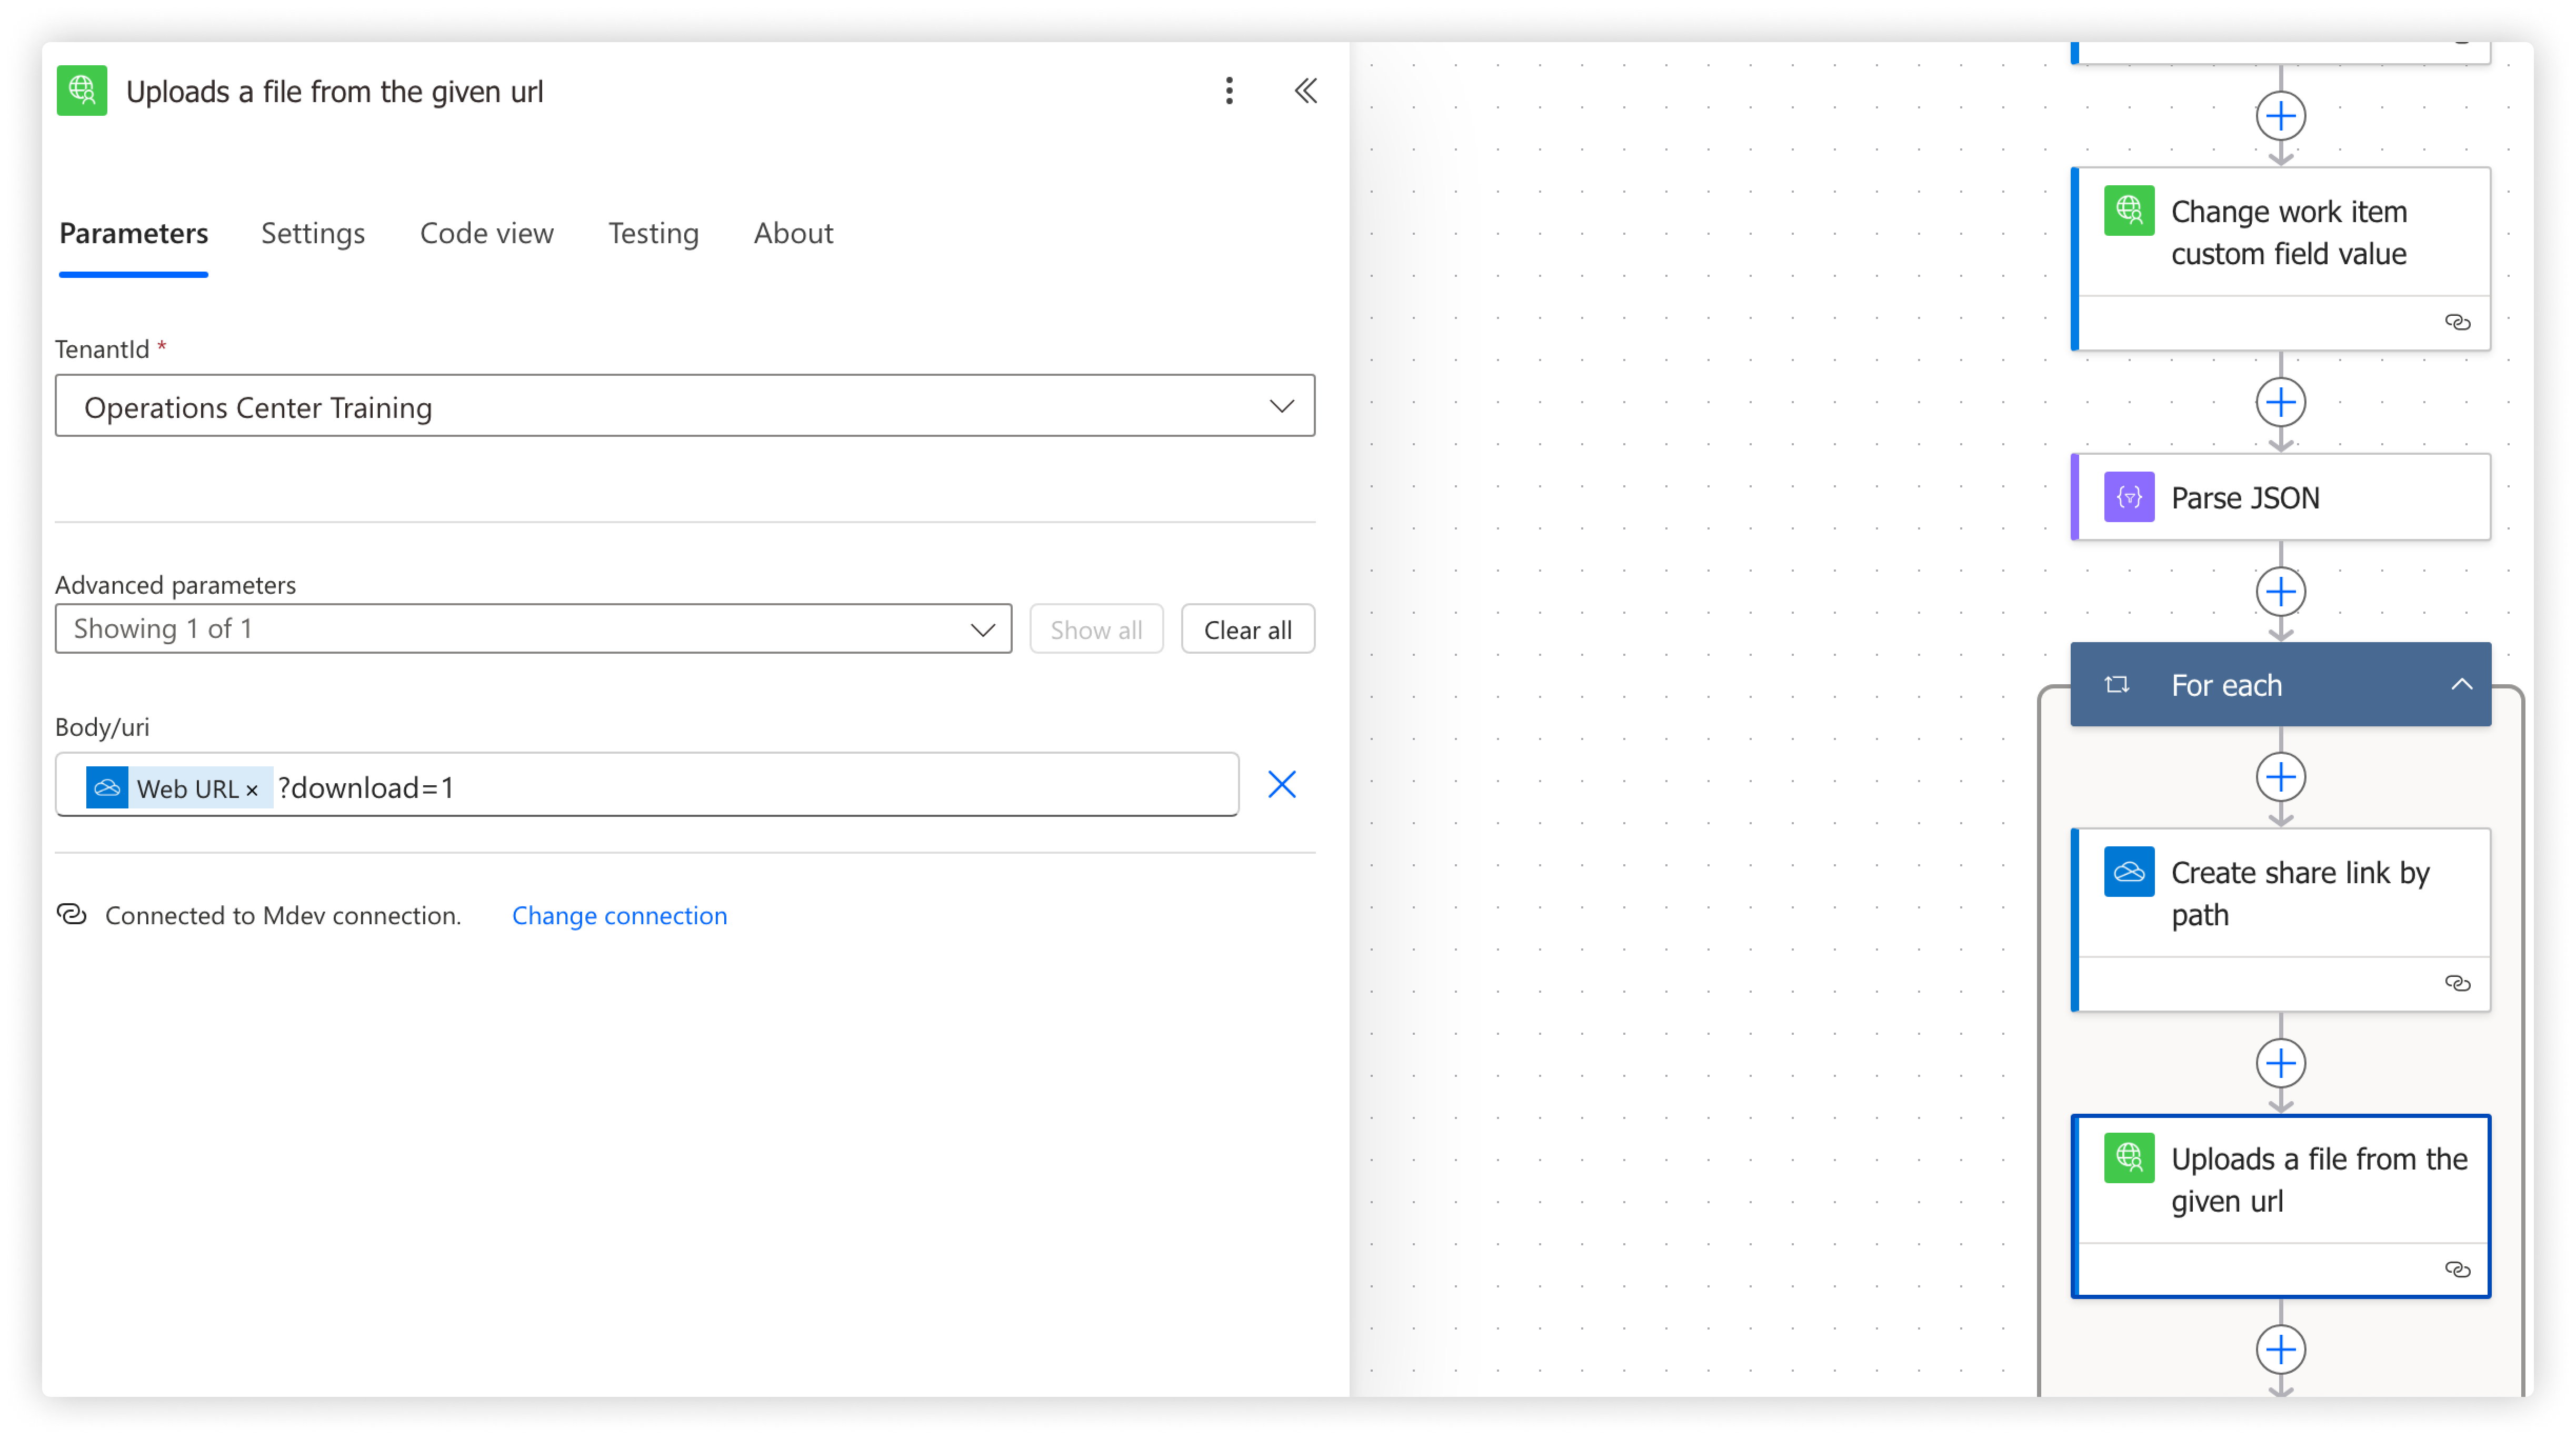
Next, add another action, set the connector to Custom, and select the Operations Center connector.
Search for "Upload a file from the given URL" and select it.
- Tenant ID → Select your Tenant ID.
- Advanced Parameters → Body/URI → Click the lightning icon and select Web URL.
- At the end of Web URL, manually add
?download=1to ensure the file is downloaded correctly.
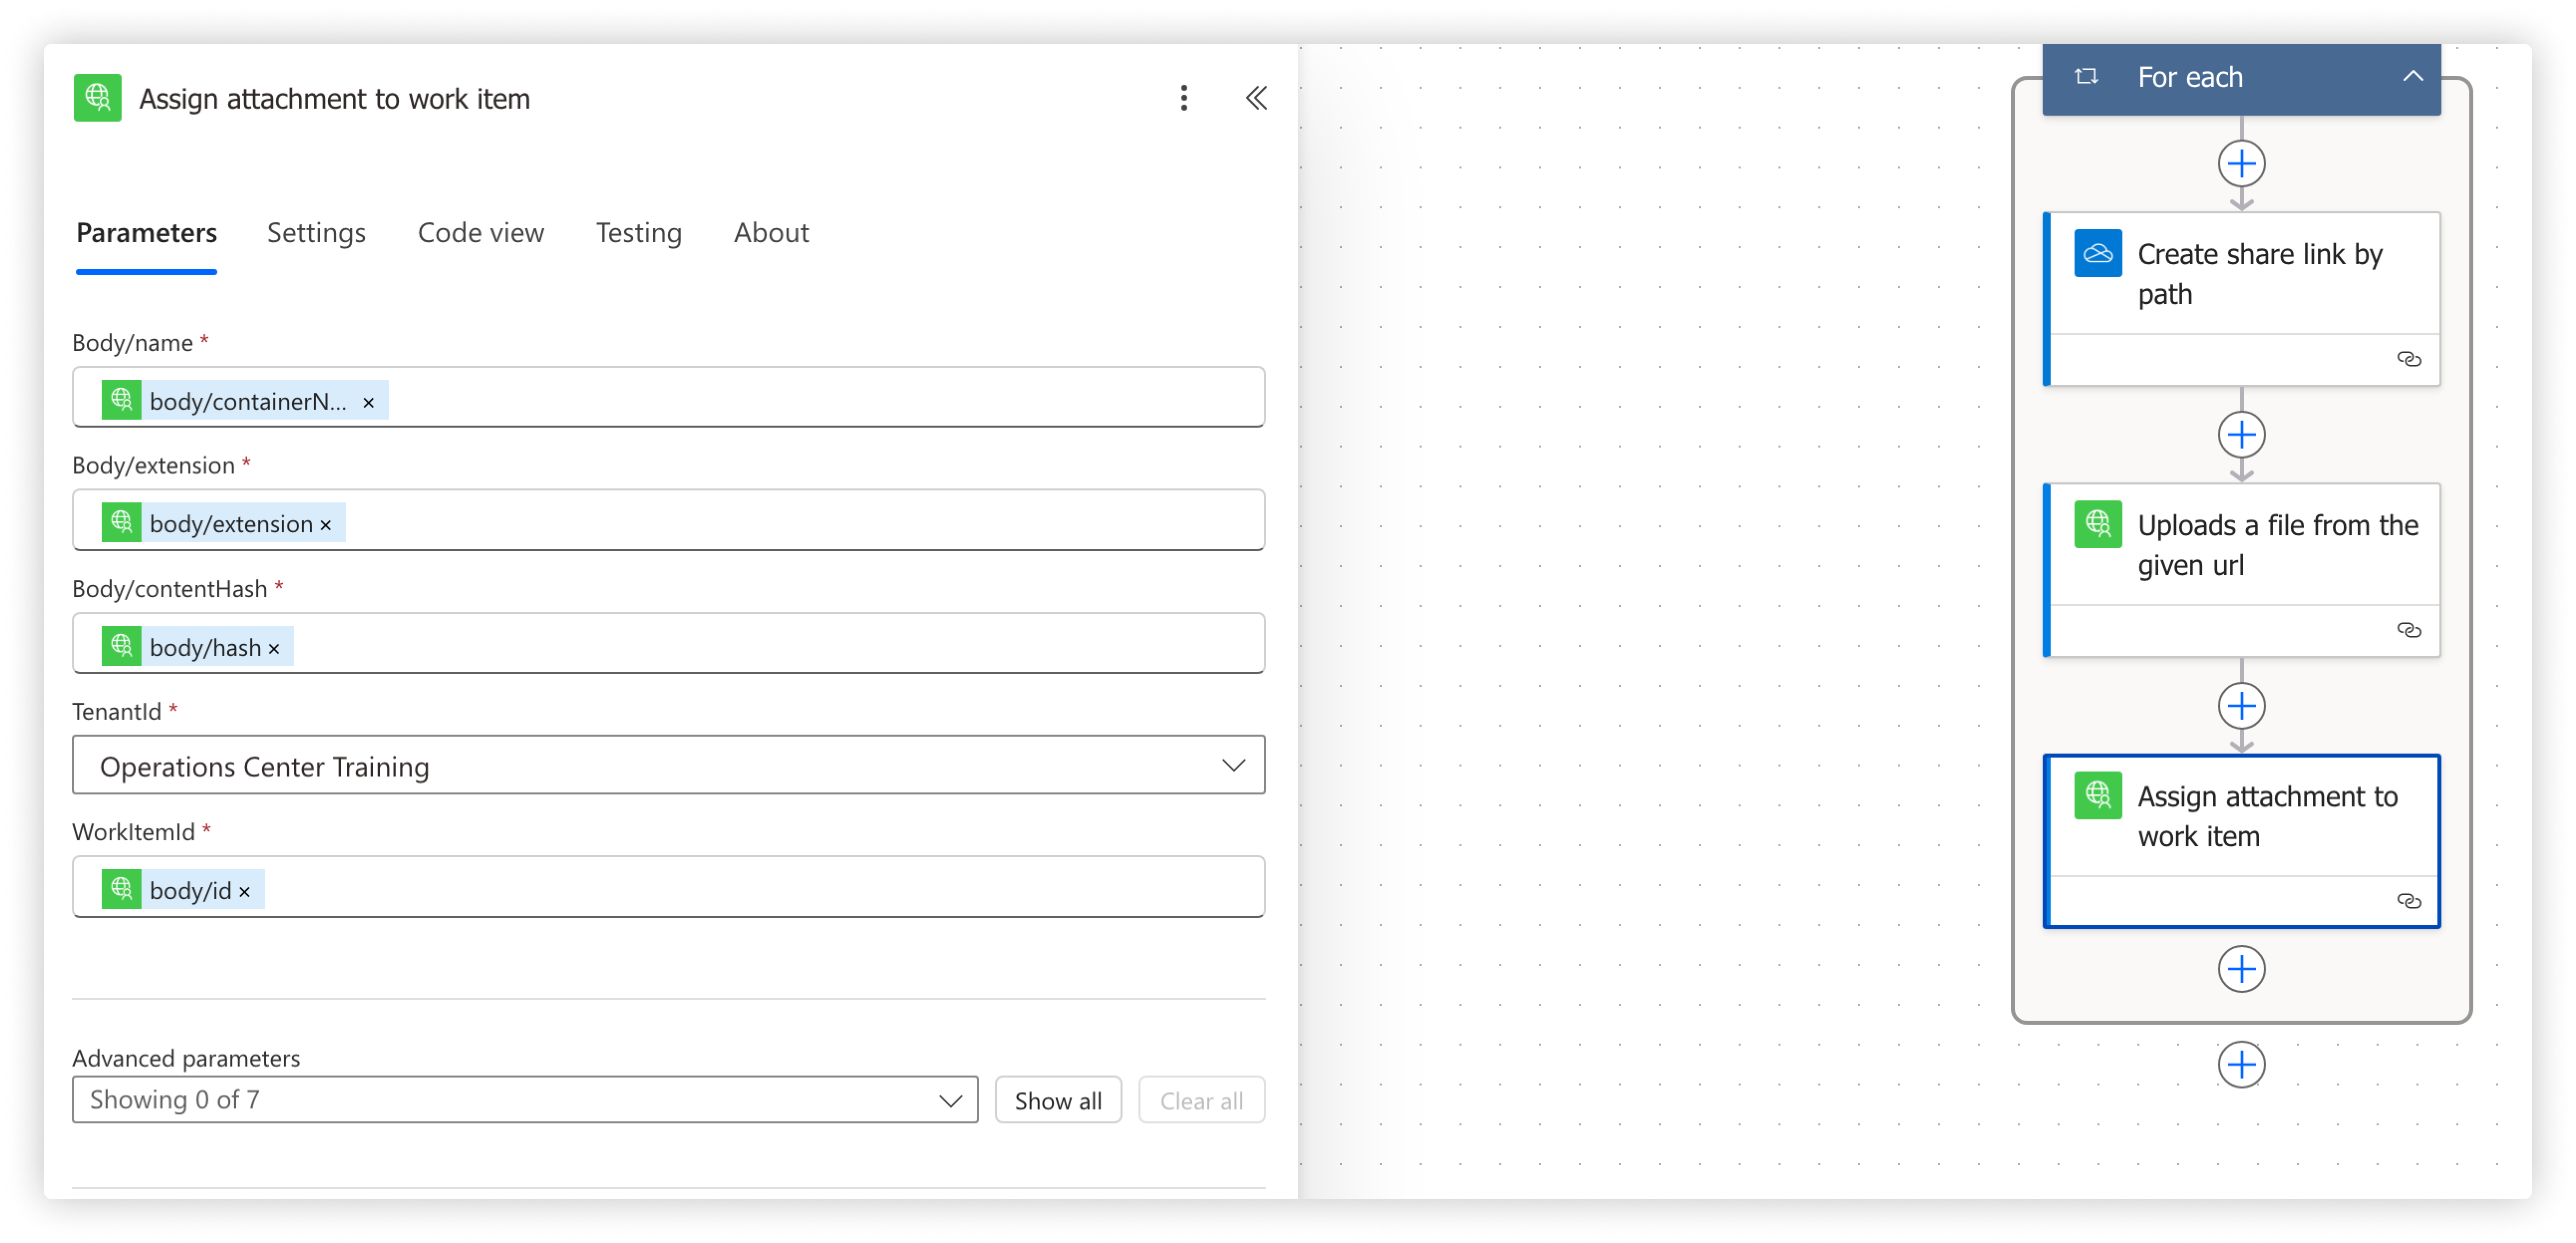
Attach the File to the Work Item
Now, add the final action to attach the uploaded file to the correct work item.
Search for "Assign attachment to work item", then set the following fields:
- Tenant ID → Select your Tenant ID.
- Work Item ID → Click the lightning icon and select Body/ID.
- Body/ContentHash → Select Body/Hash.
- Body/Extension → Select Body/Extension.
- Body/Name → Select Body/ContainerName.
Final Step: Save and Test
That’s it! Save your flow, then submit a test response in Microsoft Forms with an attachment. If everything is correct, the file should automatically upload and attach to the right work item in Operations Center.
Done! 🎉