Data Source for the Weekday Widget
Topics Covered
- Adding and configuring a new data source for the Weekday Overview widget.
- Selecting and aliasing tables and columns to structure normalized data.
- Defining relationships and parameters in the query to filter data by board ID.
- Applying query filters to restrict data to the current board.
- Finalizing the data source and adding it to the dashboard.
- Preparing the dashboard for widget creation by saving changes and revealing the designer.
Create a new widget
In this section, we will create a new widget to display an overview of the weekdays and how many cards are created on each weekday. Additionally, we will use the first widget (the List Box) as a filter for this new widget.
Step 1. Open the main menu
Click on the Main Menu button to open it and navigate to Data Sources
Step 2. Add a data source
Click add New Data Source and Choose Database and then click Next to proceed.
Step 3. Select the WarehouseConnetion
And name the query CardsperDay. Next, click on the Run Query Builder... to continue.

Add Tables for Weekday Analysis
To set up the data for grouping cards by weekday, we'll add several key tables to the query builder. Here's how to proceed:
1. Add the Cards Table
- Search for dimWorkItems in the Available Tables and Views section.
- Double-click on oc.dimWorkItems to include it in the query. This table contains the card data needed for the analysis.
2. Add the Categories Table
- Search for dimWorkItemCategories.
- Double-click on oc.dimWorkItemCategories to include it. This is required for the master filter functionality.
3. Add the Dates Table
- Search for dimDates.
- Double-click on oc.dimDates to include it. This table provides the full date data, which is essential for grouping cards by weekdays.
💡 Note on UTC Weekdays
The date used for this widget is in UTC, so the grouping will reflect UTC weekdays. This may result in a slight shift when compared to localized time zones. For the purpose of this tutorial, we will use UTC, and instructions for handling localized times will be covered later in the course.
This setup utilizes normalized data:
- dimWorkItems (Cards): Stores card data.
- dimWorkItemCategories: Ensures compatibility with the master filter.
- dimDates: Provides the complete date information.
With these tables added, we can move forward to configure the query for our widget.
Adjust Relationships
When normalizing data for the dashboard, it is crucial to ensure that the relationships between tables are accurate. By default, connections between tables are auto-generated based on references. However, there might be cases where the generated connections are incorrect, especially when the same table (e.g., dimDates) is referenced multiple times in another table (e.g., oc.DimWorkItems).
To fix this, we need to remove incorrect relationships so that the correct ones can be established later.
1. Steps to Adjust Relationships
- Select and Remove Incorrect Connections
- Locate the dimDates table in the query builder.
- Click on the join line connecting dimDates to another table (e.g., oc.DimWorkItems).
- Click on the Trashcan button to delete the relationship.

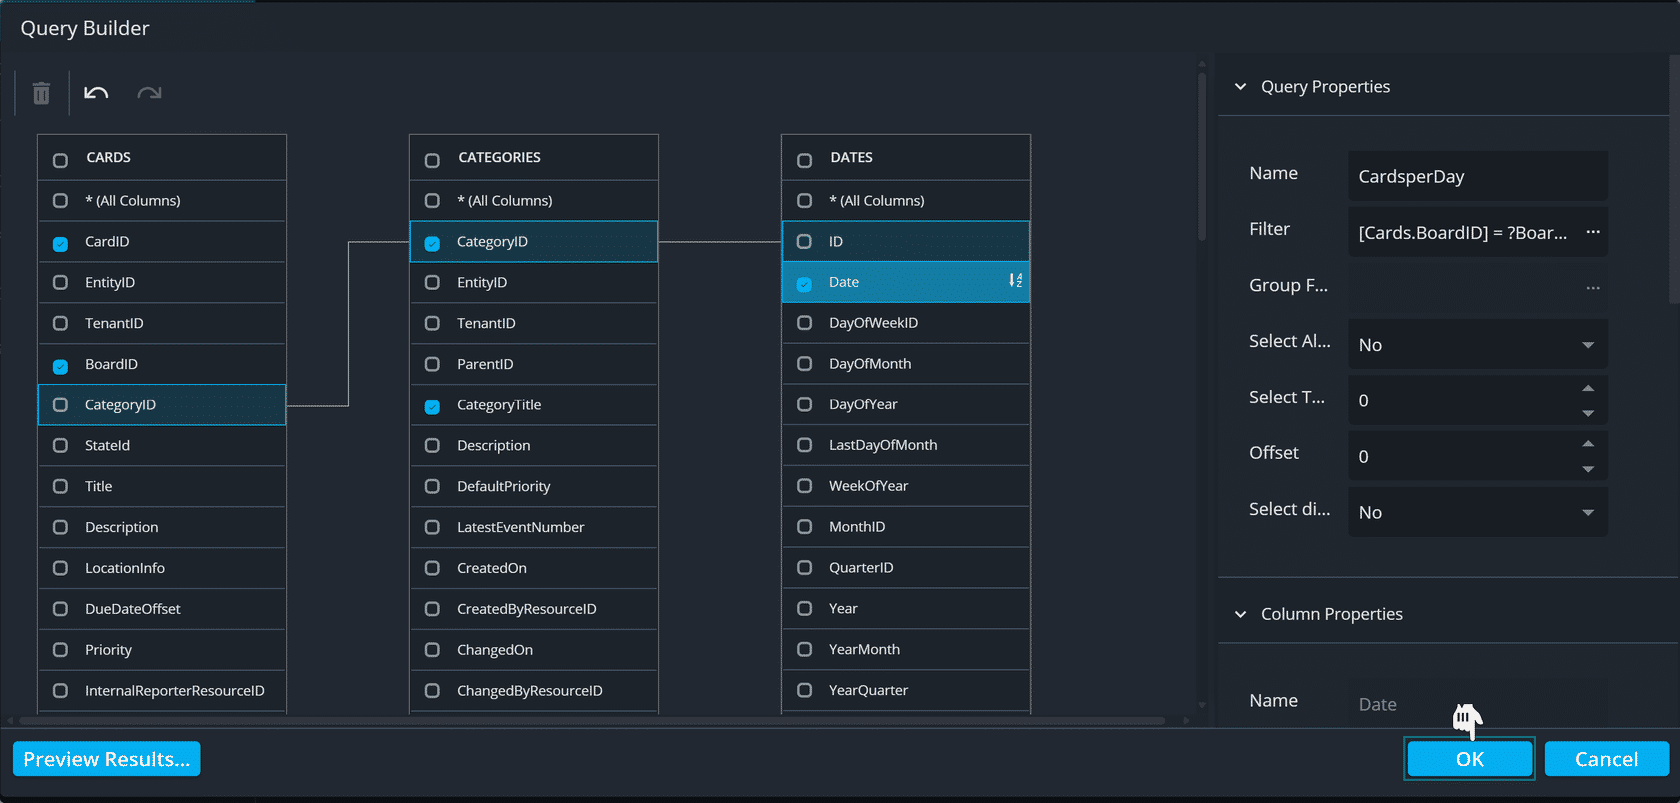
Assign Aliases, Select Columns, and Add a Parameter
To properly structure and filter your data source, we'll follow these steps to assign aliases to the tables and columns, select only the necessary data, establish relationships, and add a parameter. This will prepare the data source for accurate and efficient widget functionality.
1. Assign Table and Column Aliases: Select the dimWorkItems table by clicking its header:
- Set the Alias to Cards.
- Check the ID column and assign it the alias CardID.
- Check the BoardID column and assign it the alias BoardID.

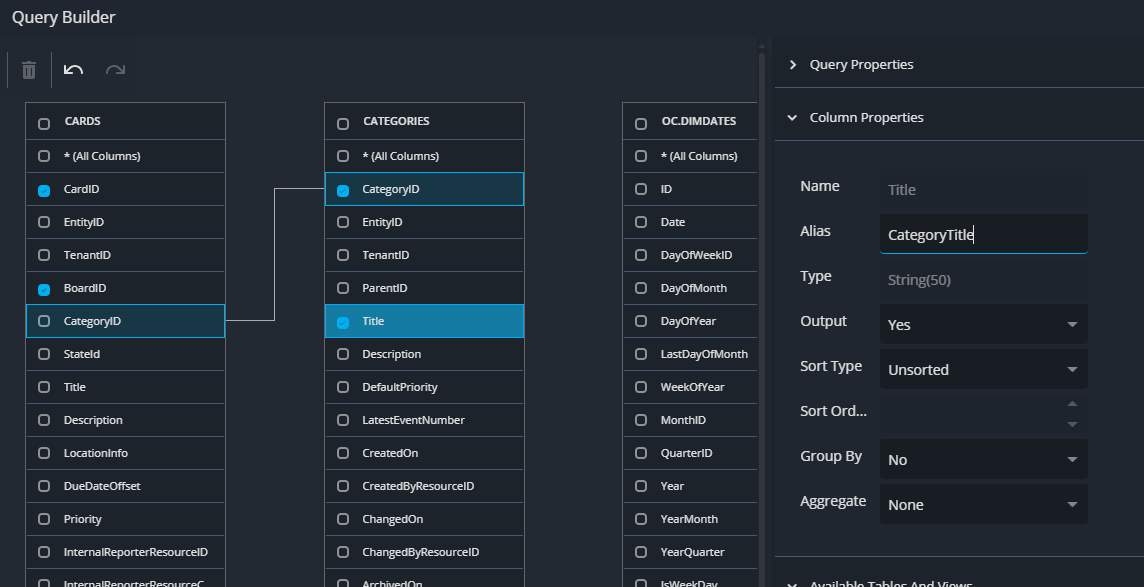
2. Click on the header of the dimWorkItemCategories table
- Set the Alias to Categories.
- Check the ID column and assign it the alias CategoryID.
- Check the Title column and assign it the alias CategoryTitle.
3. Click on the header of the dimDates table
- Set the Alias to Dates.
- Click the ID column, and drag it to the CreatedOnDateId column of the Cards table to establish a relationship.
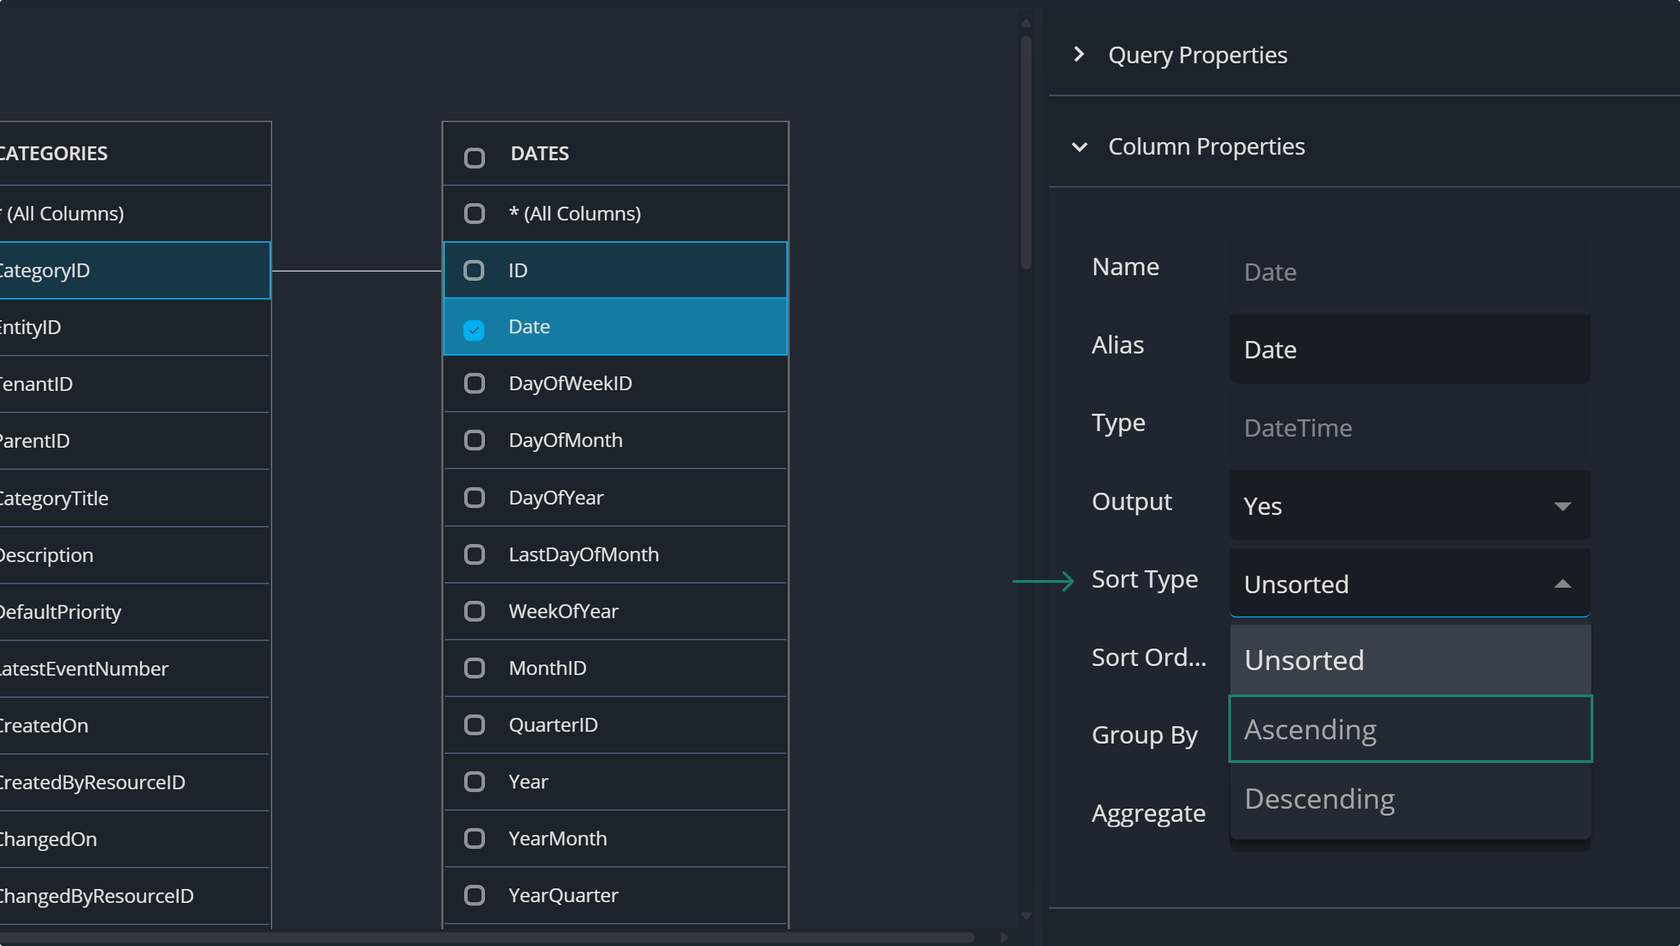
4. Final steps
- Check the Date column and assign it the alias Date.
- Set the Sort Type to Ascending in the Column Properties section.
Add a Parameter
- Expand the Parameters section on the side-panel and click the plus button to add a new parameter.
- Expand the new parameter to view its properties:
- Set the Name to BoardId.
- Set the Type to Expression.
- Set the Result Type to Number (32 bit integer).
- Set the Value to ?BoardId (Use the three-dot menu to open the popup, then double-click the Board ID to select it.).
💡 Key Notes
Normalization Insight: By setting column aliases and filtering data, we simplify referencing these columns later and maintain consistency.
Parameter Functionality: The BoardId parameter links this data source to the dashboard filters, ensuring the data shown is specific to the selected board.
Filtering Data Source for Specific Board
To ensure the data source only contains information relevant to the current board, we filter the query using the BoardId parameter. This ties the data directly to the user’s selected board, keeping the dashboard focused and efficient.
Open the Query Properties section in the side-panel and click the 3 dots next to the Filter field to access the Filter Editor. In the Filter Editor, hover over the And operator, click the plus icon, and add two conditions: Use the BoardId parameter to filter records and define any additional criteria if necessary. Click OK to save and exit the Filter Editor.
Click OK again to close the Query Builder and finalize the data source setup.
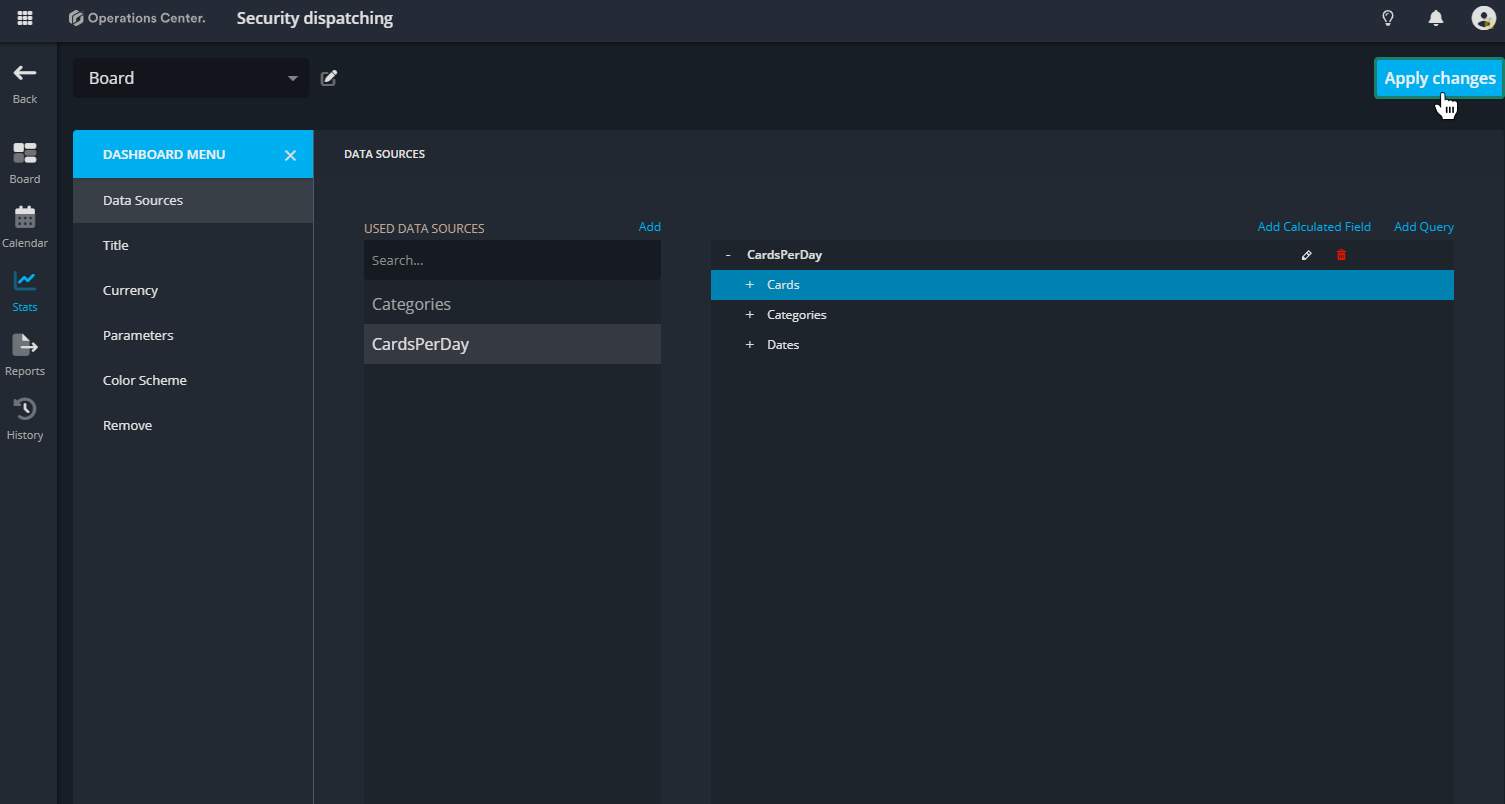
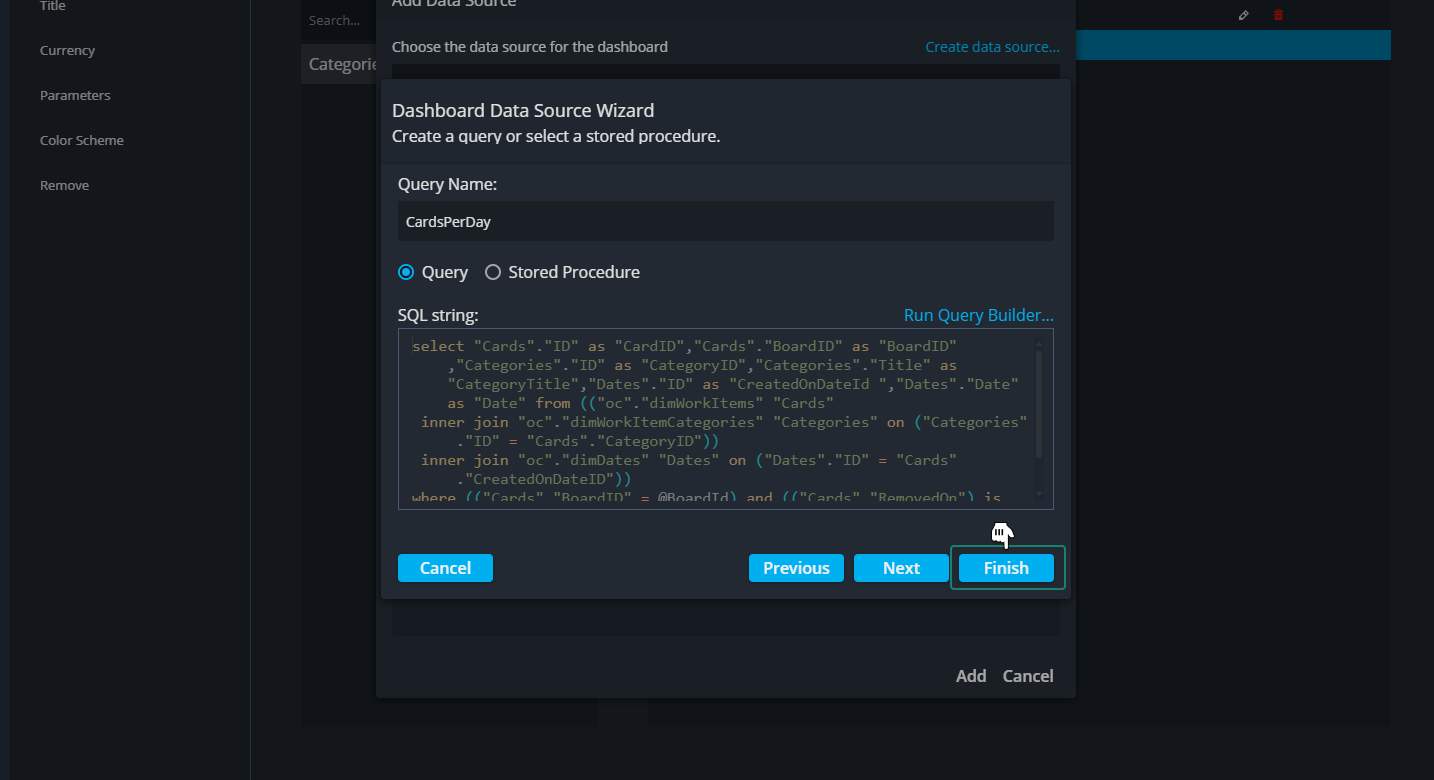
Finalizing and Adding the Categories Query
In this section, we finalize the newly created query and integrate it into the dashboard, making it available for use in widgets. Steps to Finalize and Add the Query
Step 1. Close the Data Source Wizard
Step 2. Add the Query to the Dashboard:
Click Add to include the new query in the dashboard.
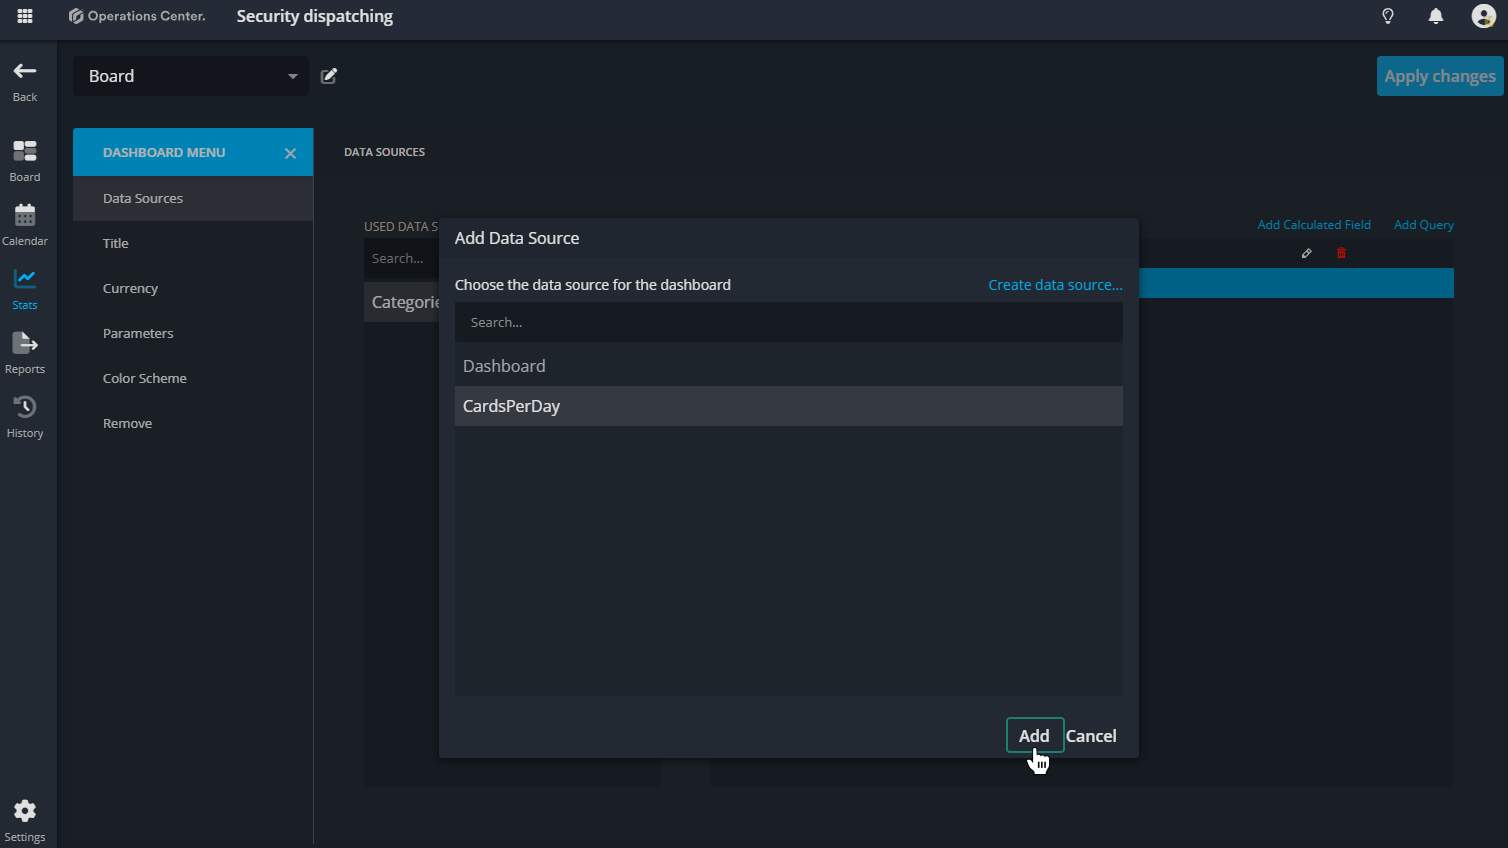
3. Save Your Changes