
Setting Up Authentication
🔑 Why This Matters
Service users keep automation secure, permissions tight, and logs clean. In short, they’re like backstage crew in a theater—critical, but not in the spotlight. Your automation needs permission to interact with Operations Center. We do this with API keys from a service user, so all actions in Power Automate will be tied to that user.
Watch this video for the full process, or follow the step-by-step breakdown below.
Operations Center system settings
Log in to your Operations Center account, head to System Settings, and find the Service Users tab under Access—your gateway to creating a new service user.

Create a new service users
Name the service user and assign it the User role.
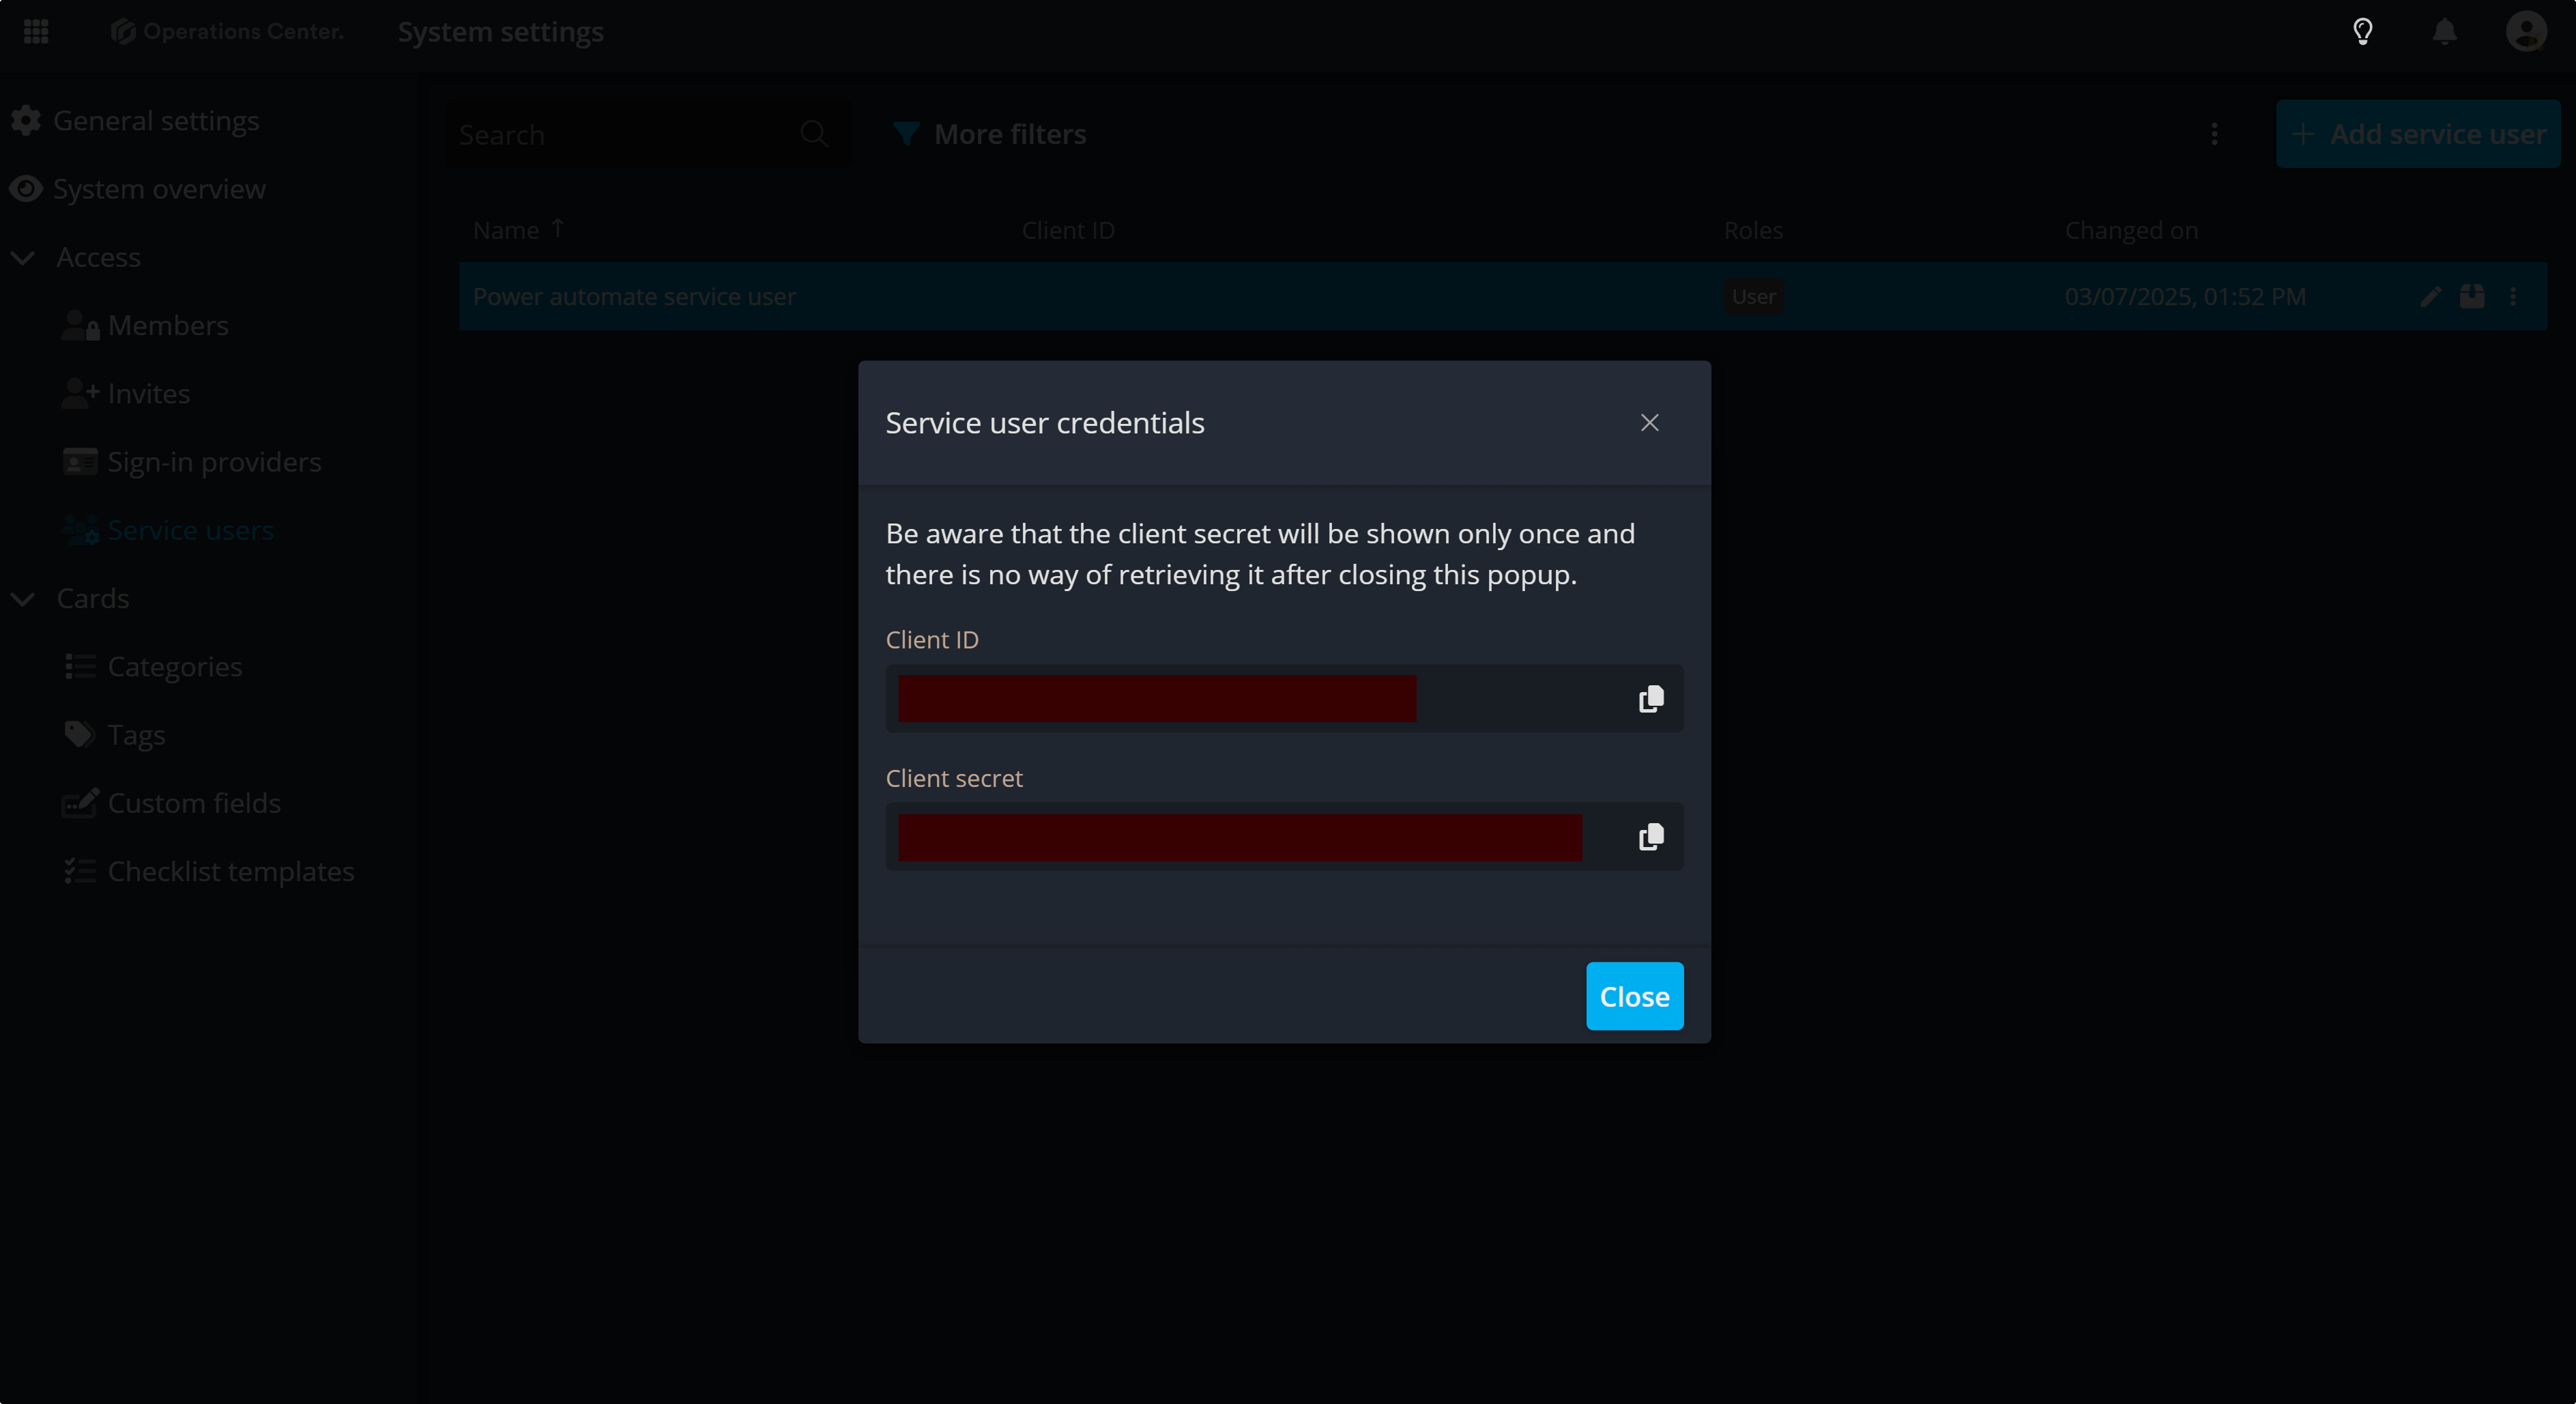
A popup will appear, revealing two crucial pieces of information: Client ID and Client Secret. Save both immediately—you’ll need them later to set up the connector when we return to Power Automate to create the flow.
Add the Service User to a Board
The final step in this section is to add the service user to the Operations Center board where you want to automate the card creation flow.
- If you already have a board: Open its settings via the ellipsis (•••) menu in the context menu.
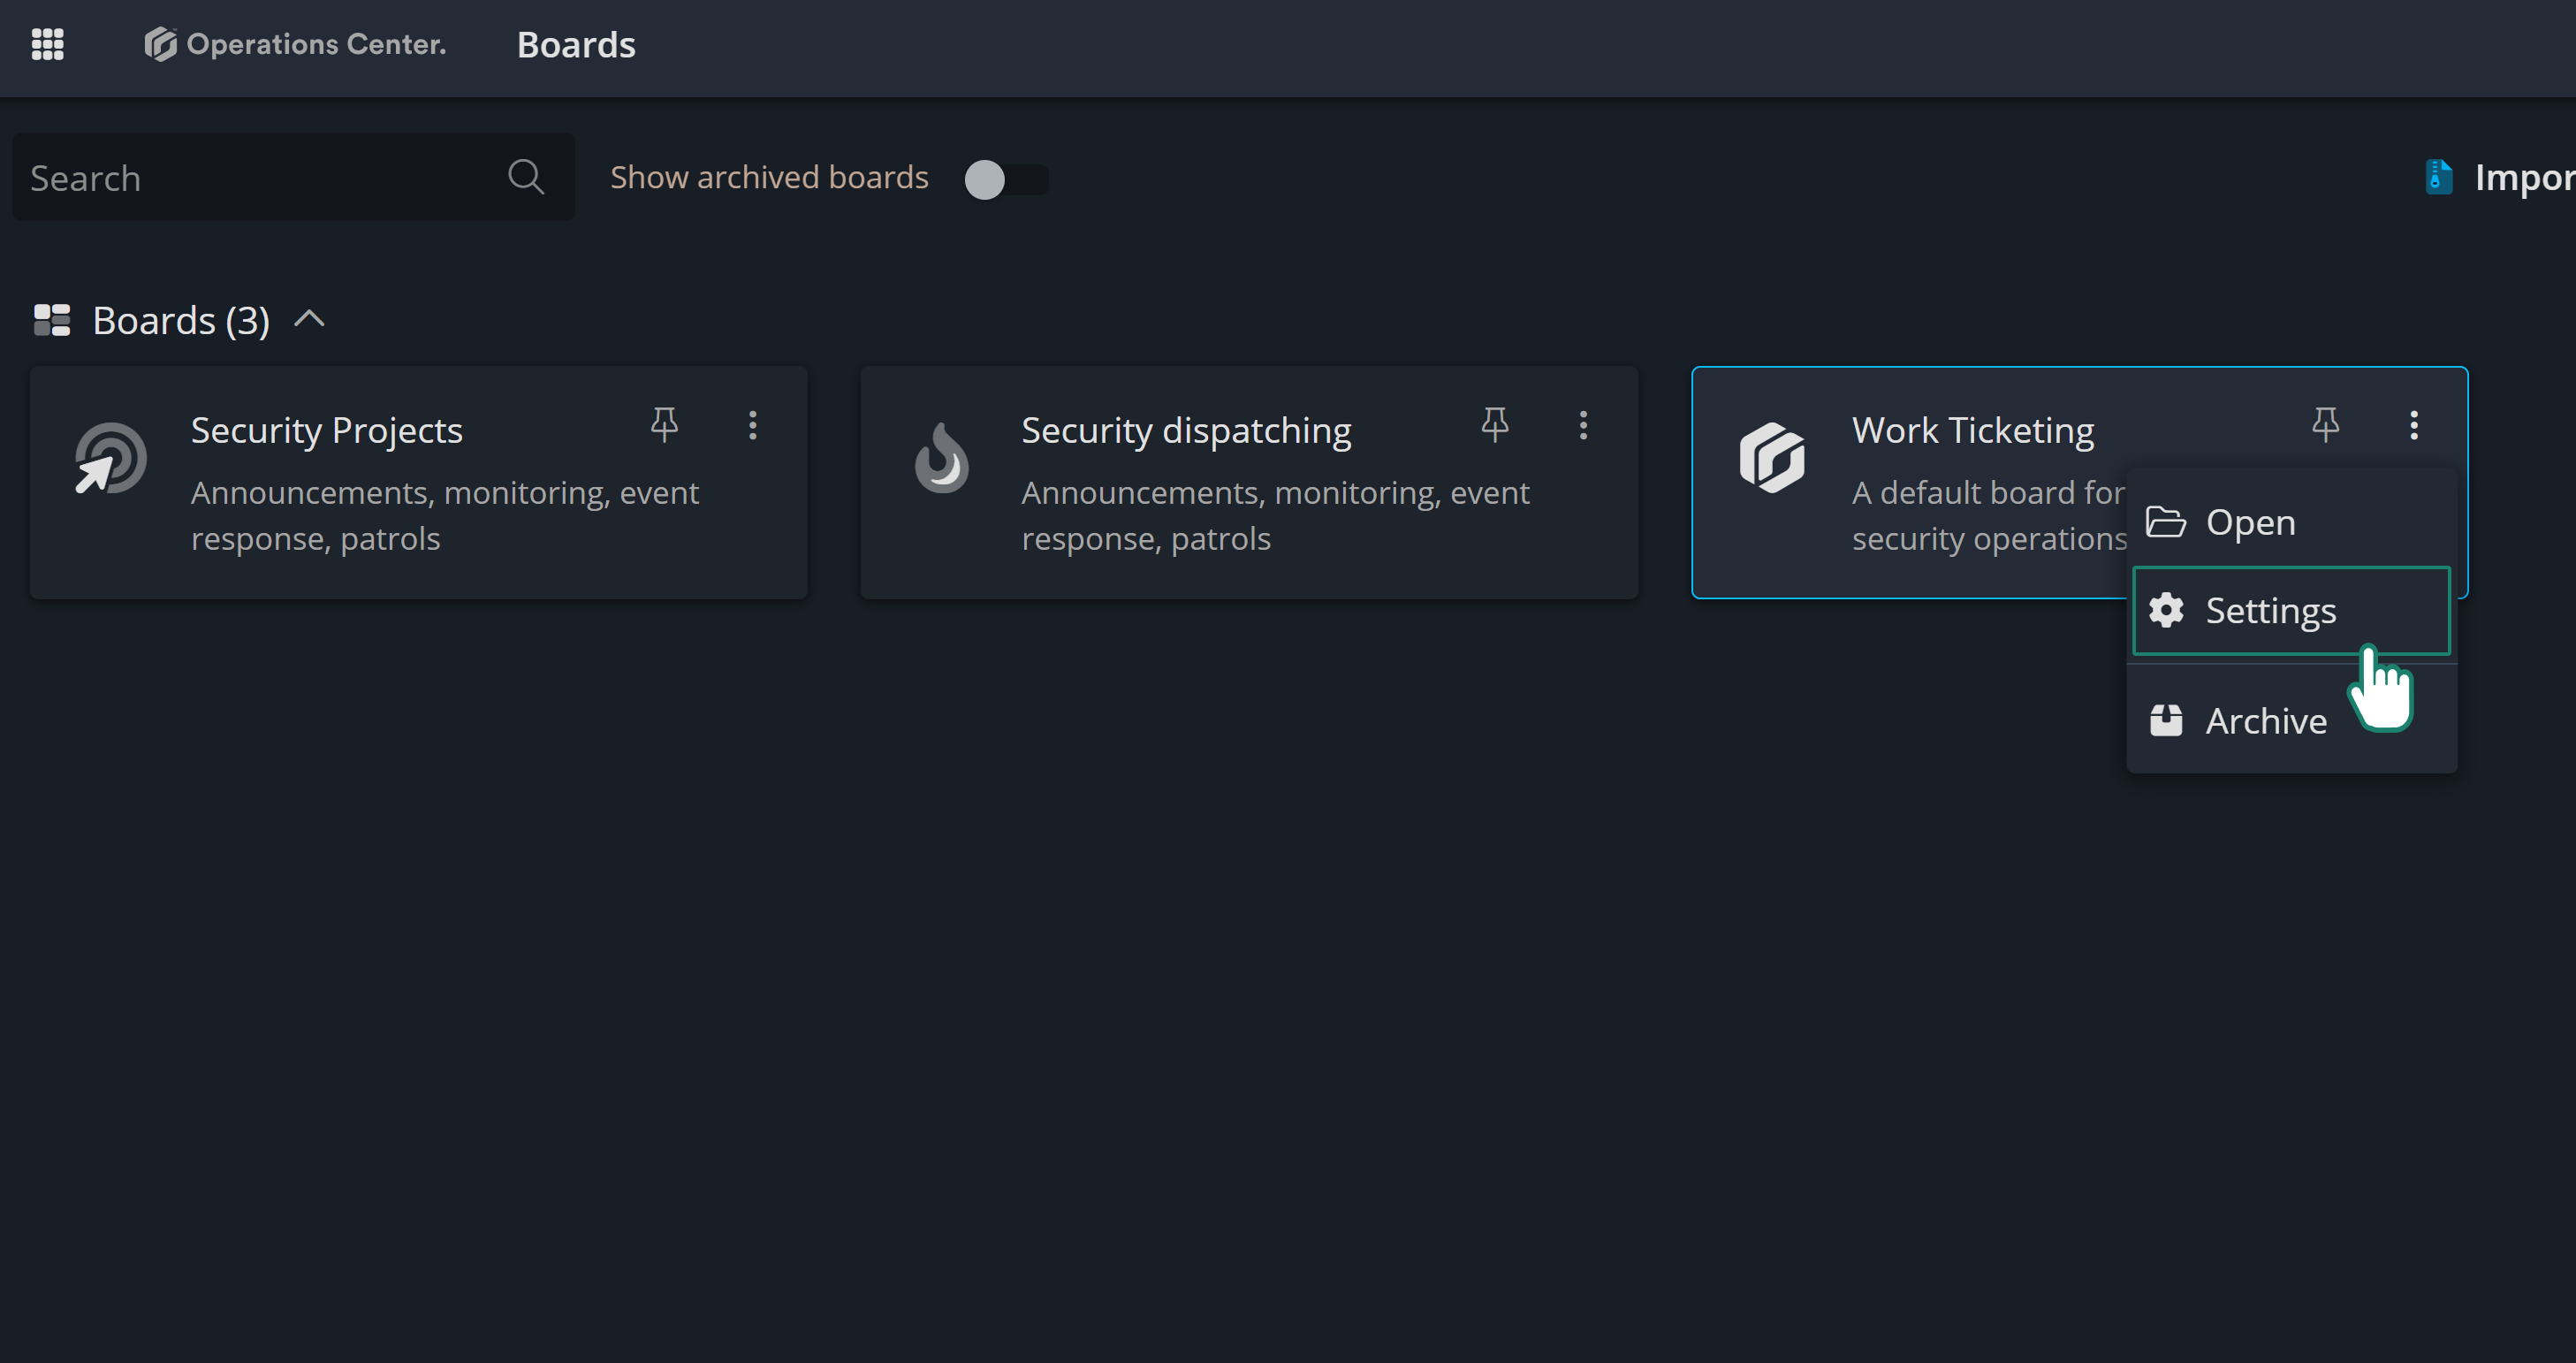
- If not: Create a new board using Operations Center’s pre-made templates.
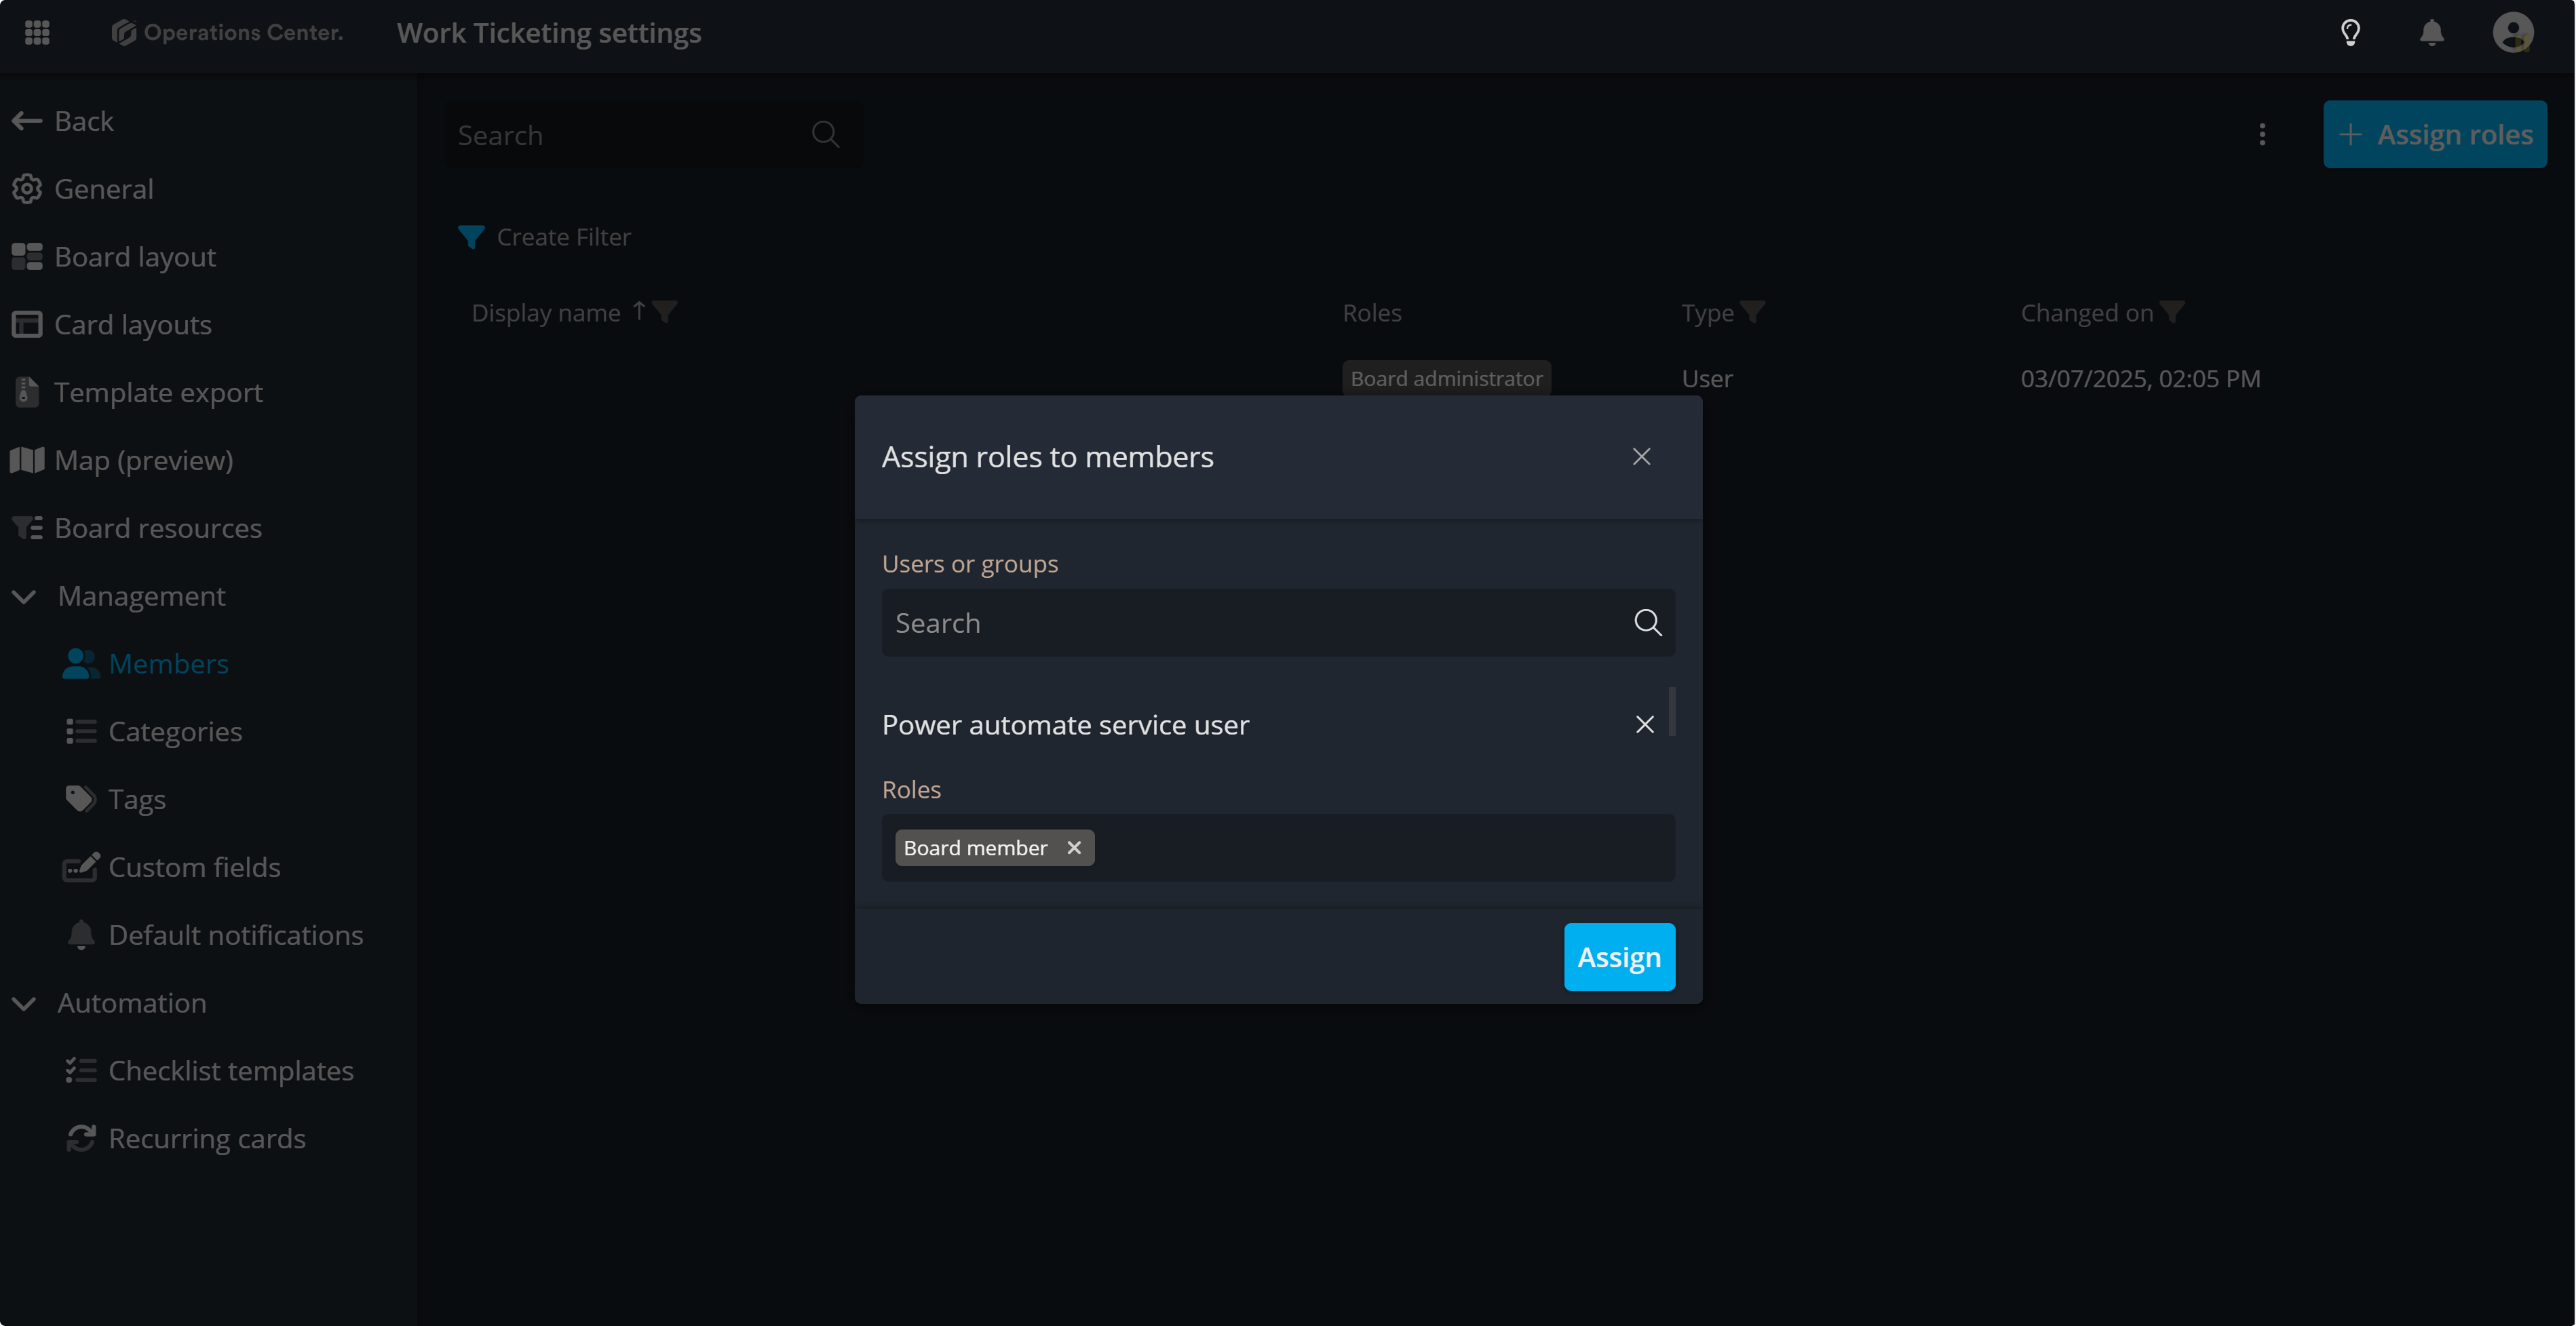
In Board Settings, go to the Management section and open the Members tab. Click Assign Role in the top-right corner, search for the service user created in the previous step, and assign it the Board Member role.
With the service user set up, you can now proceed to Power Automate and begin creating a flow to generate cards in the selected board.