
May 9th
Big things are happening in Operations Center! From a brand-new way to view your tasks and projects, to the new feature that lets you link resources together and track locations on cards — continue reading to learn more!
List view
The List view in Operations Center is your go-to place to see and manage all your cards in a streamlined and filterable format. Whether you’re keeping track of your assigned cards or checking on overdue tasks and projects, the List view helps you stay organized.
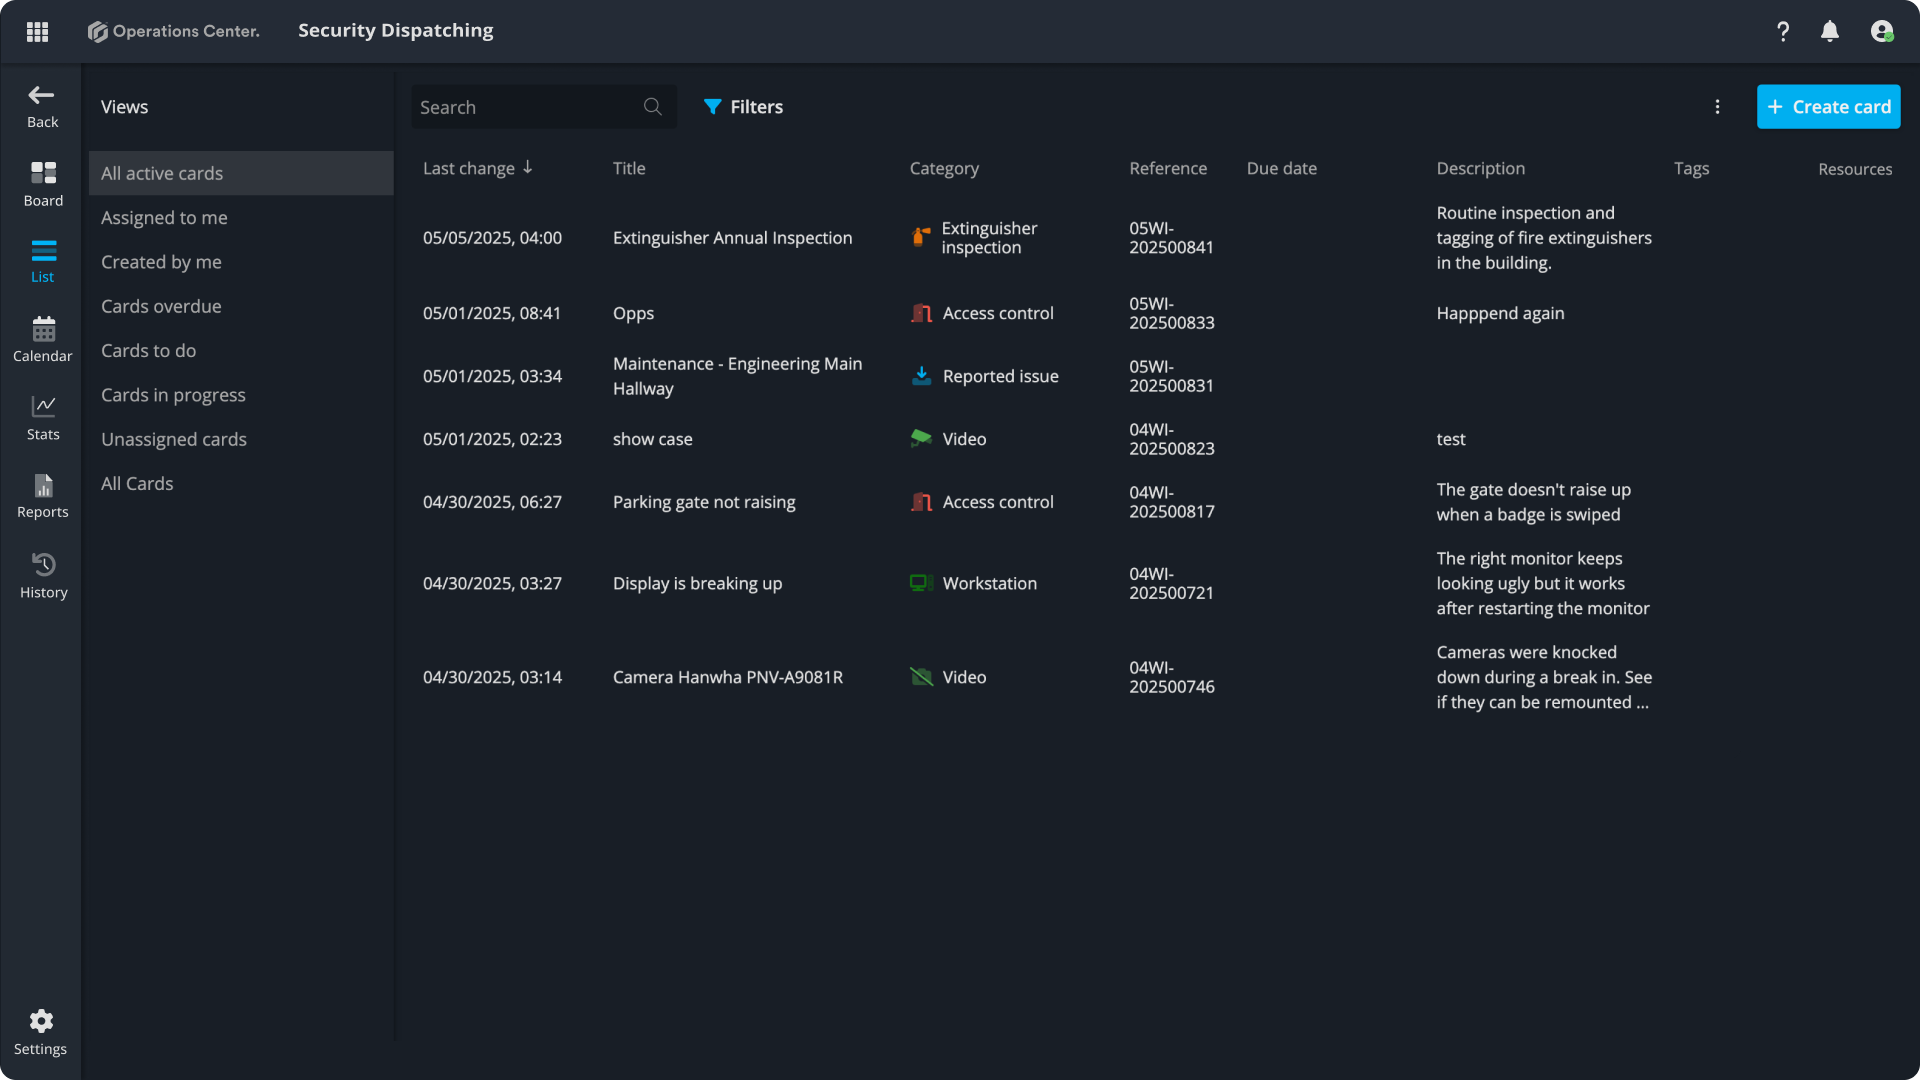
Operations Center provides several predefined views to help you get started quickly:
| View Name | Description |
|---|---|
| All active cards | All active cards, across the board. |
| Assigned to me | Cards that are currently assigned to you. |
| Created by me | Cards you have created. |
| Cards overdue | Cards with past due dates. |
| Cards to do | Cards that are yet to be started or scheduled. |
| Cards in progress | Cards that are currently being worked on. |
| Unassigned cards | Cards that haven’t been assigned to anyone yet. |
| All cards | Full list, including archived and removed cards (does not filter by status). |
Resource linking
Resource linking transforms operations from a scattered set of assets into a connected, intelligent system. It’s a smarter way to track dependencies — clearly showing who is using what, where everything is located, and how resources interact.
Imagine being able to instantly answer:
- Which equipment is assigned to which officer?
- Who to contact at a specific site when an alarm goes off?
- Where each piece of equipment is installed, assigned, or stored?
With resource linking, you gain complete visibility into your operational landscape — allowing every piece to fall into place effortlessly.
Creating a link between resources
To create a link between two resources, open the resource details view. You’ll find a section for Linked resources. From there:
- In the linked resources tab, click one of the available options: +person, +equipment, or +place.
- Choose a predefined relation type. Each resource category will offer a set of predefined relationship types tailored for that category.
- Select the resource you want to link.
- Finalize by clicking "Add link".
💡 Only one link of a given type can exist between two resource entities. If a link already exists, it must be removed before creating a new one of the type.
Location tracking on cards
This feature ensures traceability and accountability by collecting location data with each entry. You can choose to enforce it or disable it entirely to meet both organizational and local compliance requirements.
When is your location collected?
Your location will be collected only if your system admin enables it. There are three modes:
| Mode | Description |
|---|---|
| Required | You must allow location access to make changes. If disabled, access to this system will be restricted. |
| Optional | You can allow or block location tracking. |
| Off | Location data is not collected or stored. |
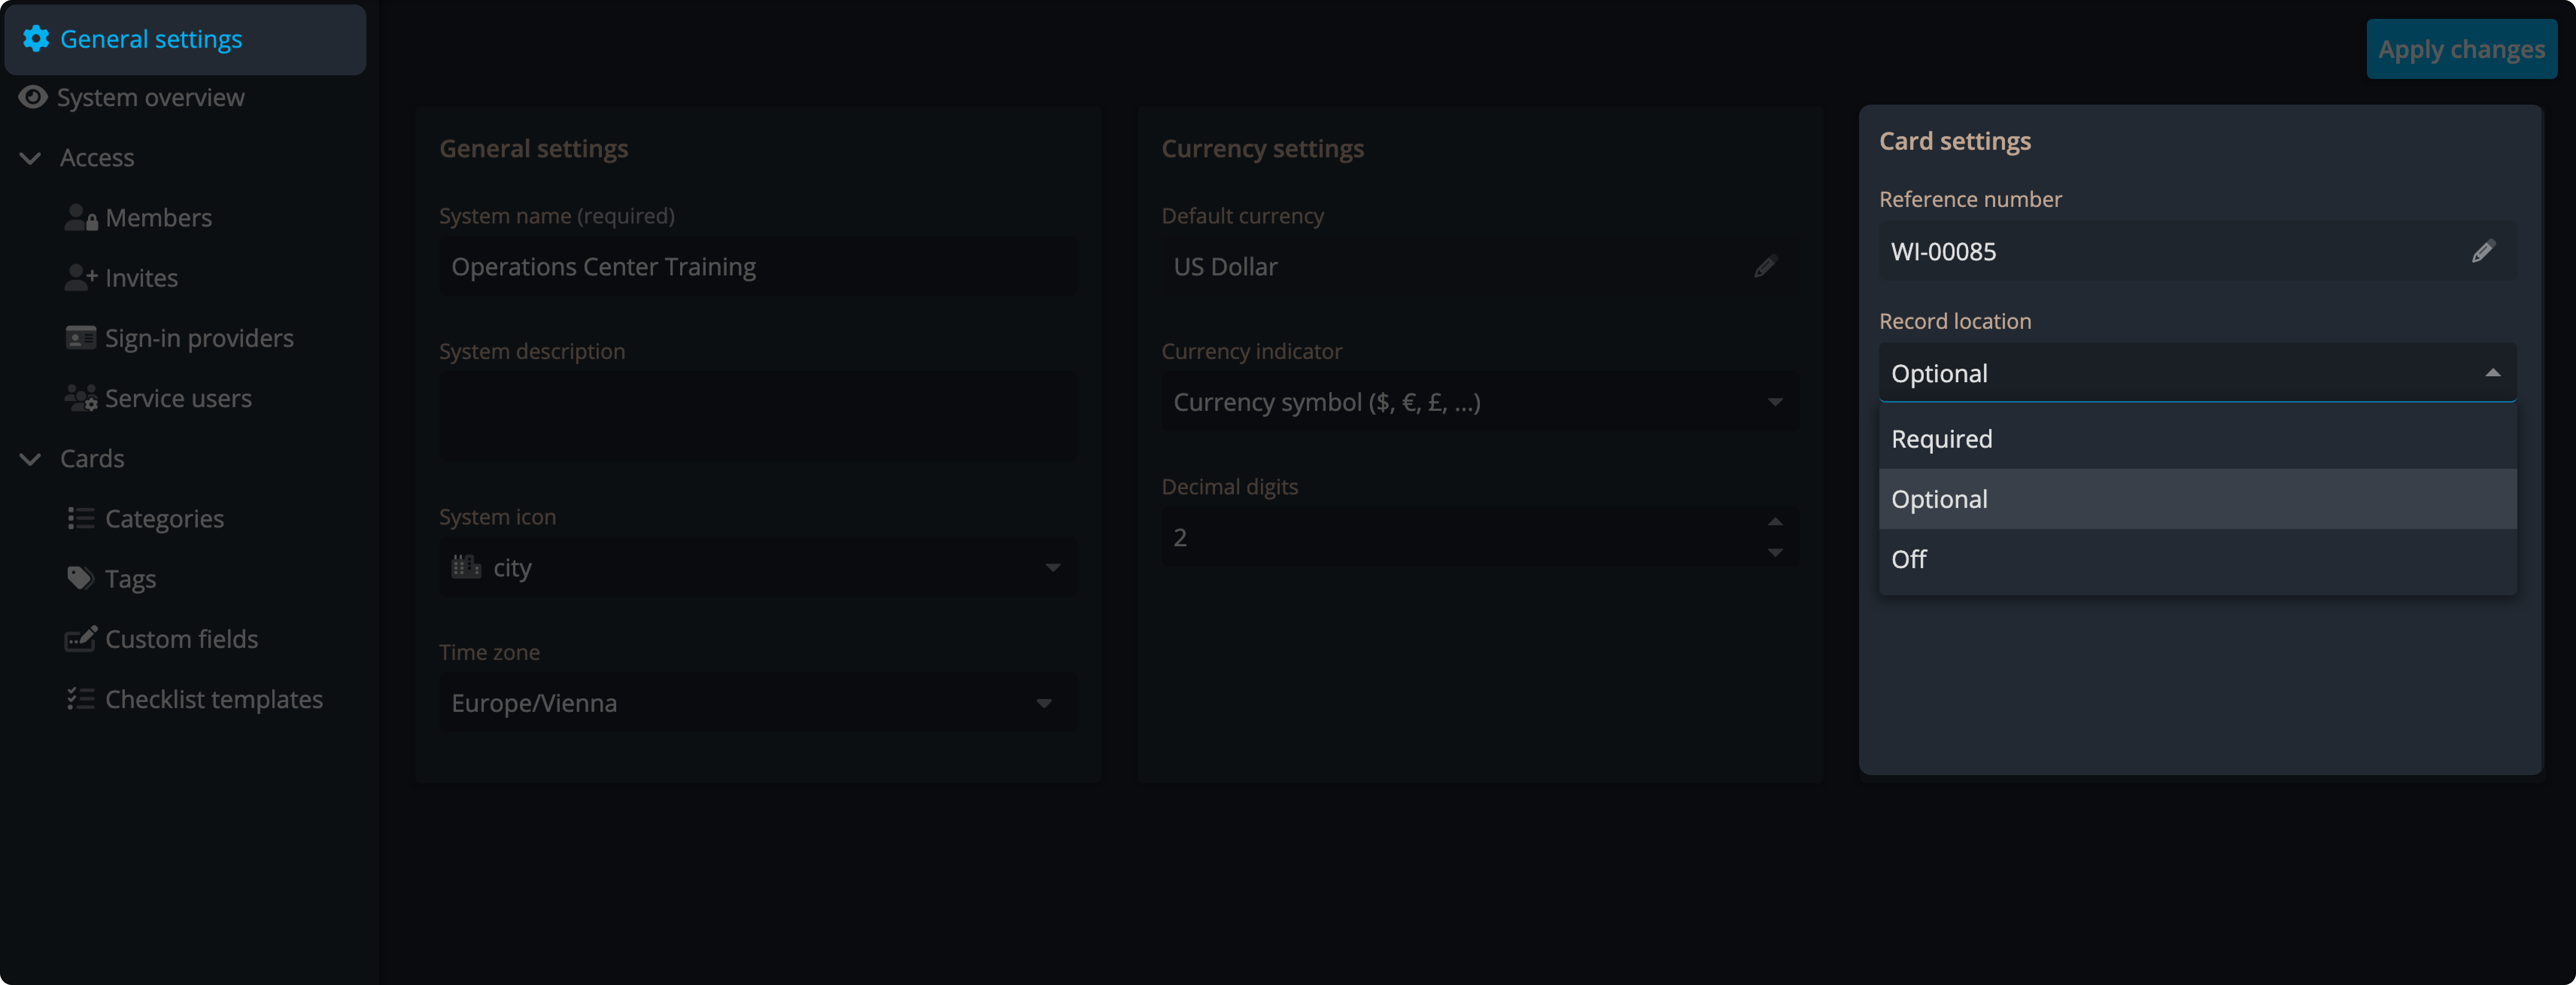
Enabling record location feature
Navigate to system settings and inside the card settings block, choose one of the following options.
- Required
- Optional:
- Off
What happens if location tracking is blocked?
If Location Is Required:
- You’ll see a message blocking you from using the app
- You may be redirected to device settings to enable location
If Location Is Optional:
- Your audit trail will still log whether GPS was allowed or denied
- Example: “GPS permission denied”
If GPS Can’t Be Retrieved:
- Your change will still go through (if allowed)
- Audit will show: “GPS could not be fetched”
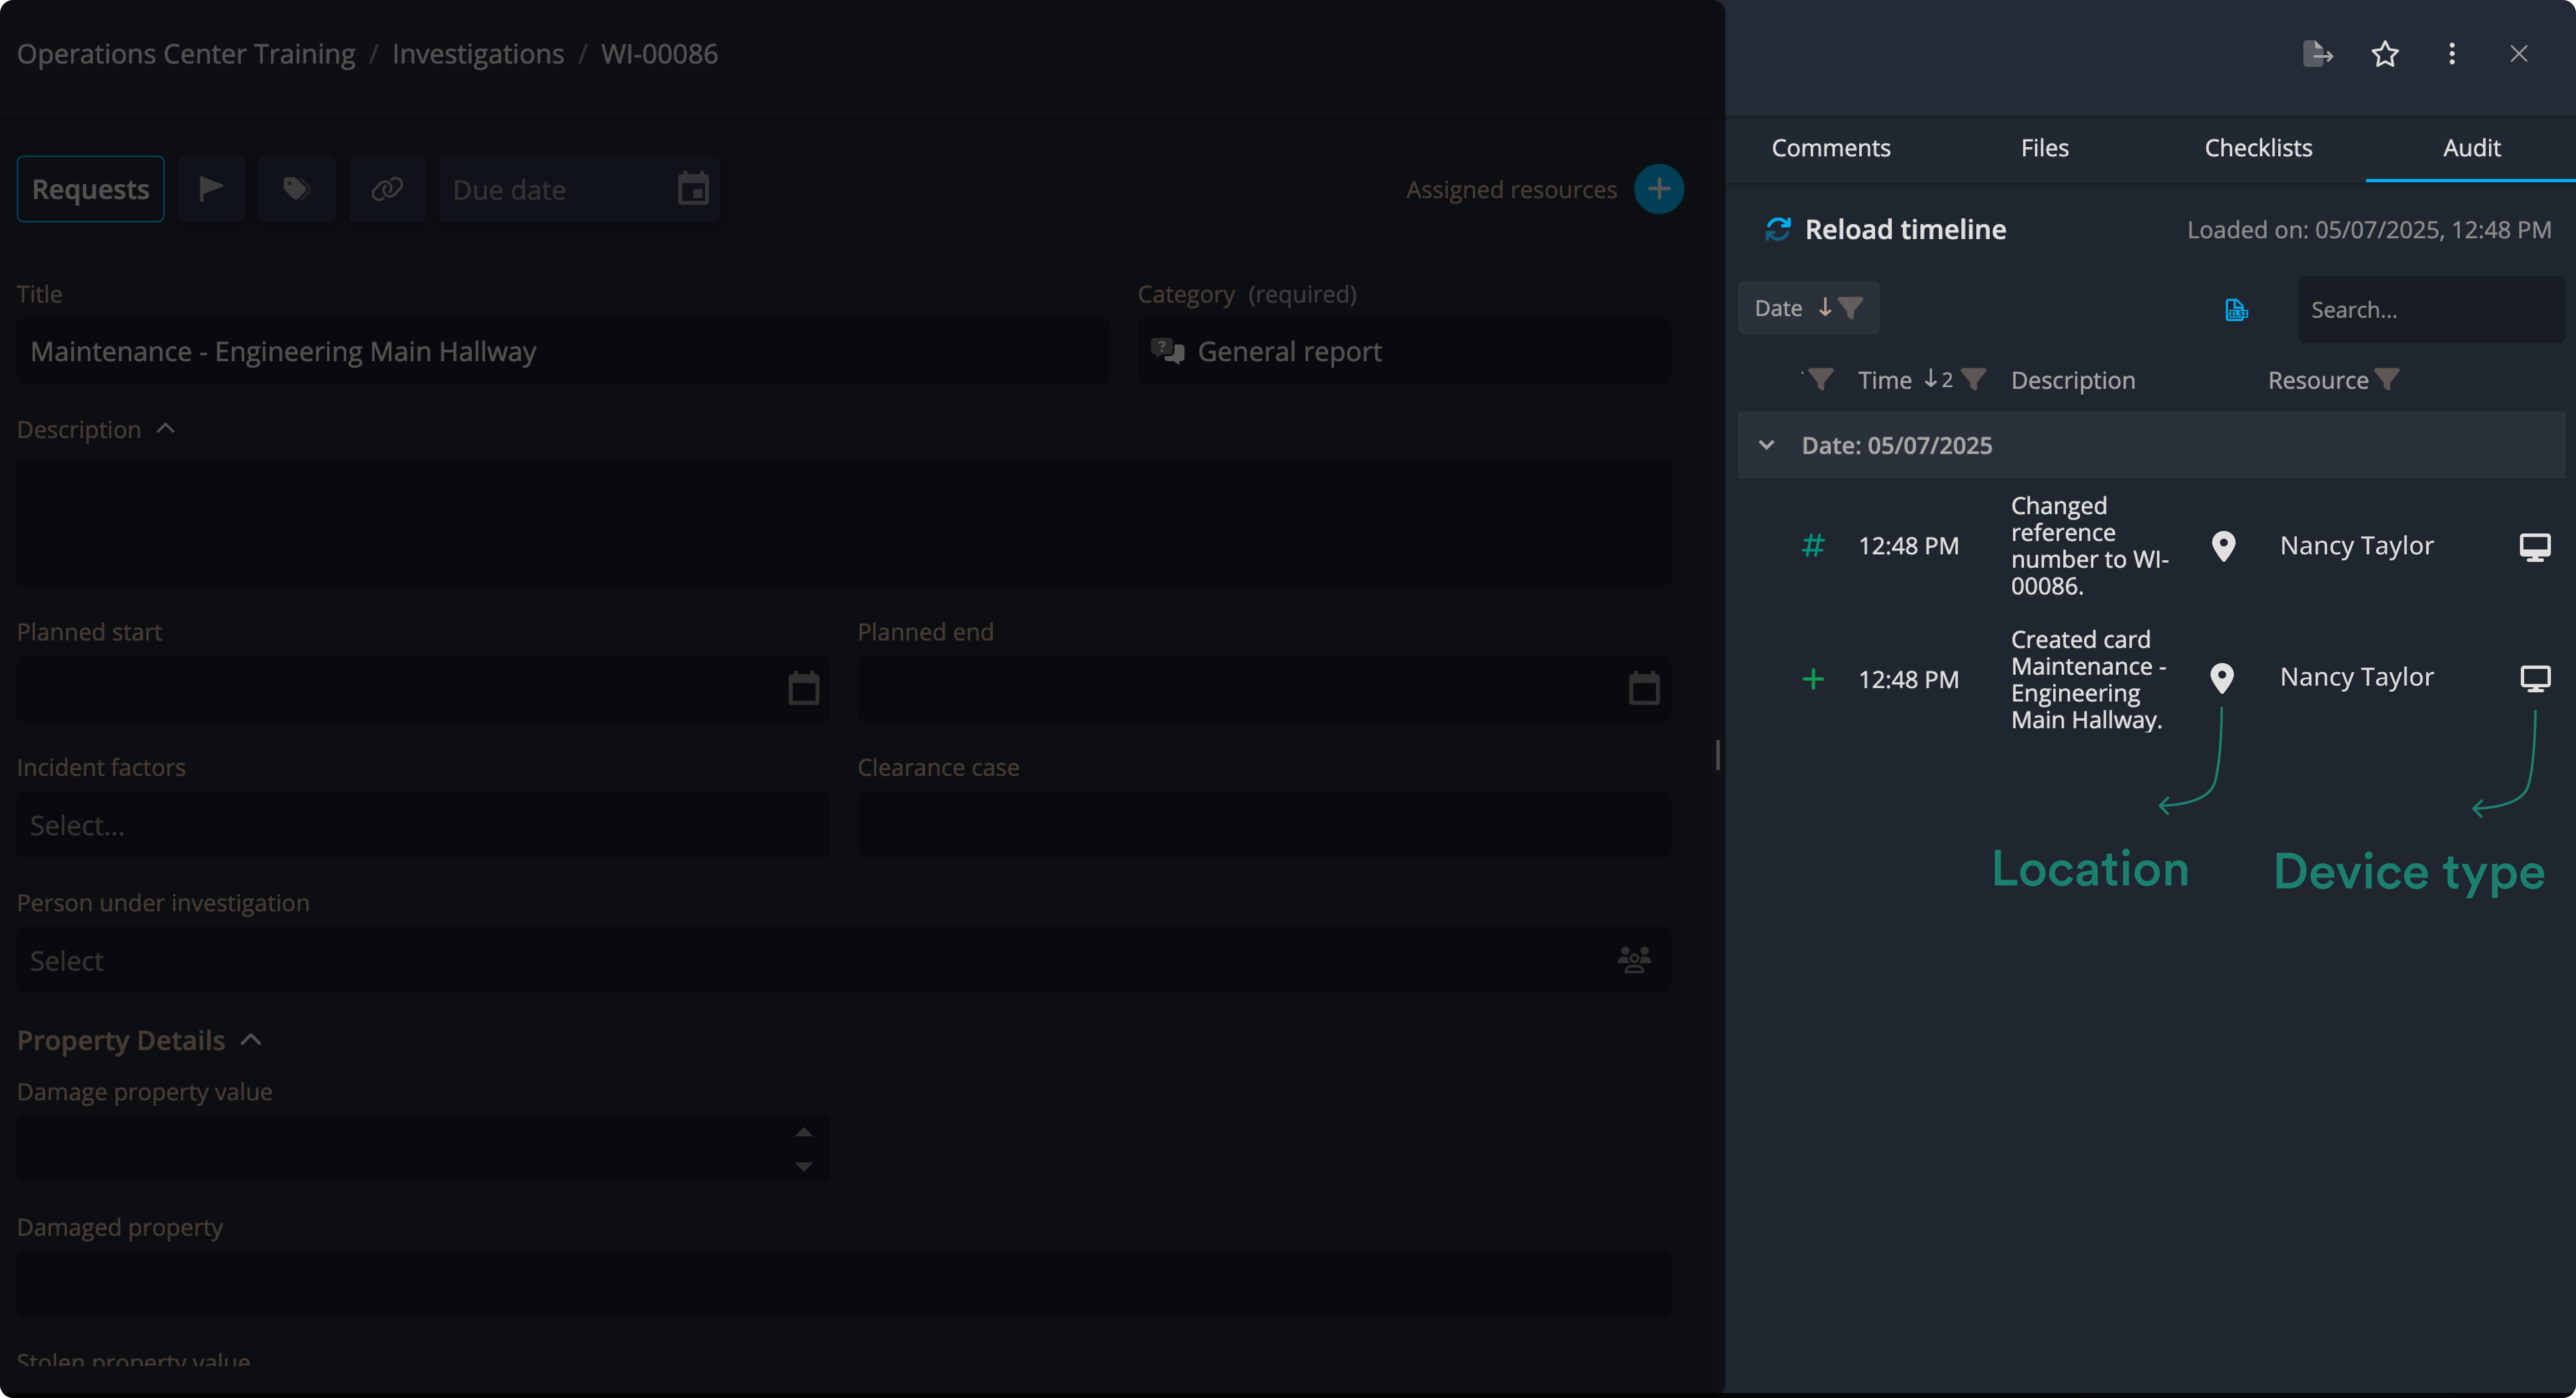
Where is the location data shown?
You can view GPS history:
- In reports
- In the Audit trail of a card
Enabling permissions in browsers
Use the following guide to enable location permissions in different browsers.
Google Chrome
- Click the Settings icon on the left side of the address (URL) bar.
- Click Site settings (opens in a new tab).
- In the Permissions section, find Location.
- Choose the Allow option.
- Return to Operations Center and reload the page.
Microsoft Edge
- Click View site information (🔒 icon) on the left side of the address bar.
- Click Permissions for this site (opens in a new tab).
- In the Permissions section, find Location.
- Choose the Allow option.
- Return to Operations Center and reload the page.
Safari
- Click the site settings icon on the left side of the address bar.
- Click ⚙️ Website settings.
- Under Location, choose Allow.
- Reload the page.
Firefox
Firefox does not allow preemptive enabling of location permissions. Users must respond when the site requests it. This can occur in two situations:
1. Accessing a system with required GPS tracking:
- You'll be redirected to a Location required page.
- A browser prompt will appear asking to allow location access.
- Important for Mac users: Check the Remember this decision box.
- After allowing, reload the page.
2. Updating a card in a system with optional GPS tracking:
- A prompt will appear to allow or deny location access.
If location access has previously been blocked:
- Open Firefox Settings.
- Go to 🔒 Privacy & Security.
- Scroll to the Permissions section.
- Find Location and click Settings...
- Locate Operations Center in the list.
- Change the status to Allow and click Save Changes.
- Return to Operations Center and reload the page.
Enabling permissions on mobile
Location services
Make sure Location Services are enabled on your device.
iOS:
- Go to Settings > Privacy & Security > Location Services.
Ensure it is turned on.
Android:
- Go to Settings > Location.
Ensure Use location is turned on.
Enabling location services for the app
iOS:
- Go to Settings > Apps > Operations Center.
- Set Location to “While Using the App”.
- Turn on Precise Location.
- Set Location to “While Using the App”.
Android:
- Go to Settings > Apps > Operations Center > Permissions > Location.
- Select “Allow only while using the app”.
- Enable Use precise location.
Mobile browsers
If using Operations Center via a mobile browser, make sure location permissions are enabled for that browser.
Example – Google Chrome:
iOS:
- Go to Settings > Apps > Chrome.
- Set Location to “While Using the App”.
- Turn on Precise Location.
Android:
- Go to Settings > Apps > Chrome > Permissions > Location.
- Select “Allow only while using the app”.
- Turn on Use precise location.
👉 Follow the same steps for other browsers.