
Using webhook to kick off workflows based on card changes
So far, we've used external triggers (like Microsoft Forms) to create work items in Operations Center. But what if the trigger comes from within Operations Center itself?
For example, let's say a work item is moved to the "Approved" column on your board. Instead of manually tracking approvals, Power Automate can:
✅ Update a custom field in the work item to reflect its approval.
✅ Send an email notification to a specified recipient.
Step 1: Create a Flow (or Add to an Existing One)
First, create a new flow in Power Automate.
- If you're starting fresh, click + Create, choose Automated cloud flow, and name your flow.
- If you already have a flow you want to modify, just click + Add an action and continue.
Now, set up the trigger:
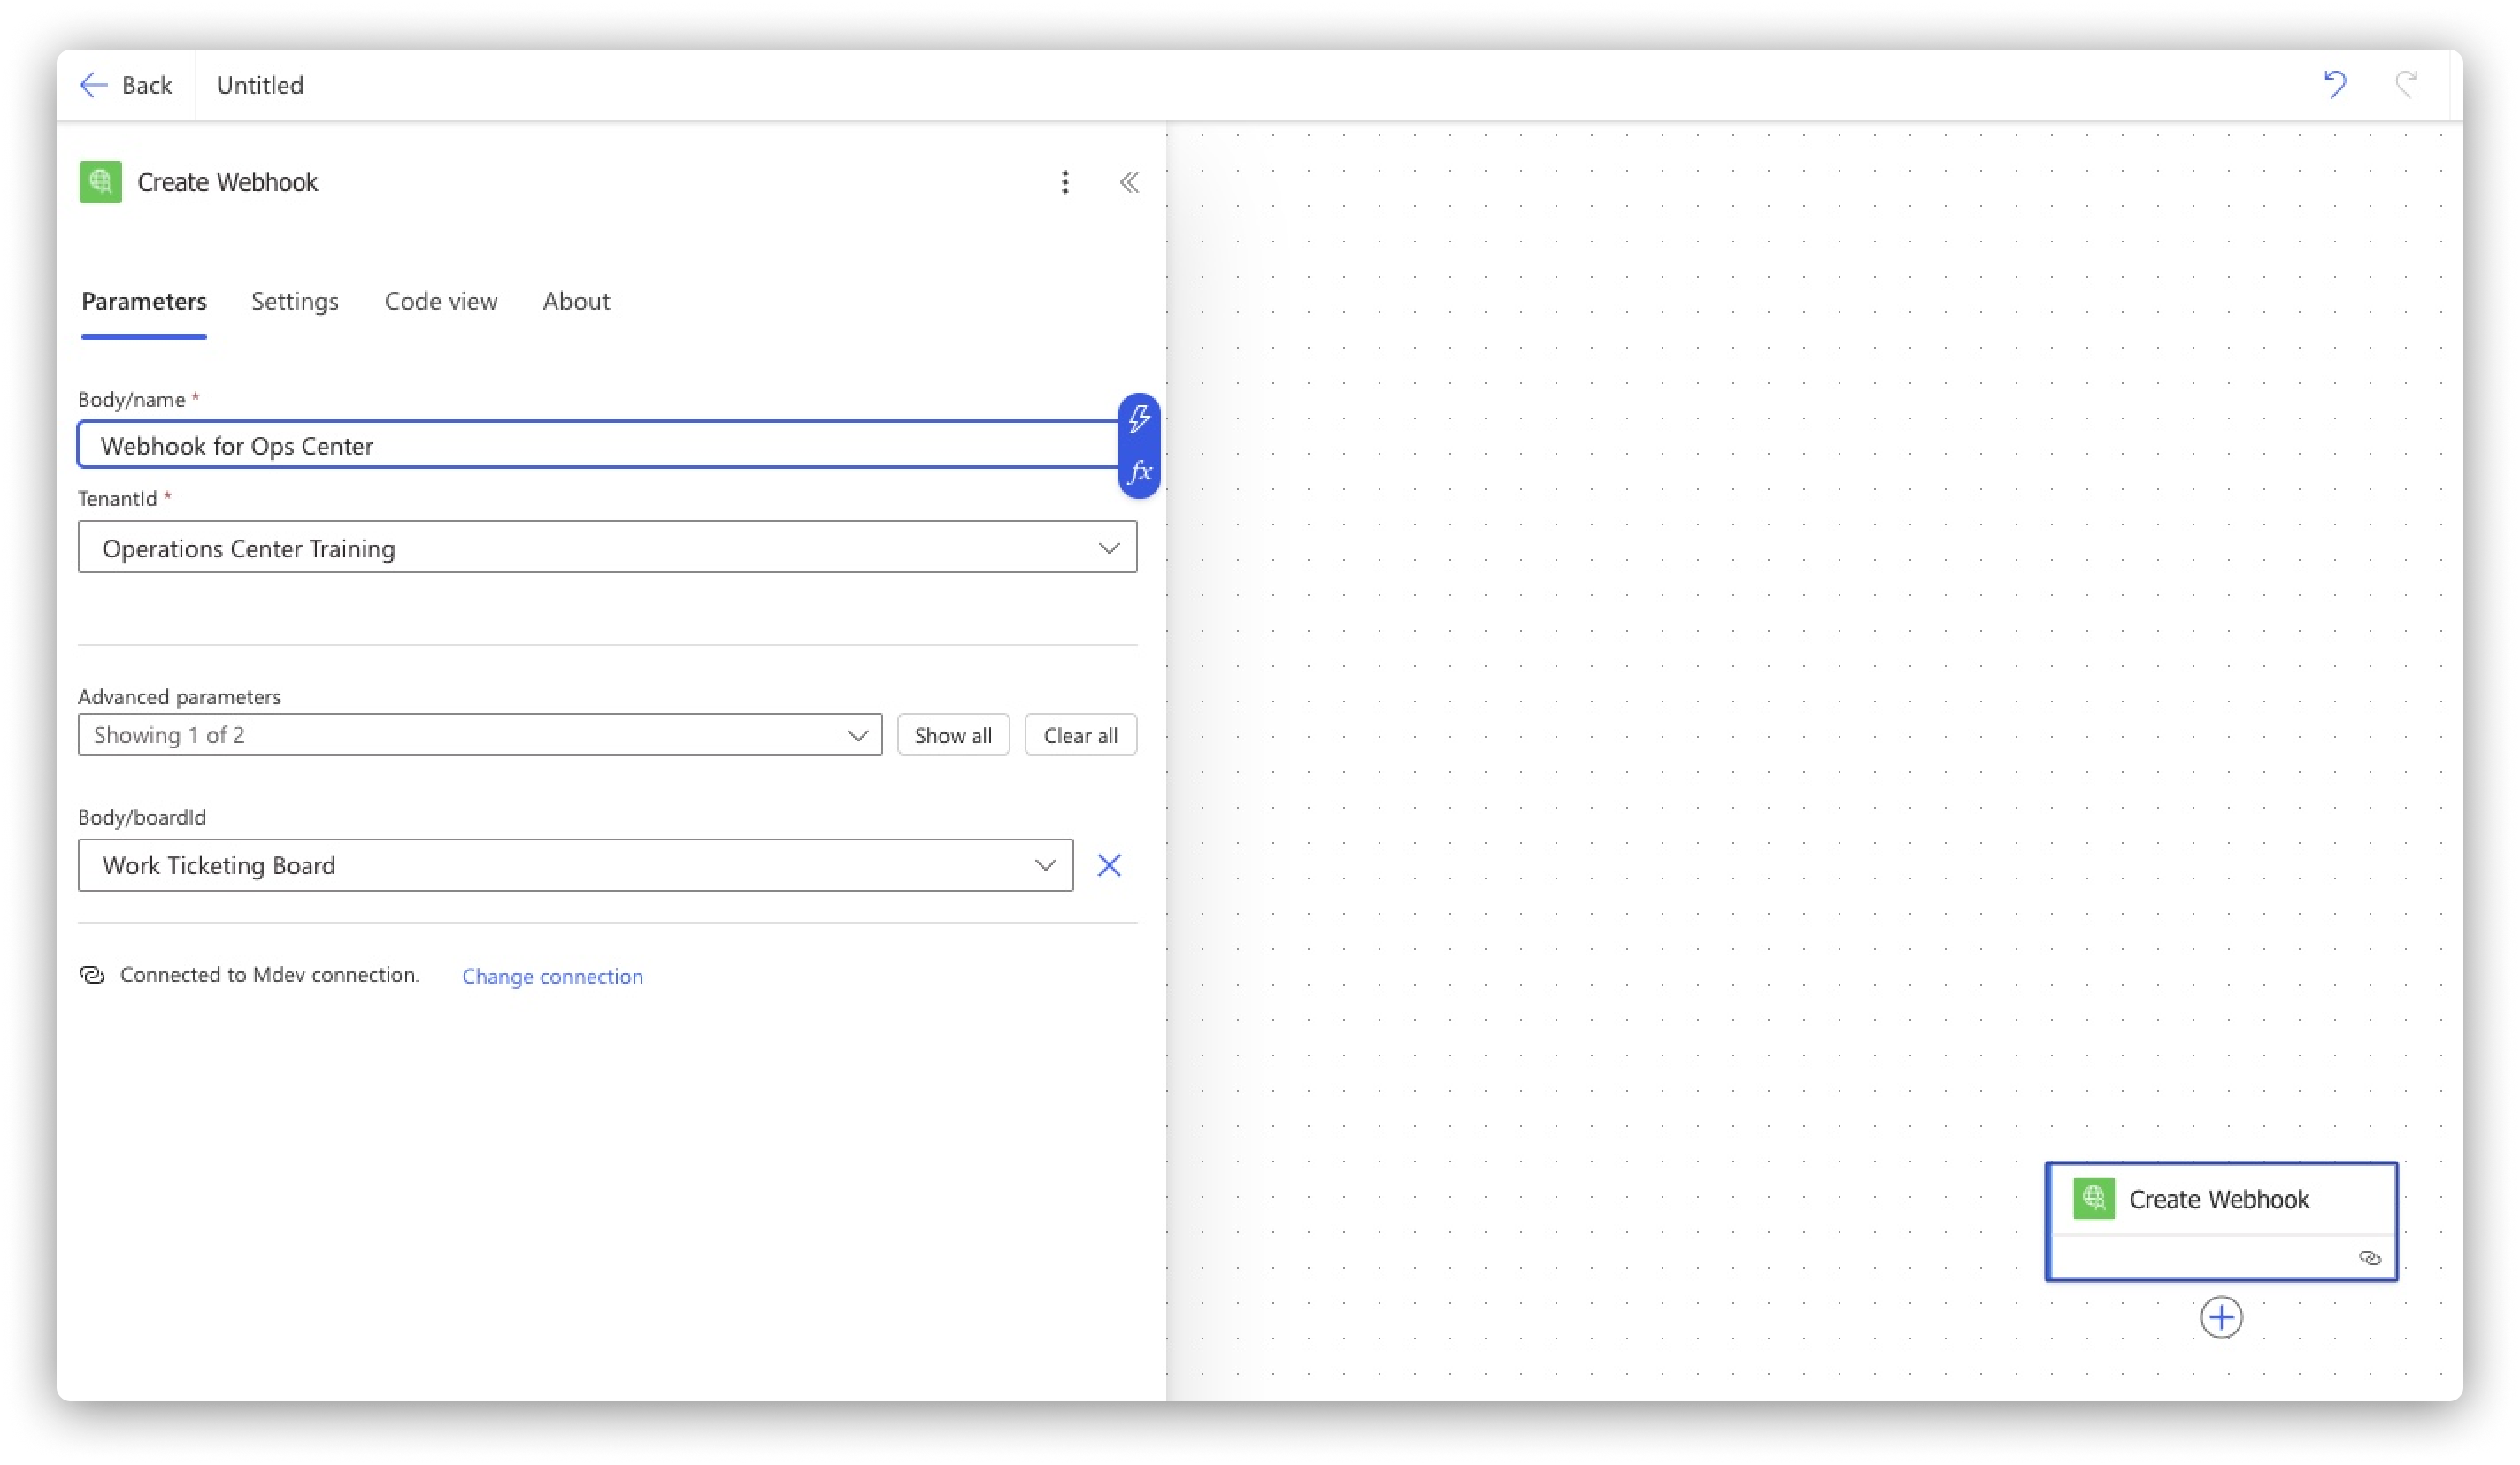
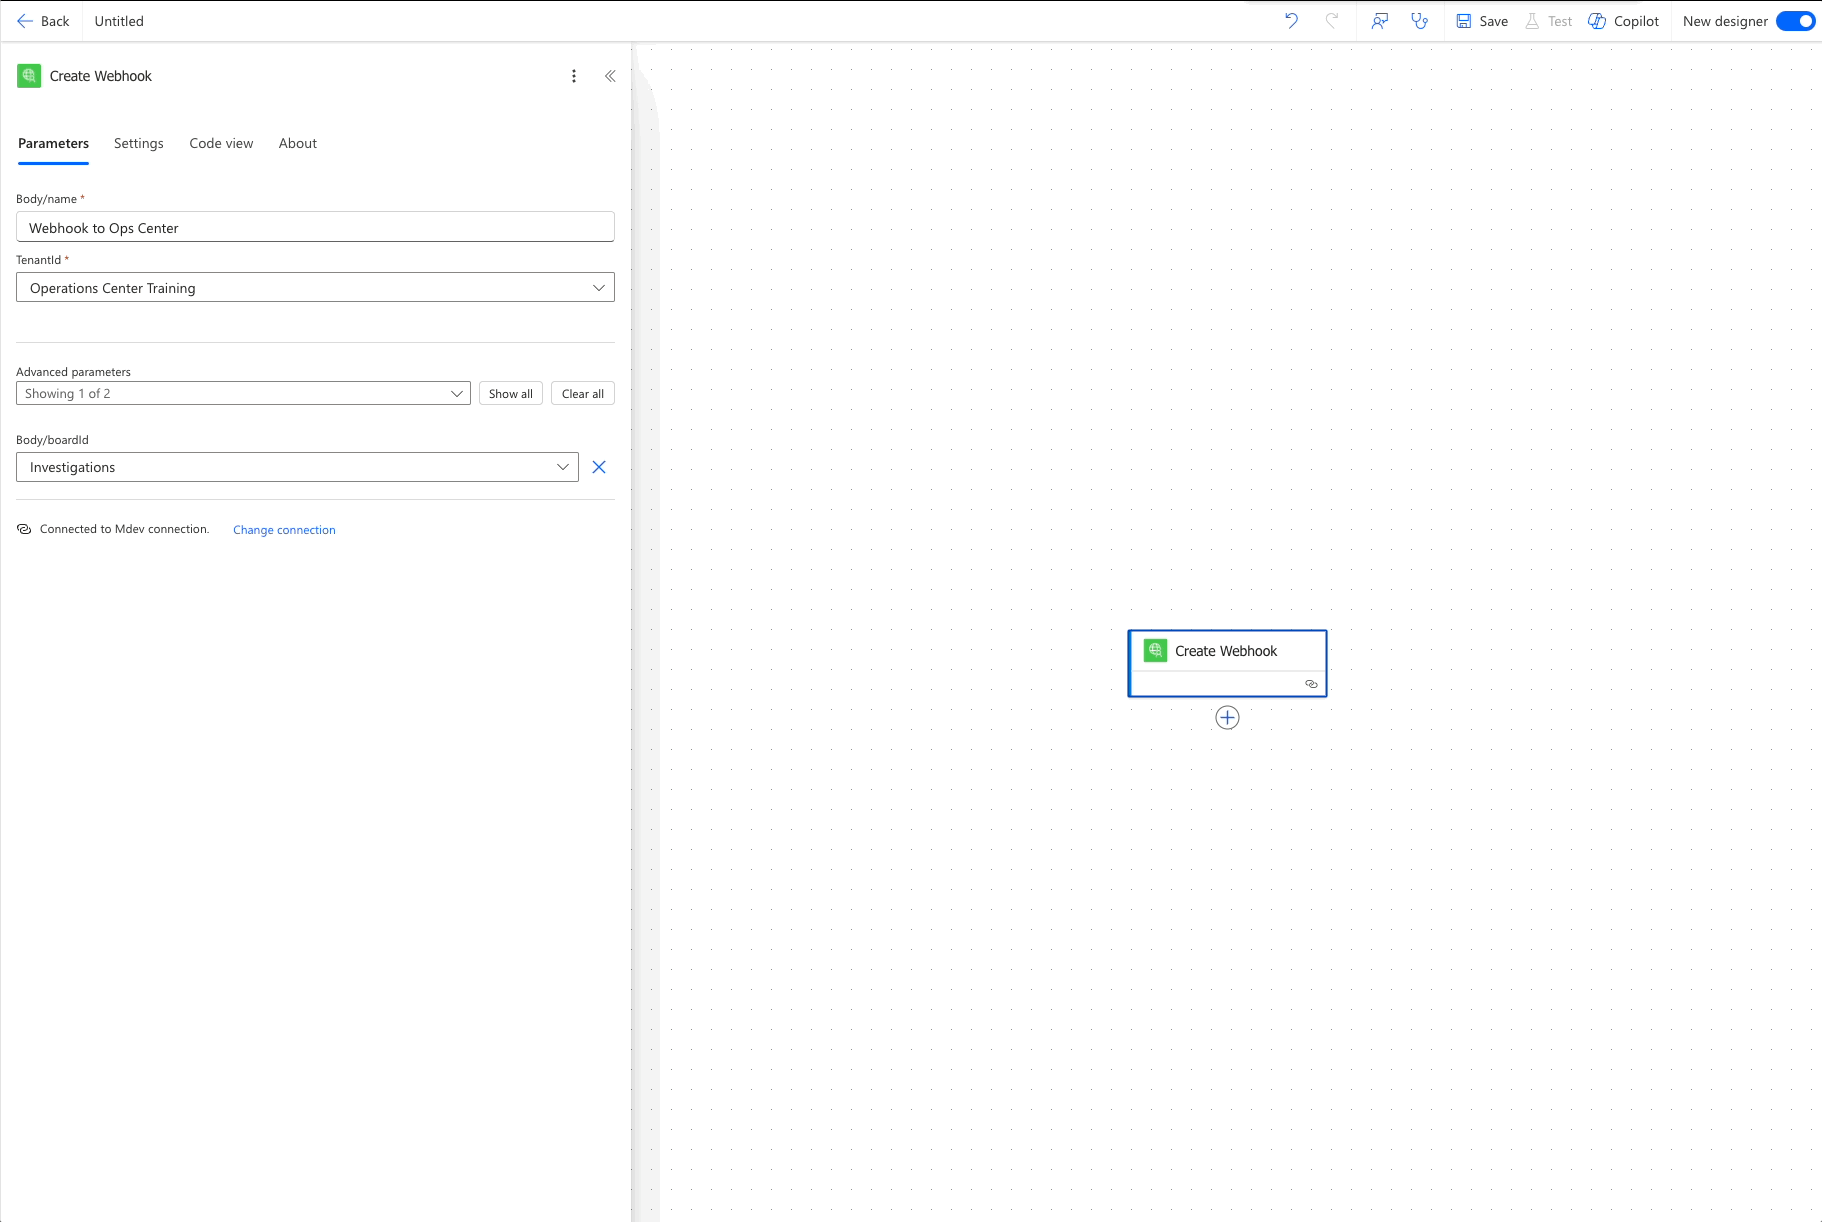
- Select the Custom Connector created for your Operations Center cluster.
- You can see Create Webhook, select it.
- Fill in the following details:
- Tenant ID → Select your Tenant ID.
- Advanced Parameters → Board ID → Select the Operations Center board where this flow should run.
- Body Name → Give this webhook a name so it’s easy to identify.
That's it—your webhook is ready to listen for changes!
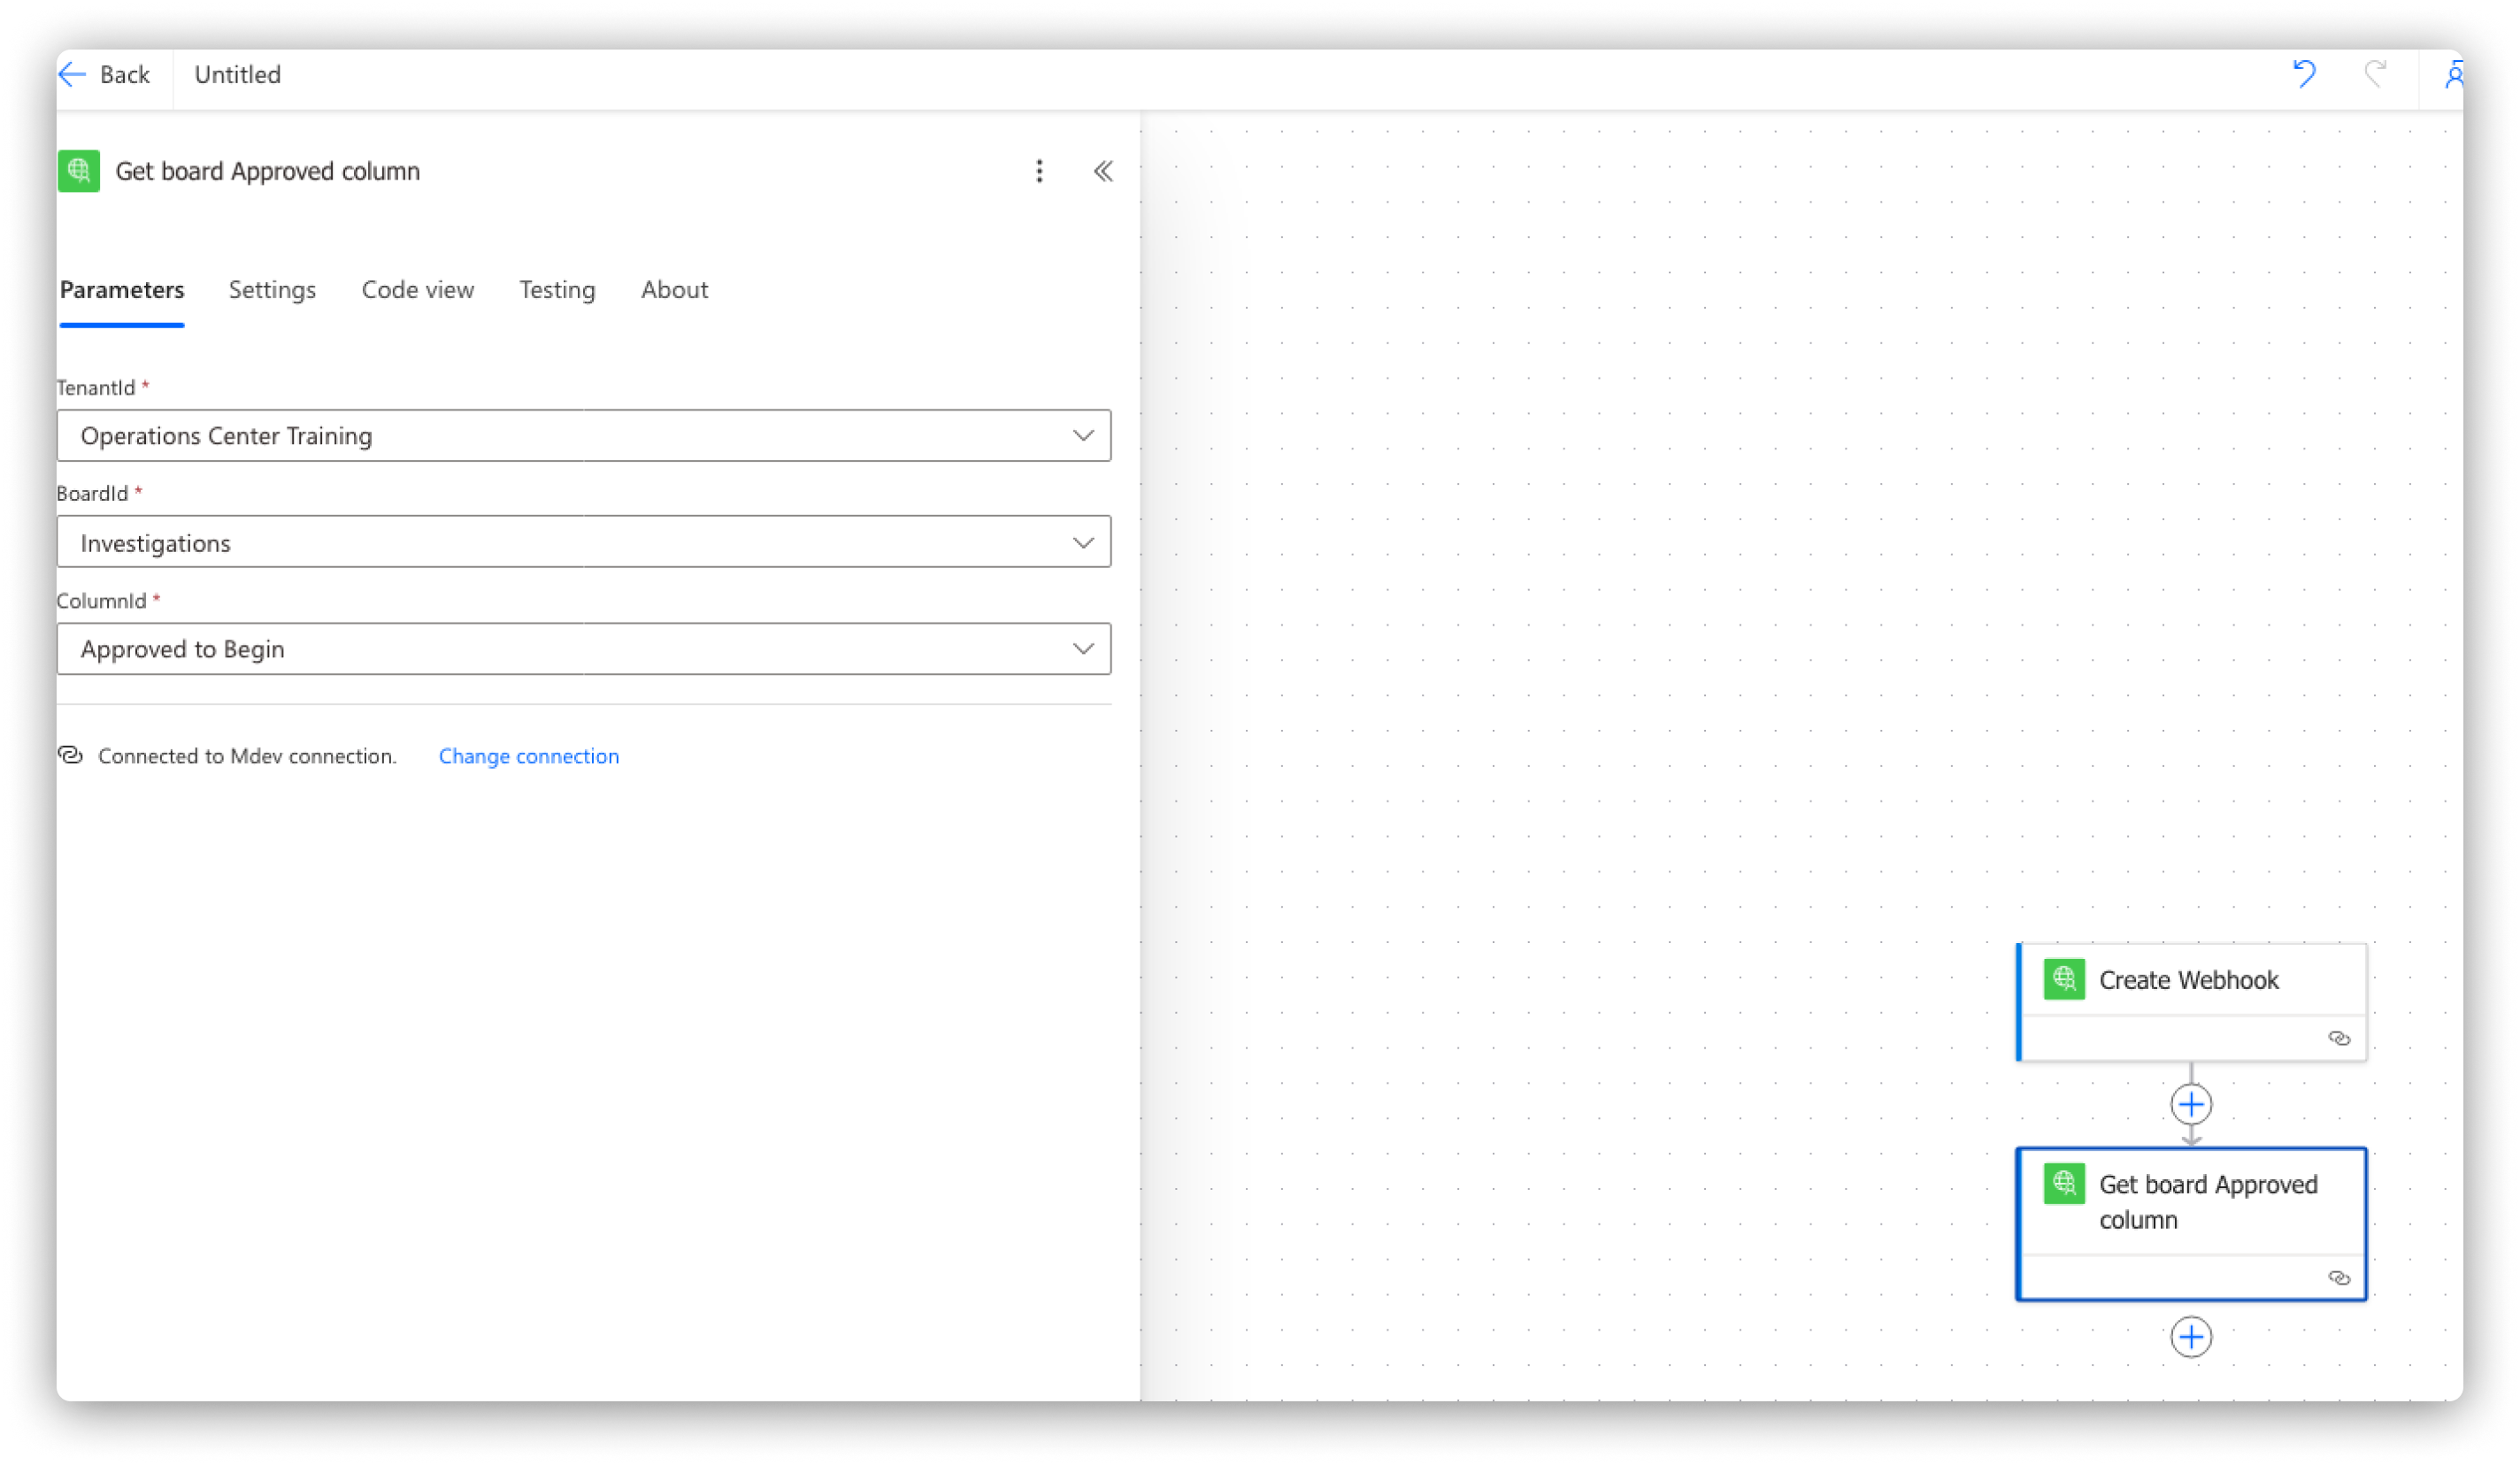
Step 2: Identify the Board Column for Tracking
- Add another action and choose the Custom Connector.
- Search for Get Board Column and select it.
- Fill in the details:
- Tenant ID → Select your Tenant ID.
- Board → Choose the board where work items are being tracked.
- Column ID → Select the specific column you want to monitor.
- Rename the Action → Change the name of this action to match the column name (this helps keep your flow organized).
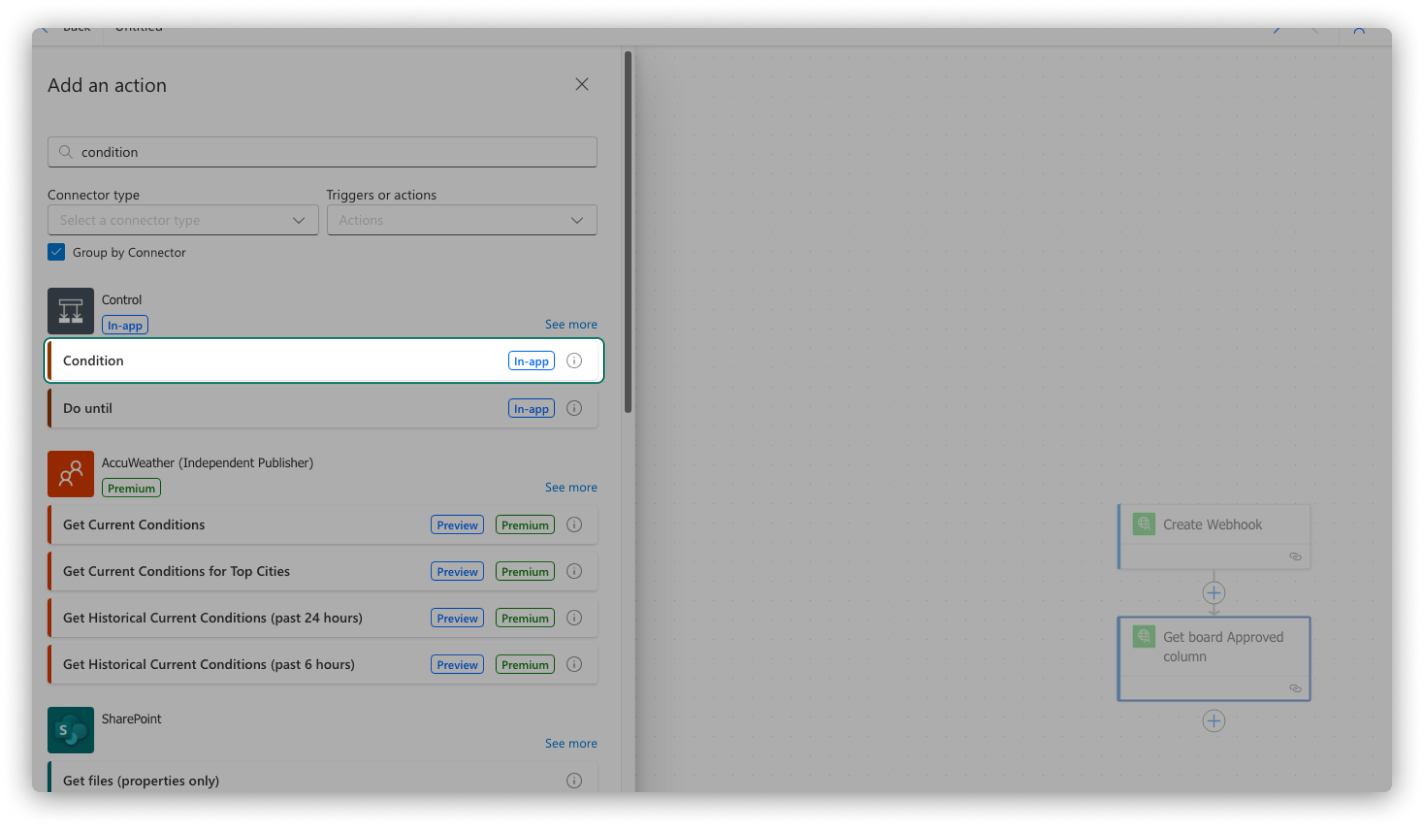
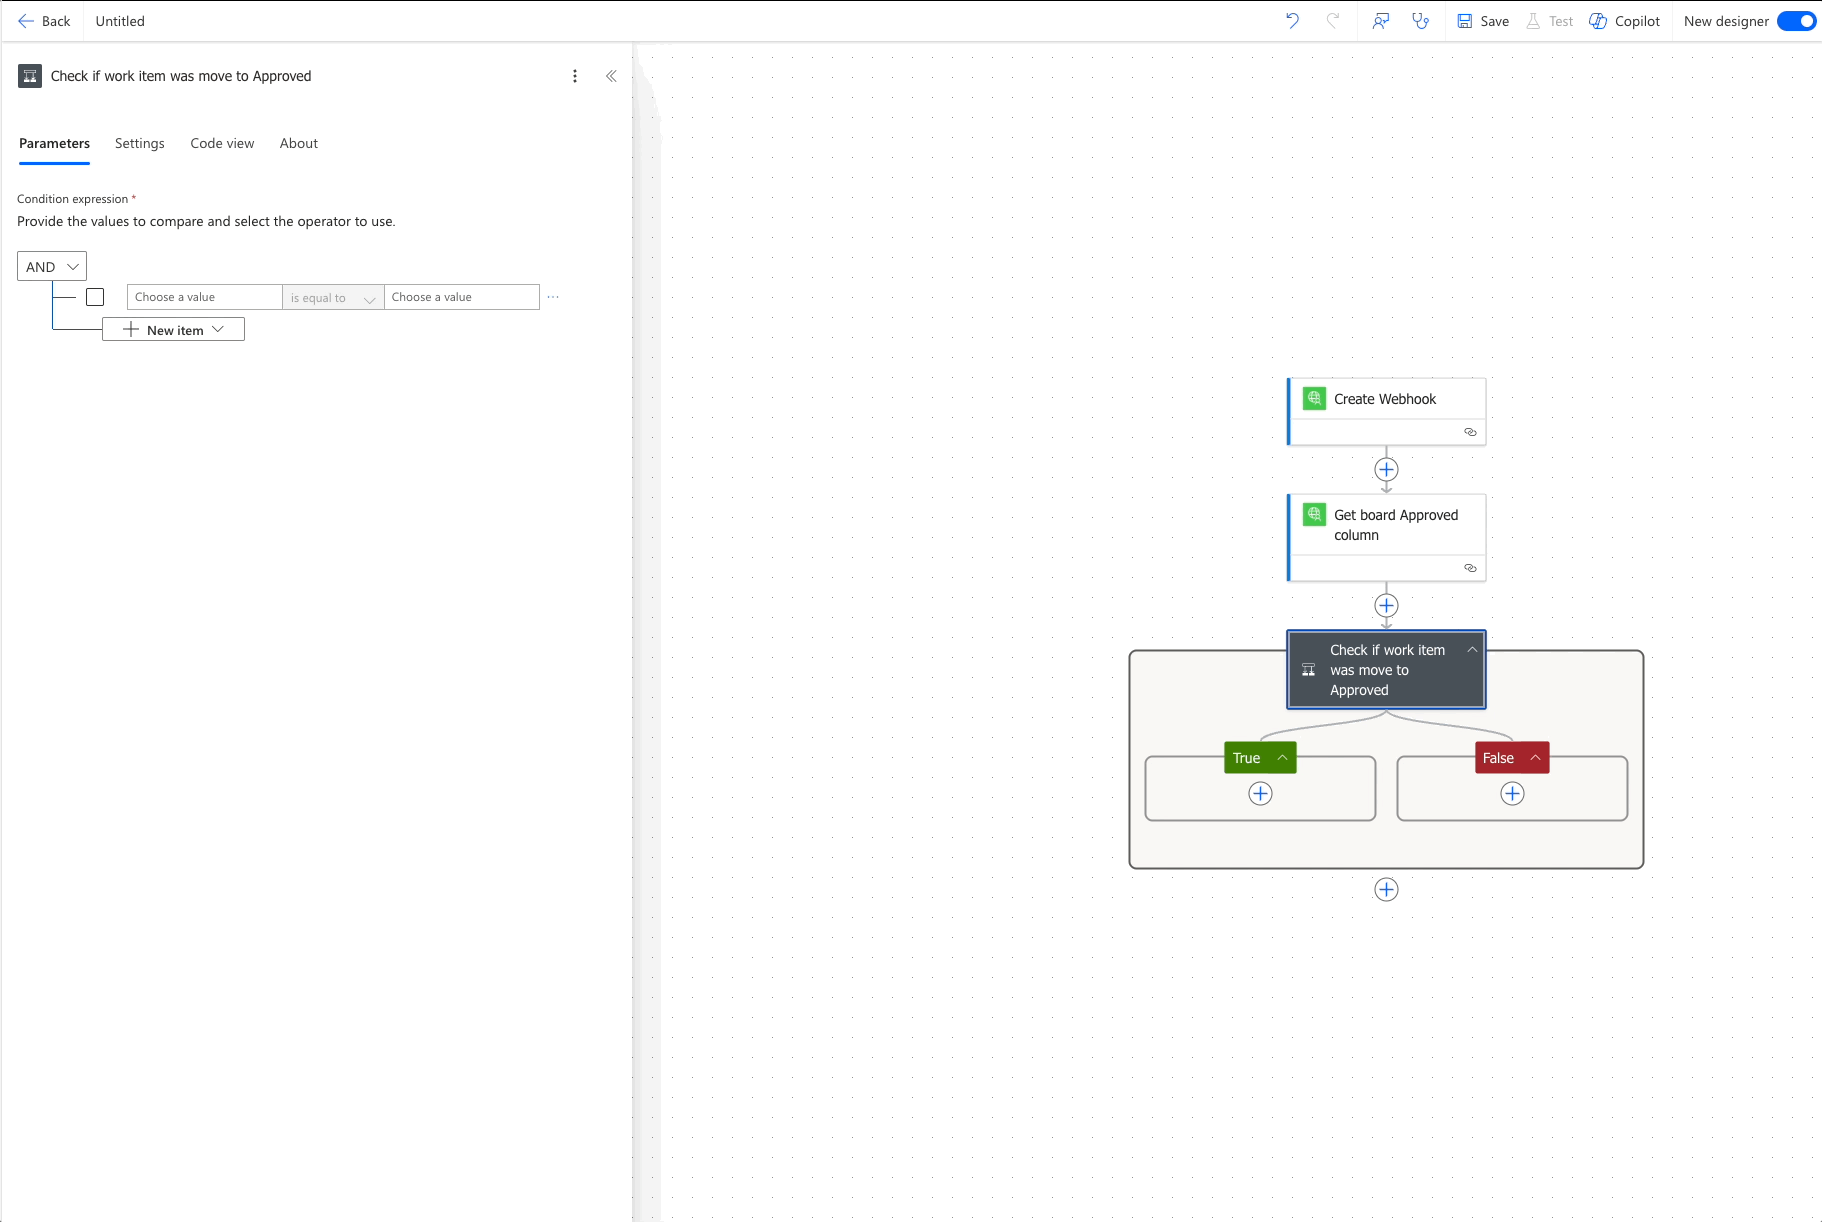
Step 3: Set Up a Condition to Track Work Item Movement
Now, we need to check if a work item was moved to the "Approved" column.
- Add a new action and search for Condition.
- Rename the Condition to Check if Work Item Moved to Approved.
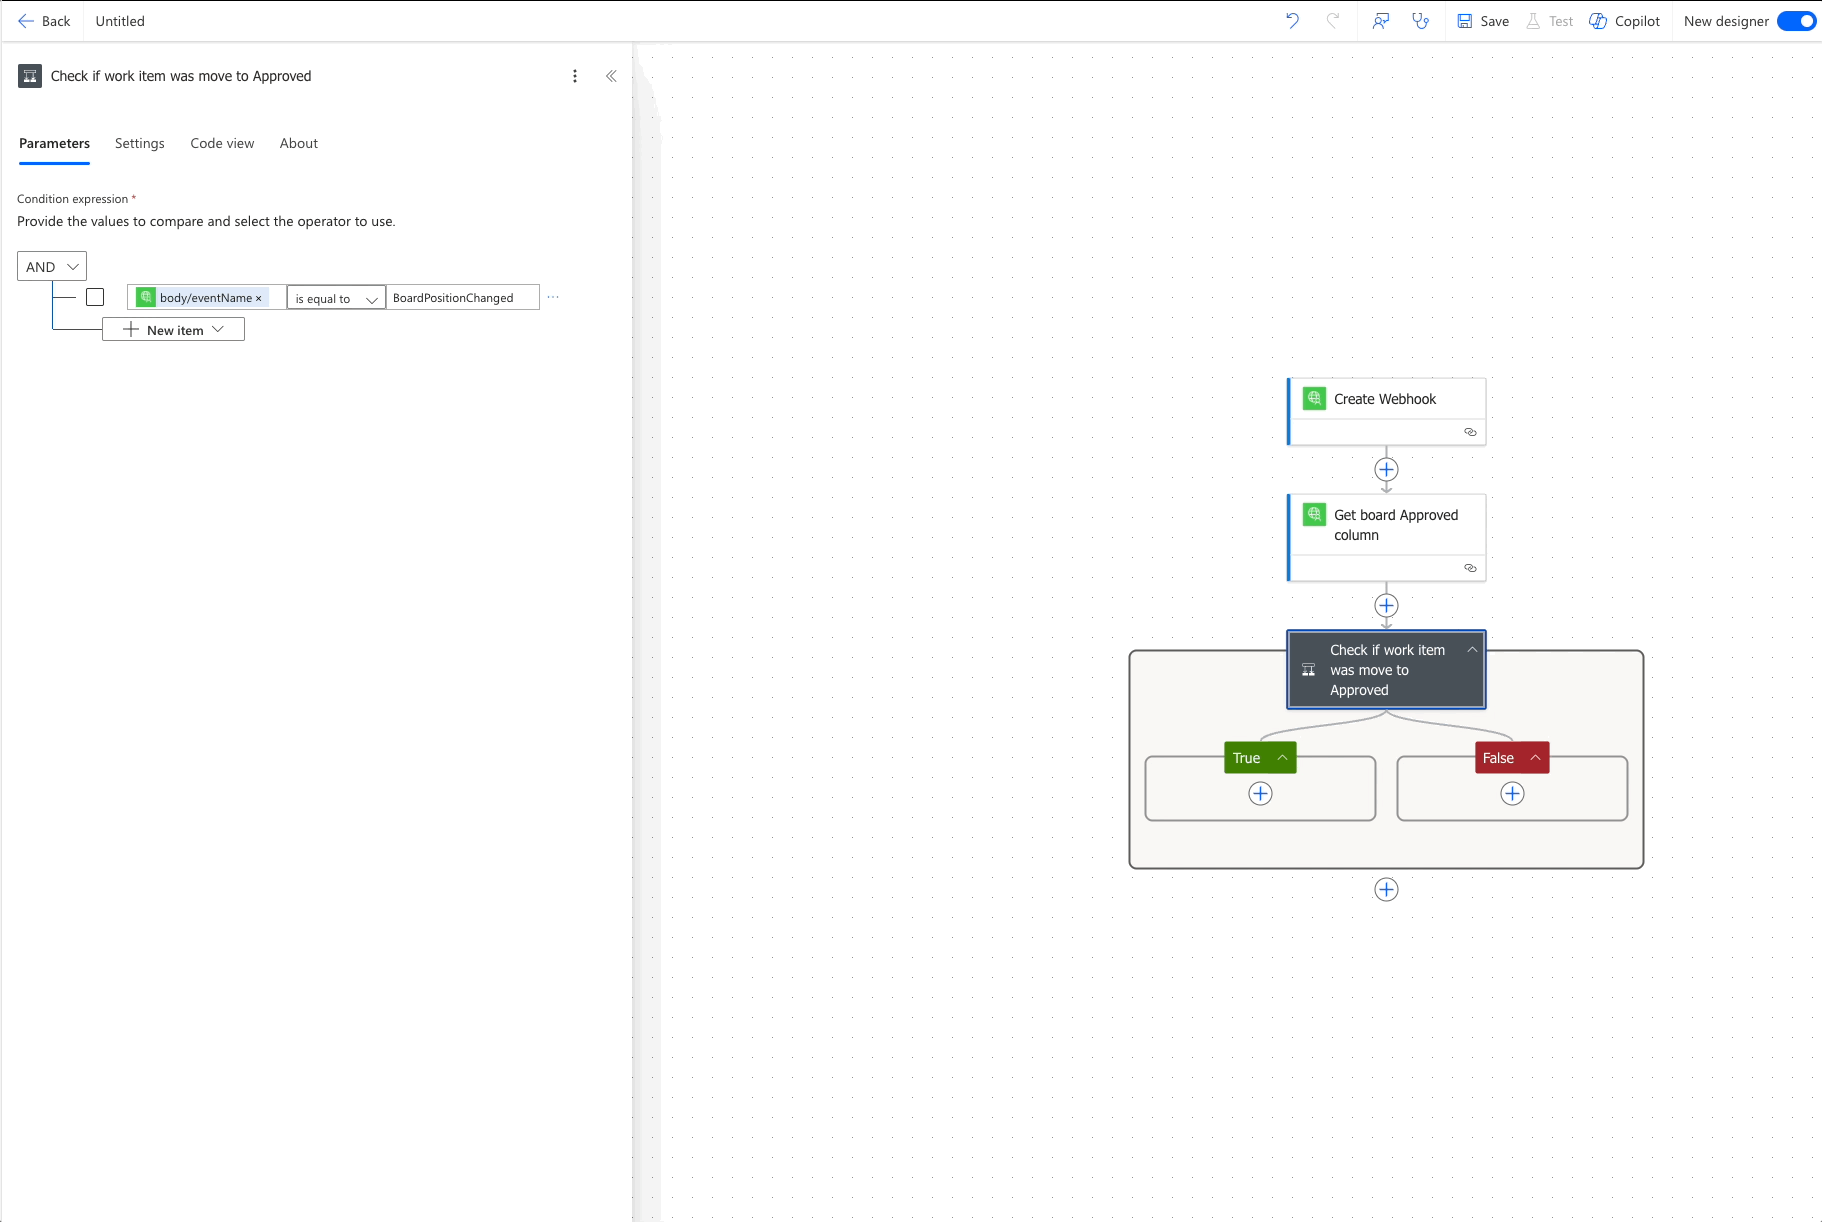
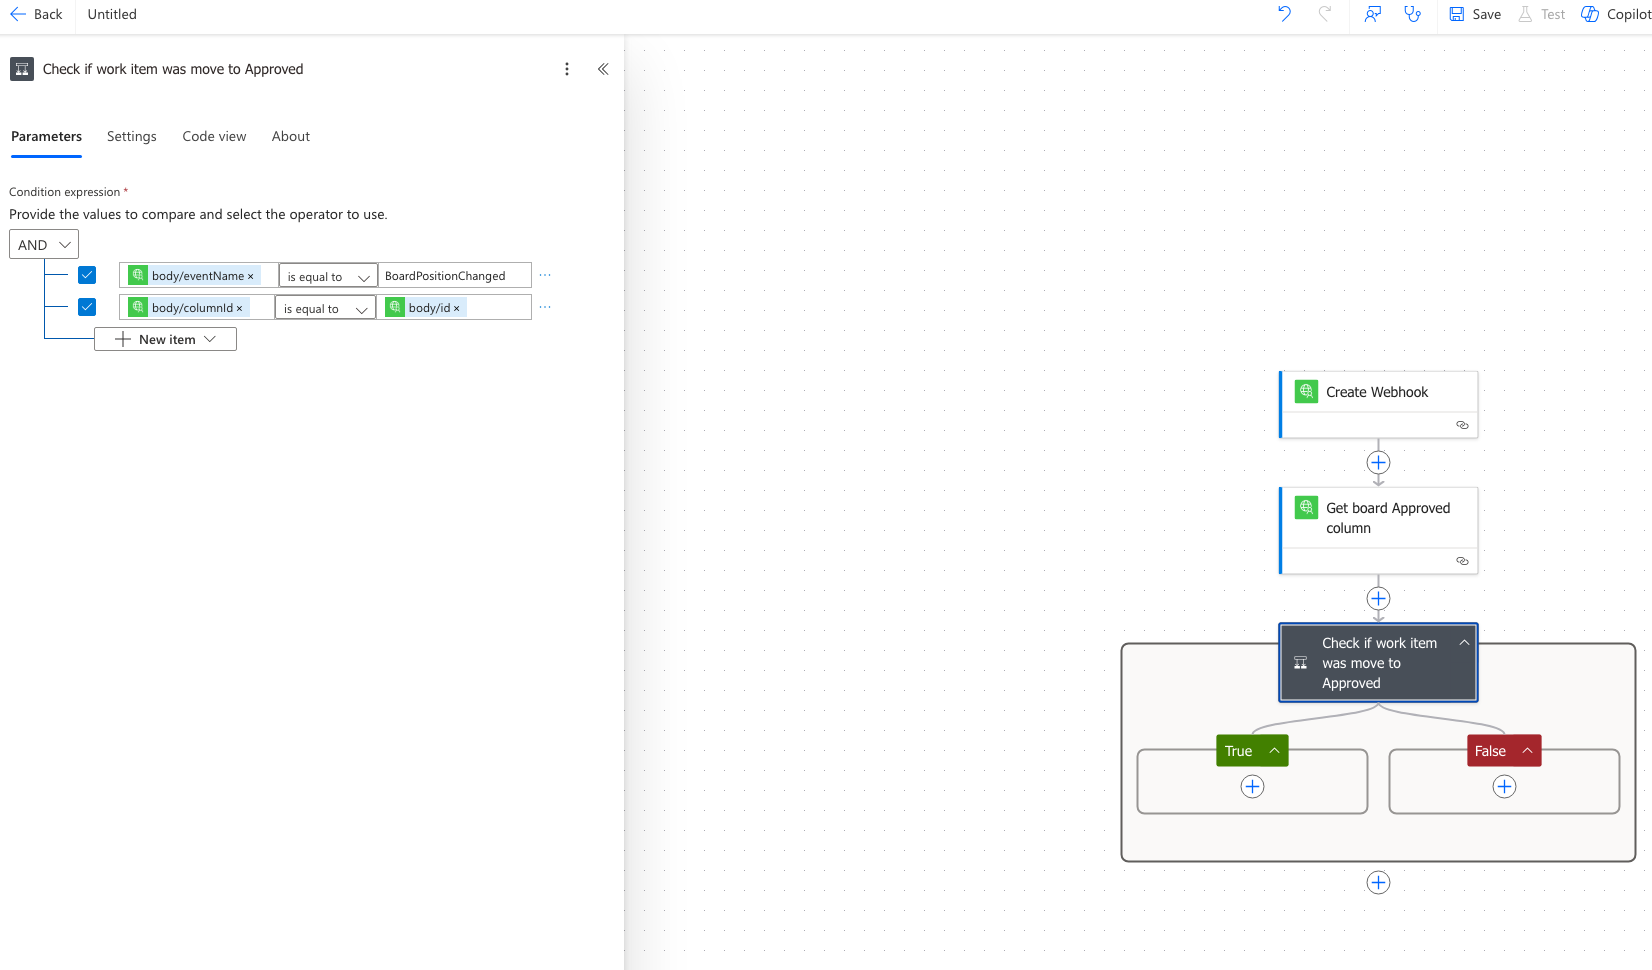
Set up the condition:
- In the first field, click / or the lightning icon, then select Body/EventName.
- Set the condition to equals and type:
BoardPositionChanged.
Make sure to check the box for this item add another condition:
- Click / or the lightning icon and select Body/ColumnId.
- Set it to equal Body/ID (use
/or the lightning icon to find it).
Make sure to check both boxes to make sure these conditions are applied correctly.
At this point, the flow will only continue if a work item was moved to "Approved".
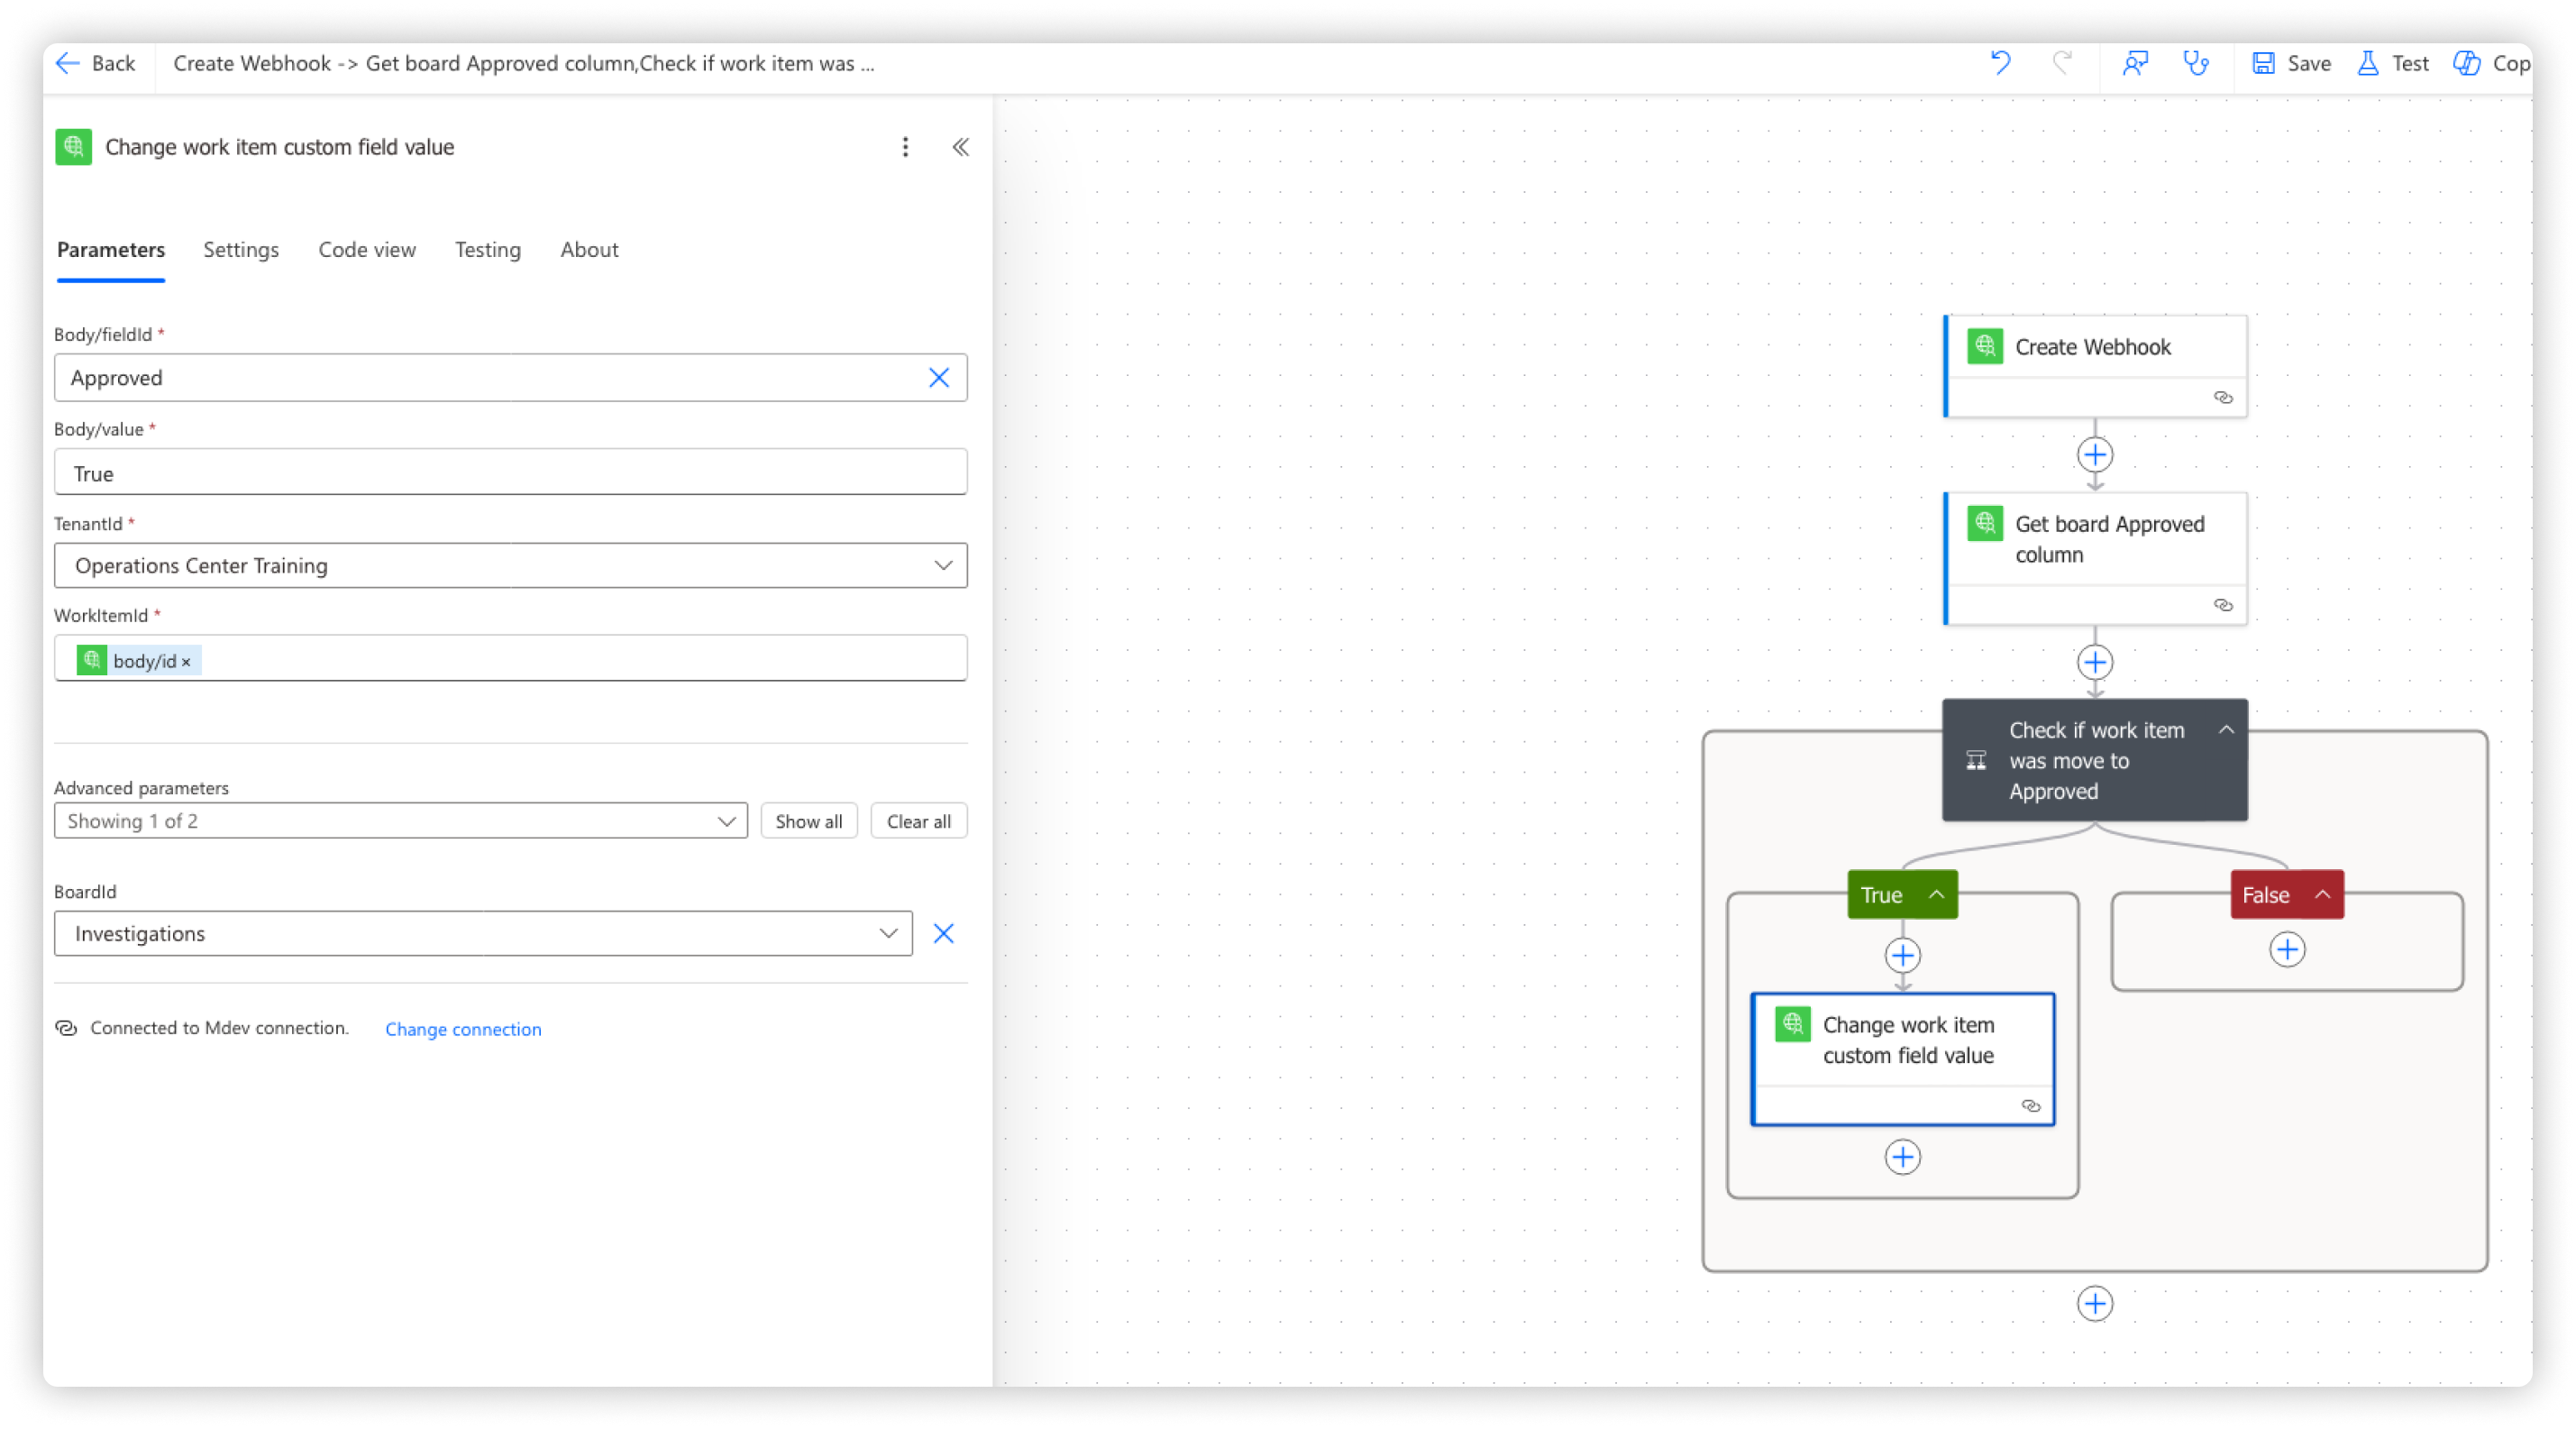
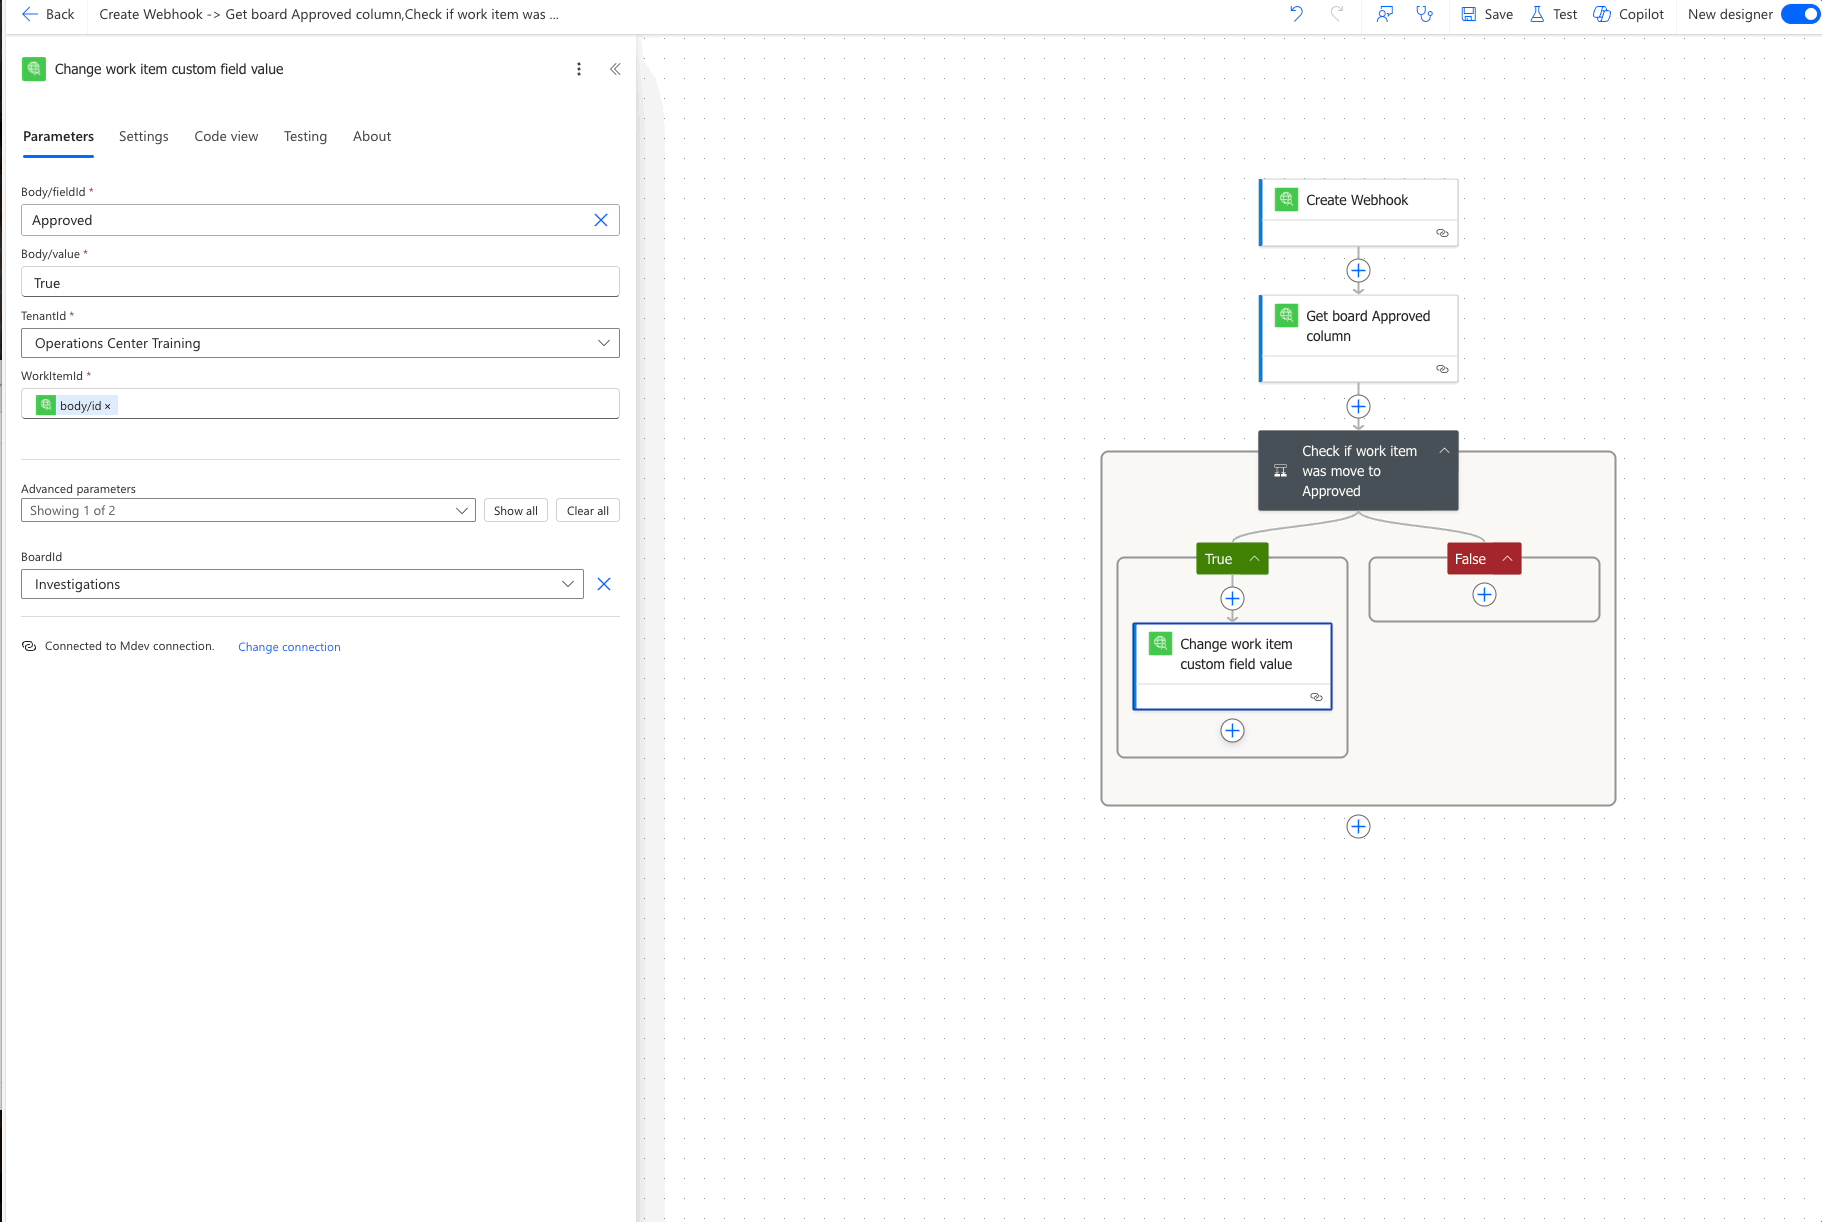
Step 4: Update the Work Item in Operations Center
If the condition is True (meaning a work item was moved to "Approved"), we need to update the custom field inside Operations Center.
- In the "True" branch, add a new action.
- Select the Custom Connector and search for Change Work Item Custom Field Value.
- Fill in the details:
- TenantId → Select your TenantId.
- Advanced Parameters → BoardId → Select the board where this update should happen.
- Body/FieldId → Use
/or the lightning icon to select the custom field (in this case, "Approved"). - Body/Value → Set this to
true. - WorkItemId → Use
/or the lightning icon to insert Body/id (this ensures the update applies to the correct work item).
At the end, your action should look like this:
Step 5: Notify a Manager or Colleague
If a manager or colleague needs to be informed when a work item is approved but doesn't have direct access to the board, Power Automate can send them an email automatically.
- Inside the True condition, add a new action and search for Send an Email.
- If it's your first time setting up email notifications, you might need to accept permissions before proceeding.
3. Fill in the email details:
- To → Enter the recipient’s email address.
- Subject → Write something clear, like:
"Work Item Approved: Immediate Attention Required". - Body → Customize the message with relevant details (e.g., the work item title, who approved it, and what needs to happen next).
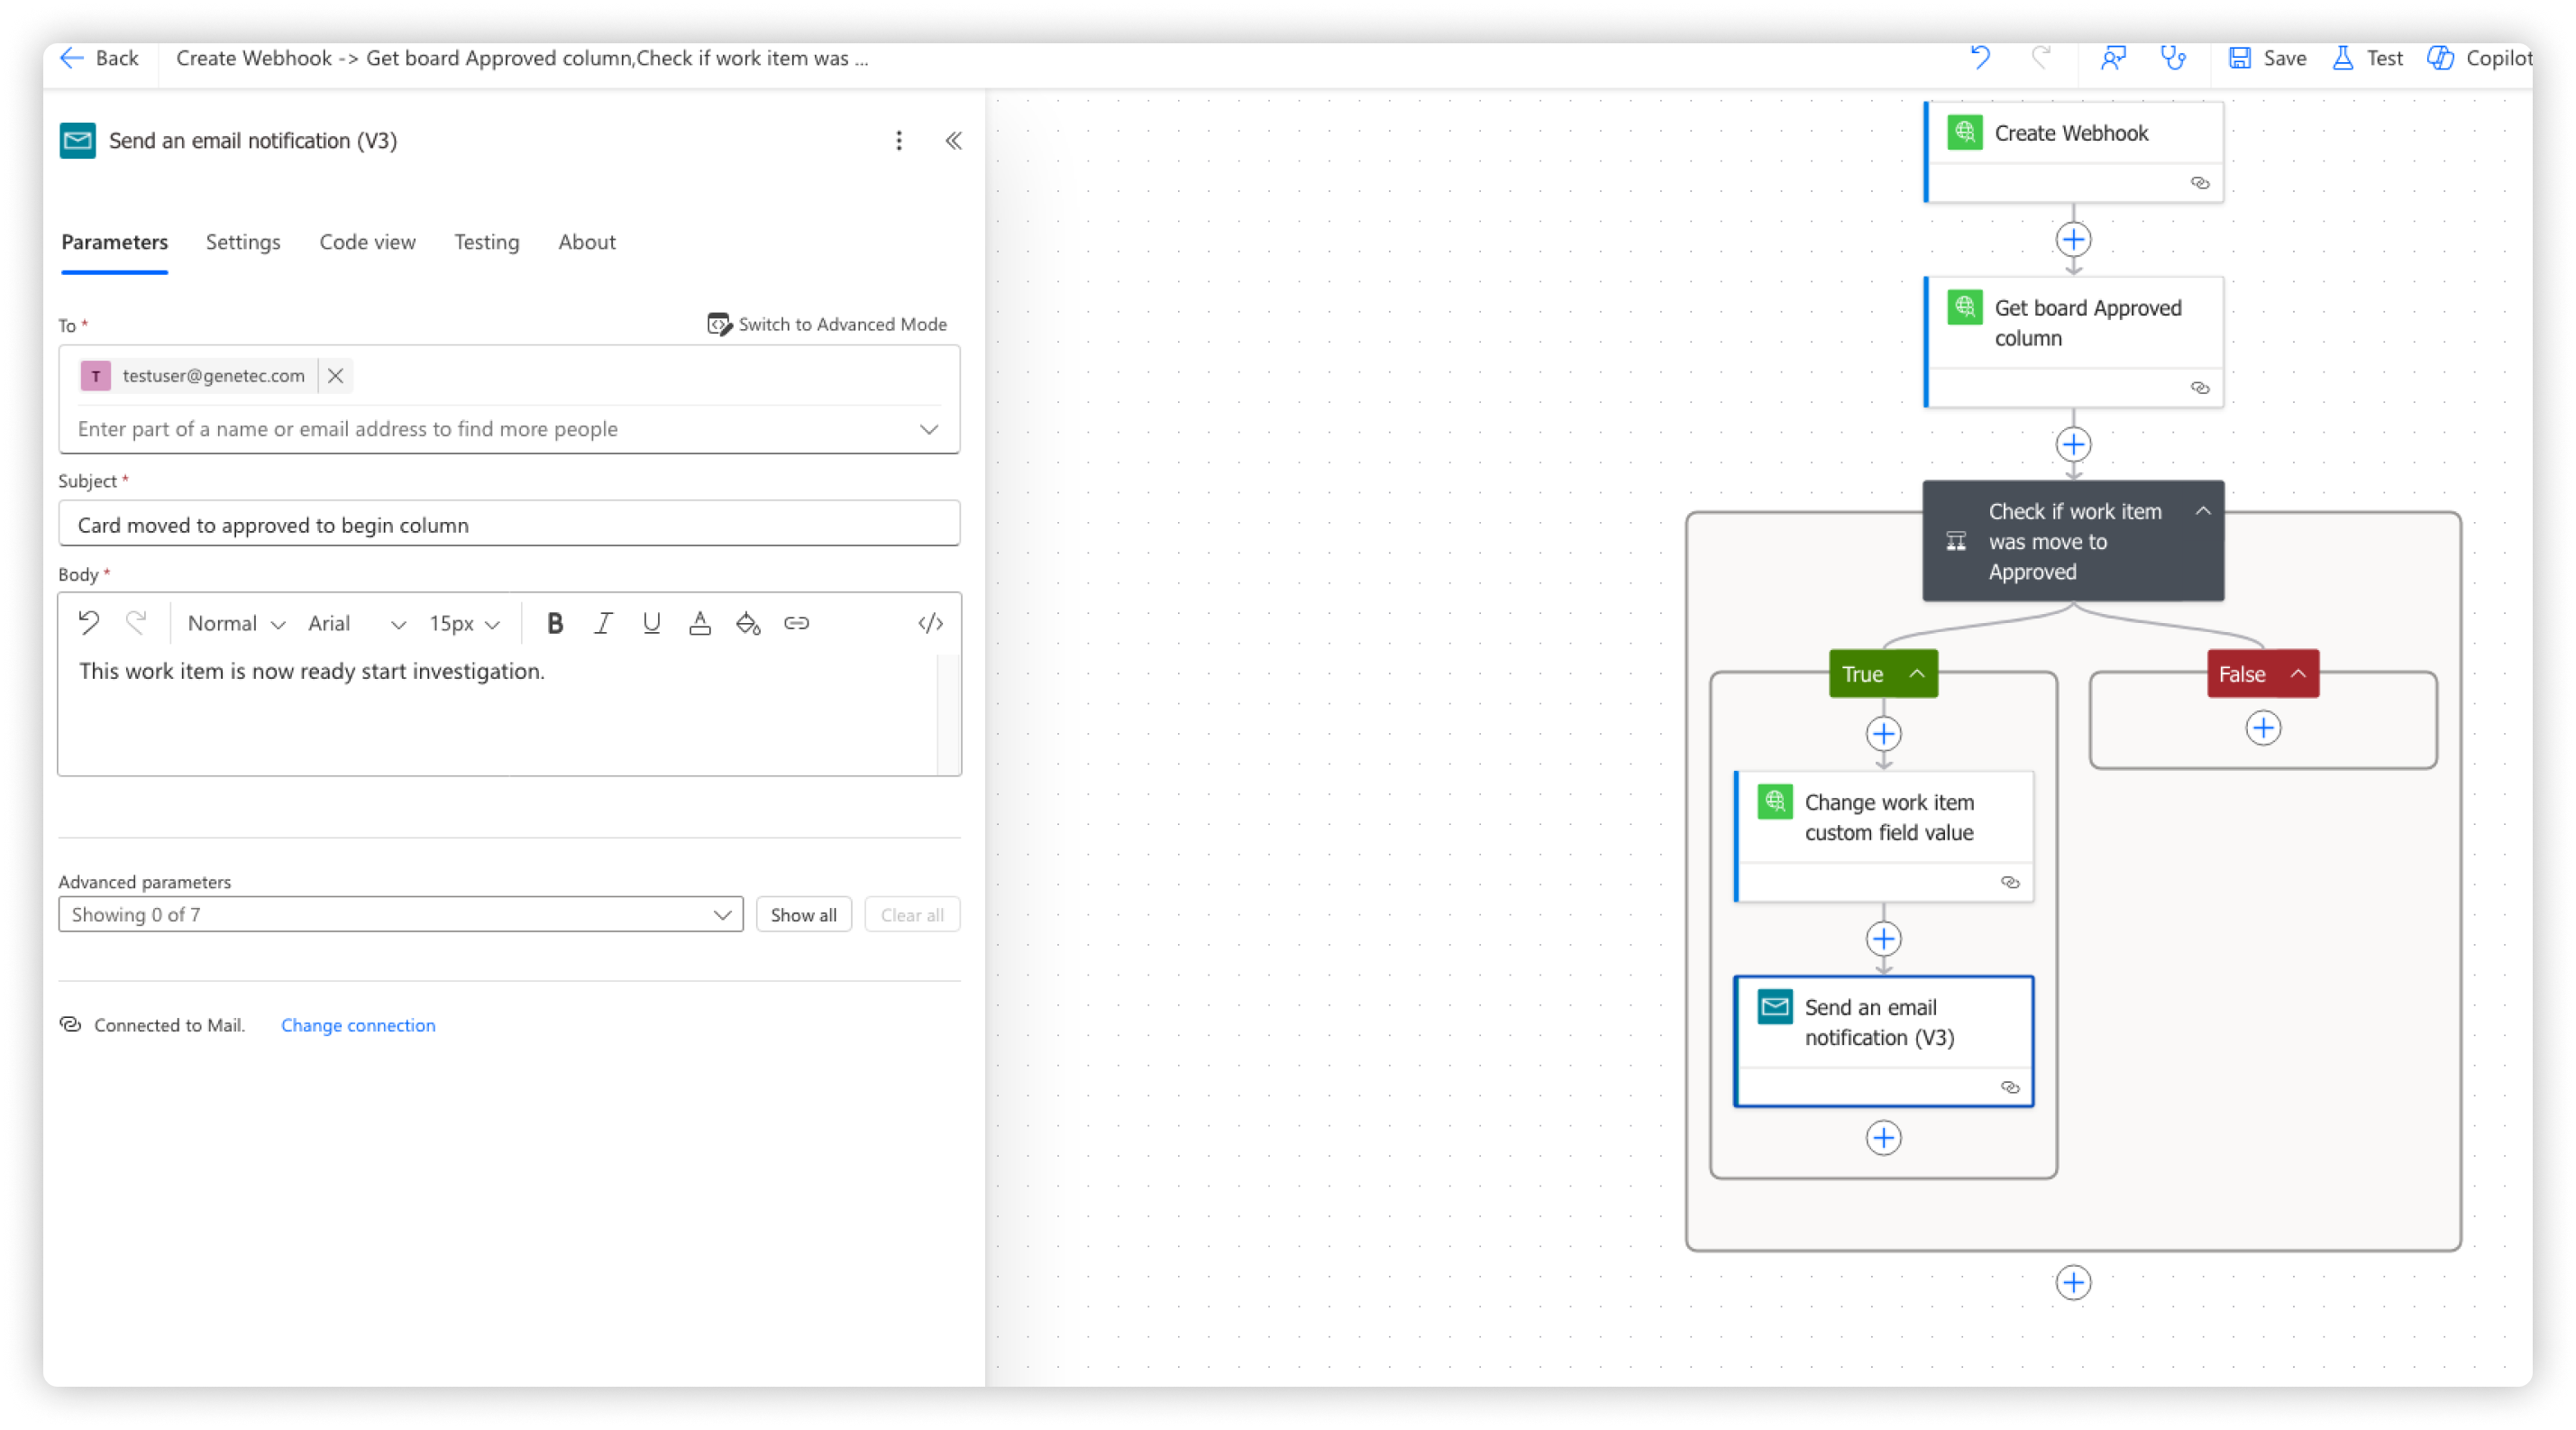
That’s it! Save your flow and test it by moving a work item to "Approved". If everything is set up correctly:
✅ Operations Center will trigger the flow.
✅ Power Automate will update the work item.
✅ A notification email will be sent (if configured).
Your automation is now fully functional, reducing manual work and ensuring everyone stays in the loop! 🎉