
Resources settings
In Operations Center, the Resource settings gives you full control over how you manage and organize your resources. Whether it's your people, equipment, or places, this page allows you to customize every aspect of your resources. From setting layouts and custom fields to defining specific states for each category, you'll be able to tailor your resources to fit the exact needs of your operations. This article will guide you through the Resource Settings and all the features it offers.
Navigate to resources settings
When you open the Resources page, you'll find a gear icon at the bottom of your screen. Clicking on this icon will open the Resource settings in a convenient popup, giving you access to all the customization options.
Key components
| Custom fields | Custom fields allow you to capture specific details about each resource, tailored to your unique workflow. |
| Types | Resource types define the specific variations within a category, such as different roles within the "People" category (e.g., security officers, staff) or different devices within the "Equipment" category (e.g., cameras, radios). |
| Layouts | Layouts allow you to customize the fields and how information is displayed for each resource type, ensuring that only relevant data is shown. |
| States | States track the status or condition of a resource, helping you manage its lifecycle and changes over time. |
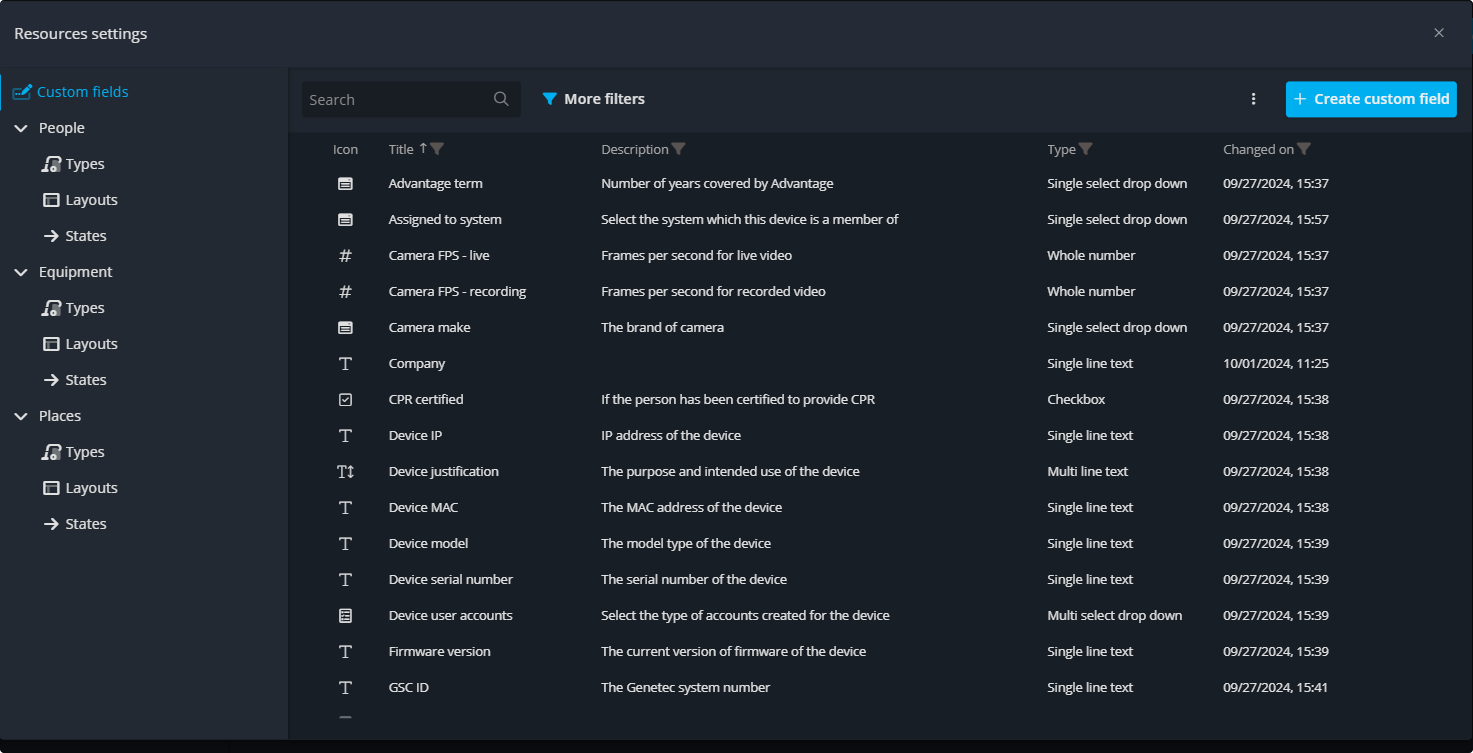
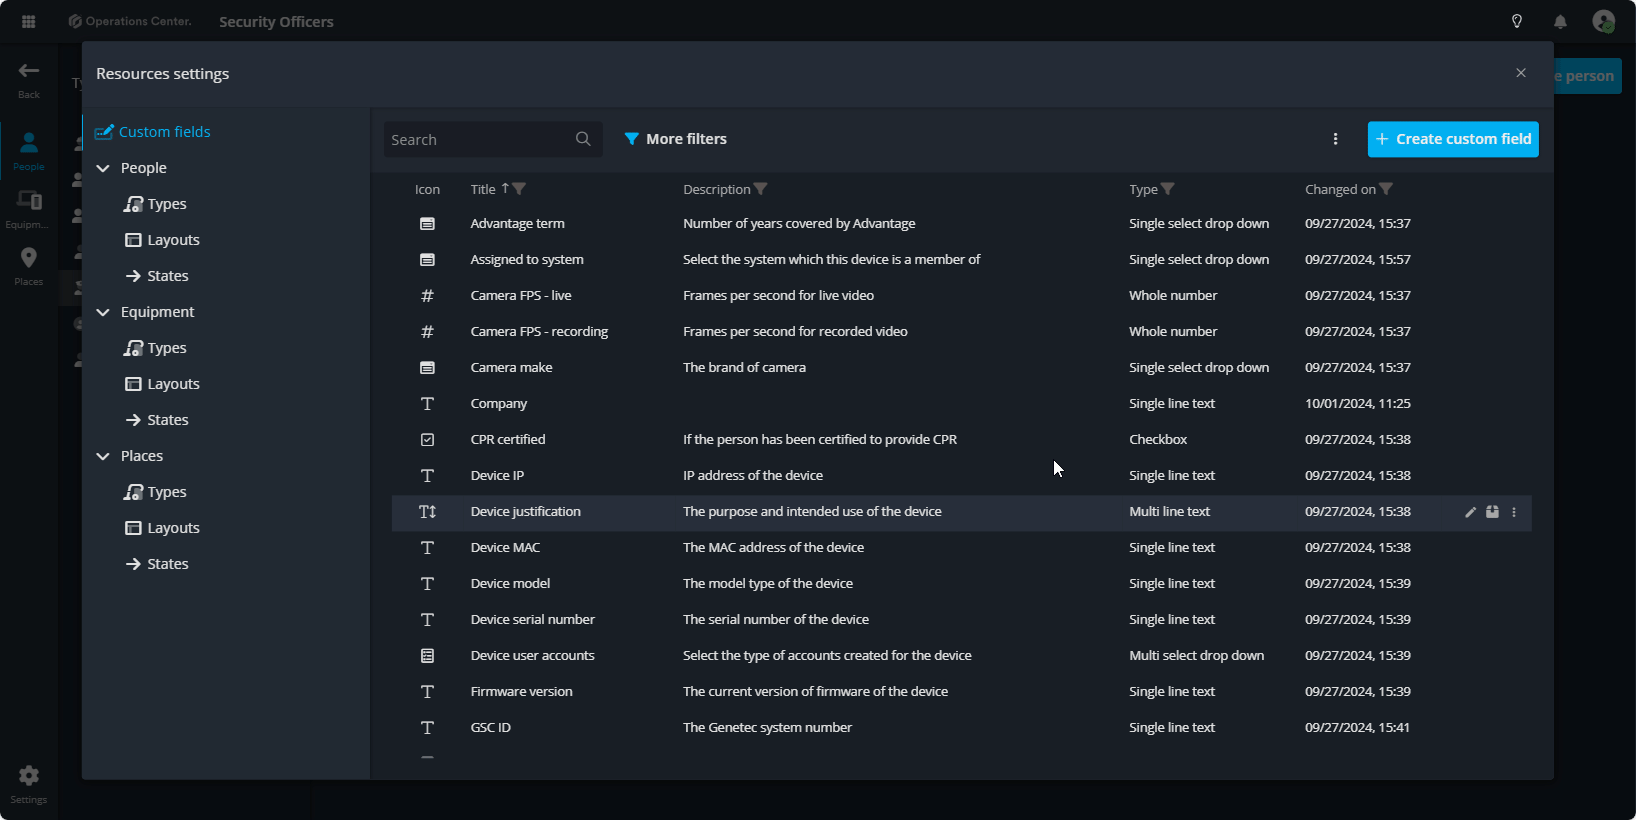
1. Custom fields
Custom fields in the Operations Center offer the flexibility to track critical information relevant to each resource. Whether it's device details like serial numbers and IP addresses, or personnel certifications and assignments, custom fields allow you to create and manage data fields that align with your operational requirements. These fields can then be added to different resource layouts, ensuring that the right information is captured for each resource type. For example, dispatch officers in the People category can have a different set of fields displayed when creating a new person, compared to creating a new person for staff or contractors.
Create a new custom field
When you open the Resource settings popup, navigate to the Custom Fields section. Here, you'll find the + Create Custom Field button located at the top right. Click this button, then give your field a title and select the appropriate field type from the dropdown menu. This allows you to create tailored fields for your resources, ensuring the collection of relevant data for each category.
You can select the following types for your field:
- Single line text
- Multi line text
- Checkbox
- Whole number
- Decimal number
- Date & time
- Hyperlink
- Single select drop down
- Multi select drop down
Continue reading to learn how to customize resource layouts.
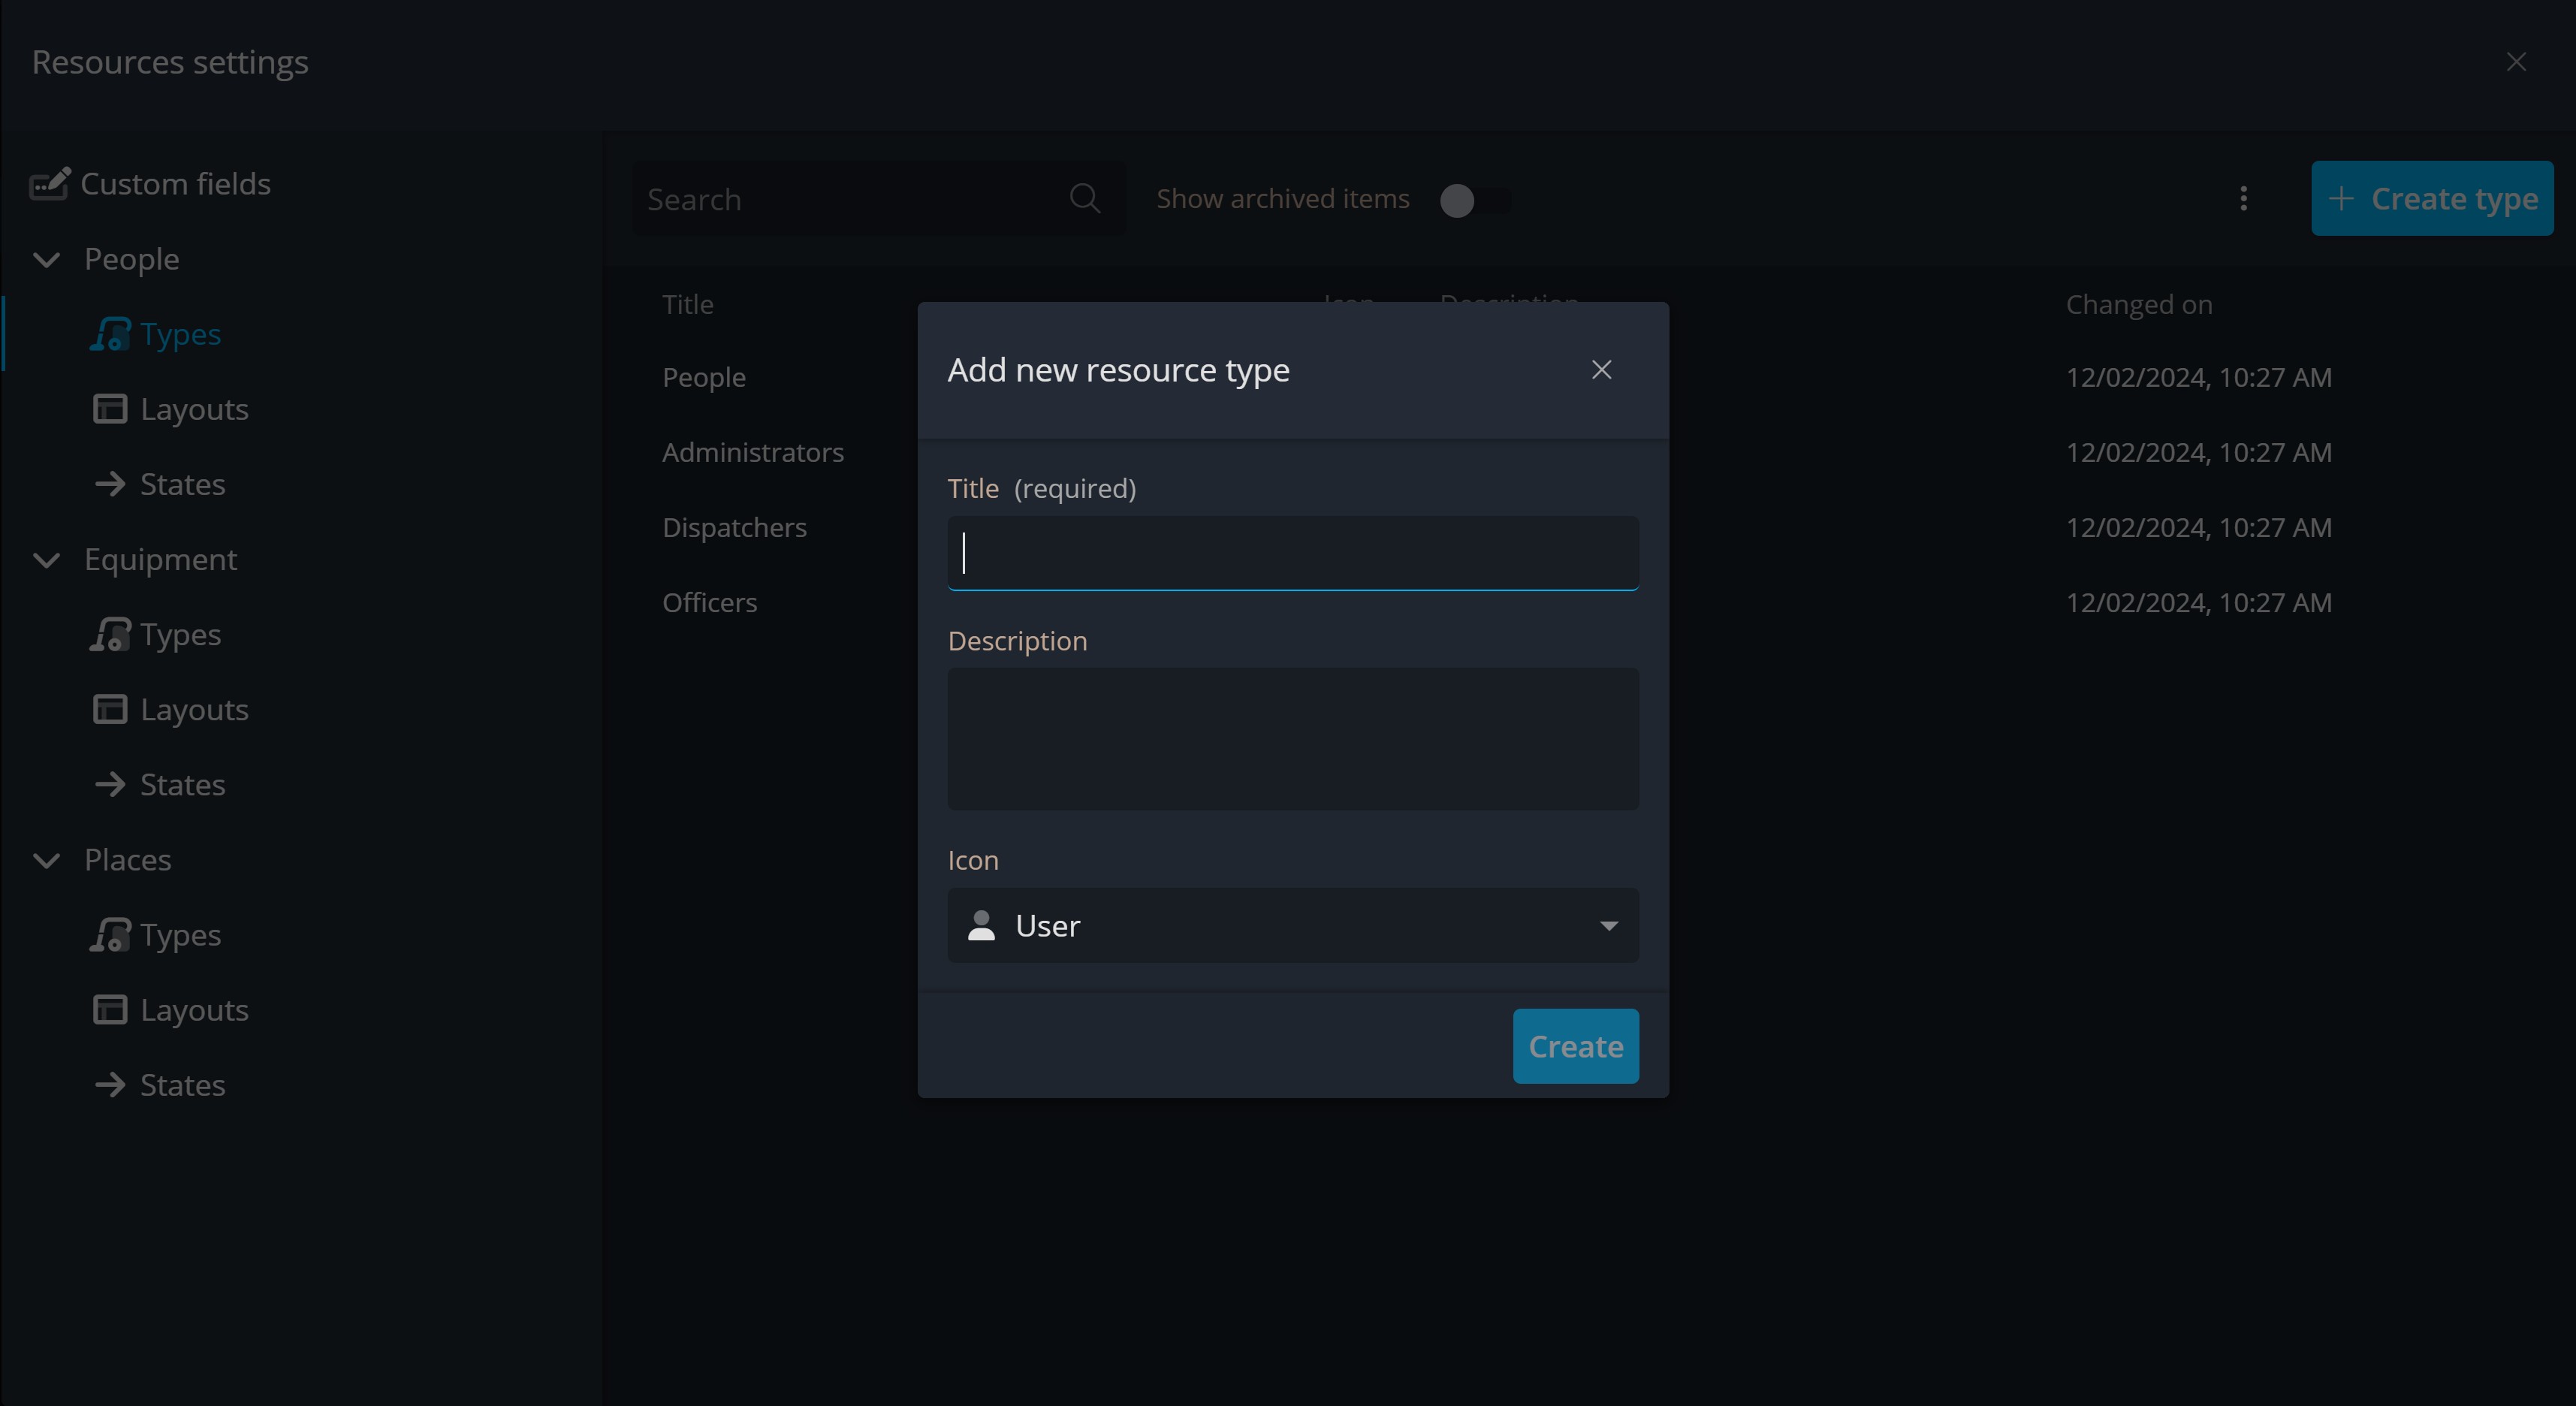
2. Types
Each resource category can have different types created. For example, the "People" category can include various types such as contractors, security officers, staff, and more. The "Equipment" category can include different types like cameras, access control devices, radios, and servers. The "Places" category can include various locations such as office buildings, parking lots, event centers, and more.
To add a resource, click the + create type button at the top. This will open a popup where you must provide a title for the resource . You can also add more details in the description field and choose an icon to represent the resource.
3. Layouts
When creating a new person, equipment, or place, a popup will appear allowing you to fill in the fields specific to that resource type. These fields are fully customizable and can be configured for each resource type, ensuring that only the most relevant information is displayed and collected.
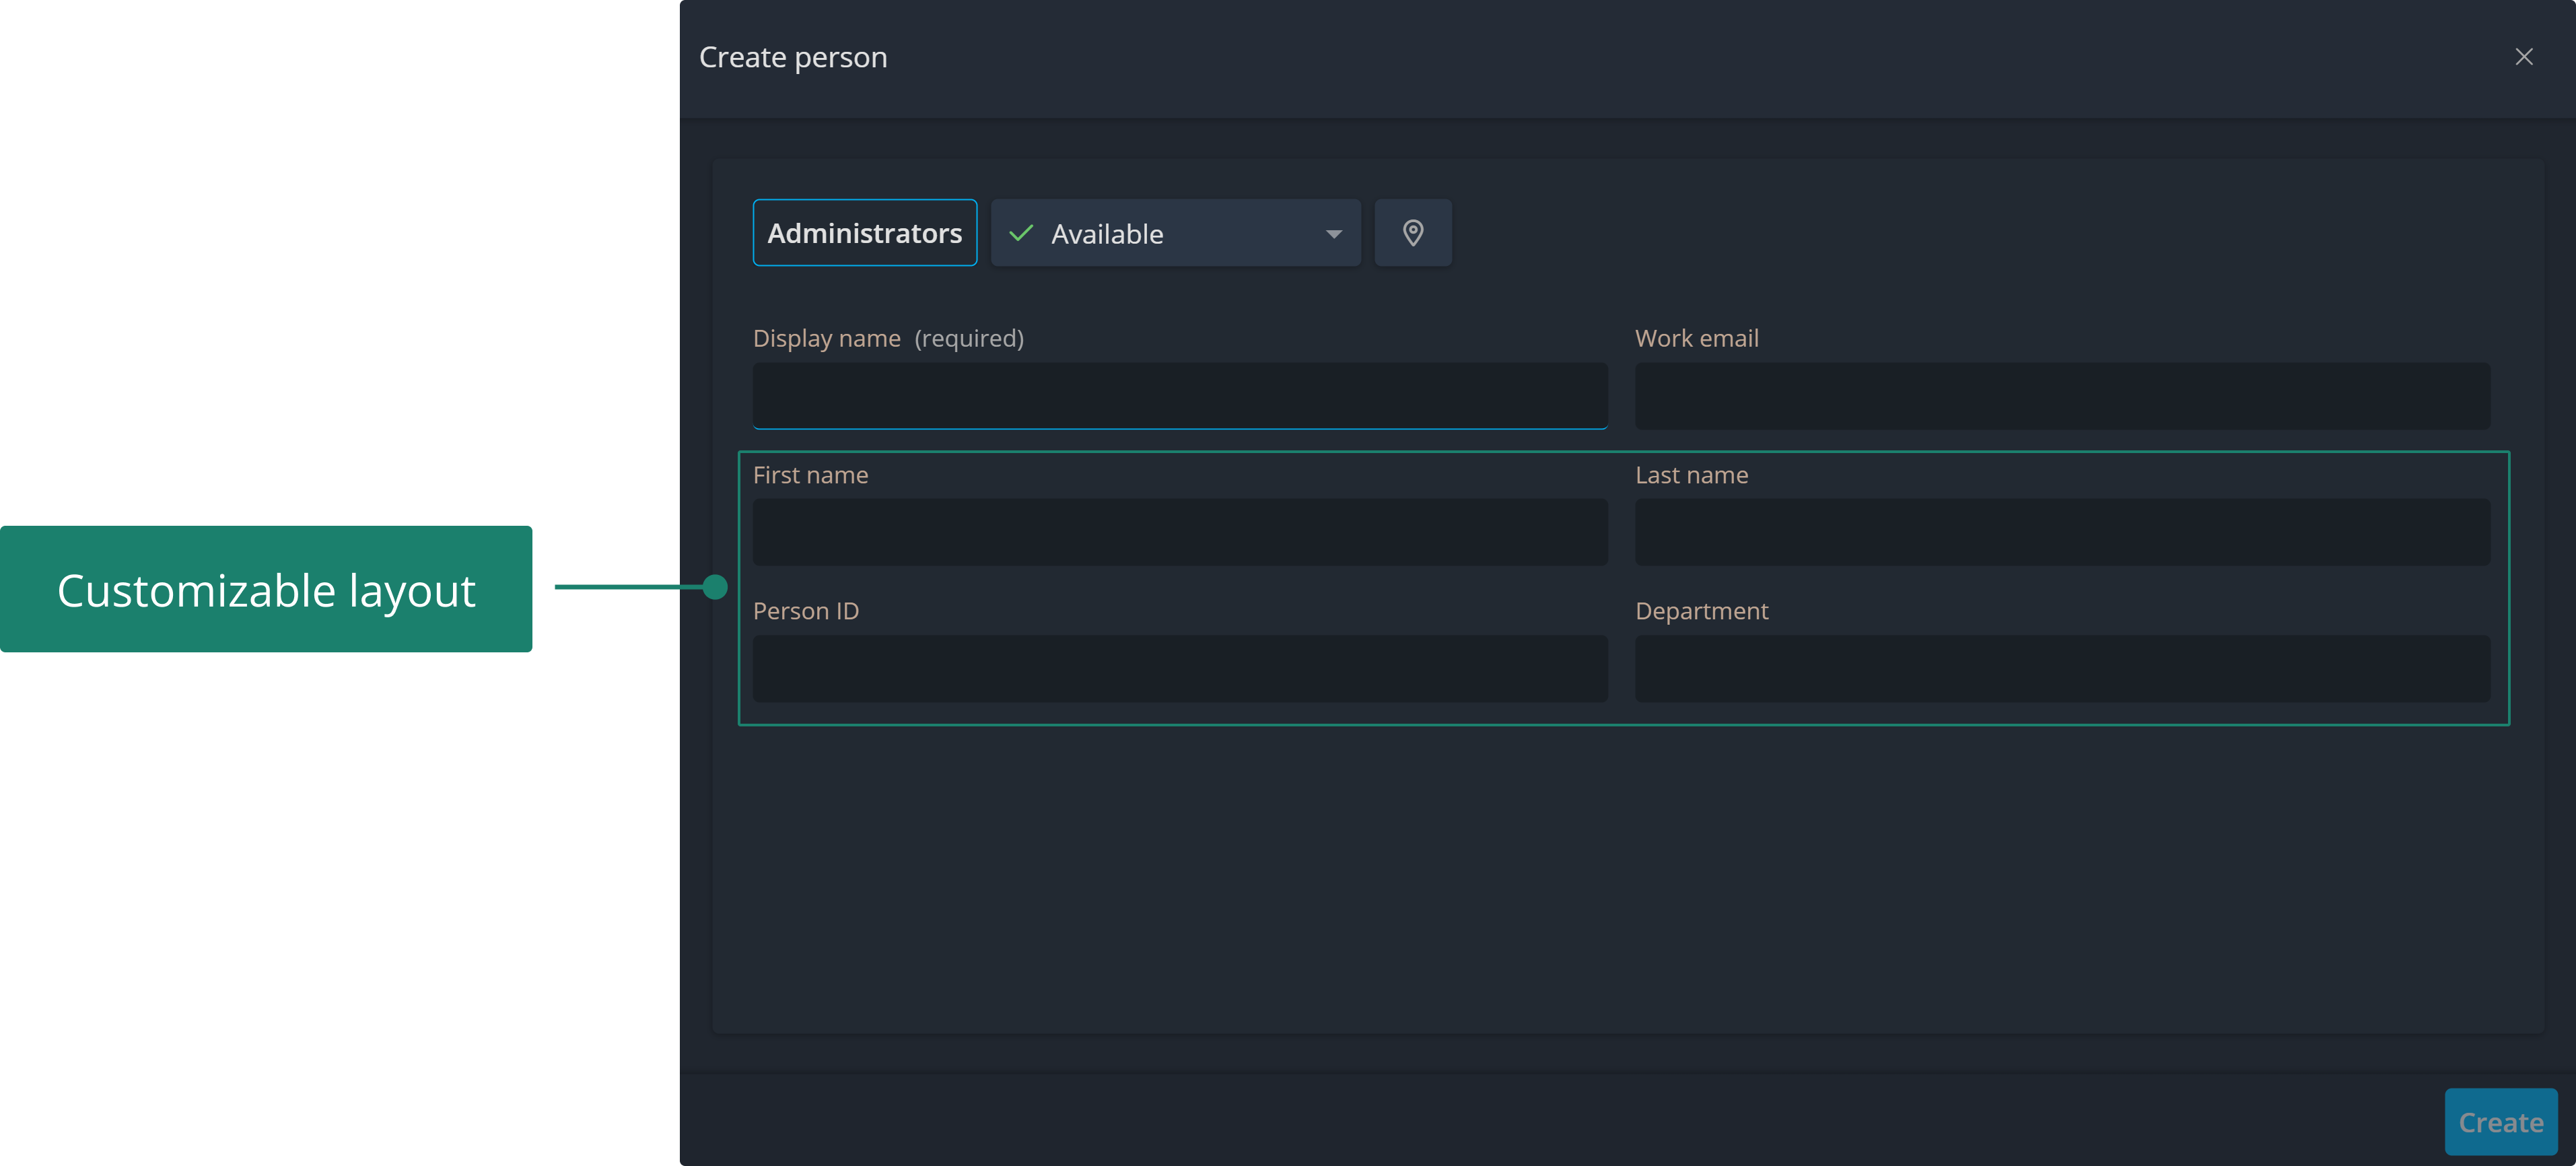
In Operations Center, each category of resources has a default layout that can be customized. Additionally, admins can create new layouts to be used by different resource types. This flexibility allows you to configure the layout to fit the specific needs of your organization.
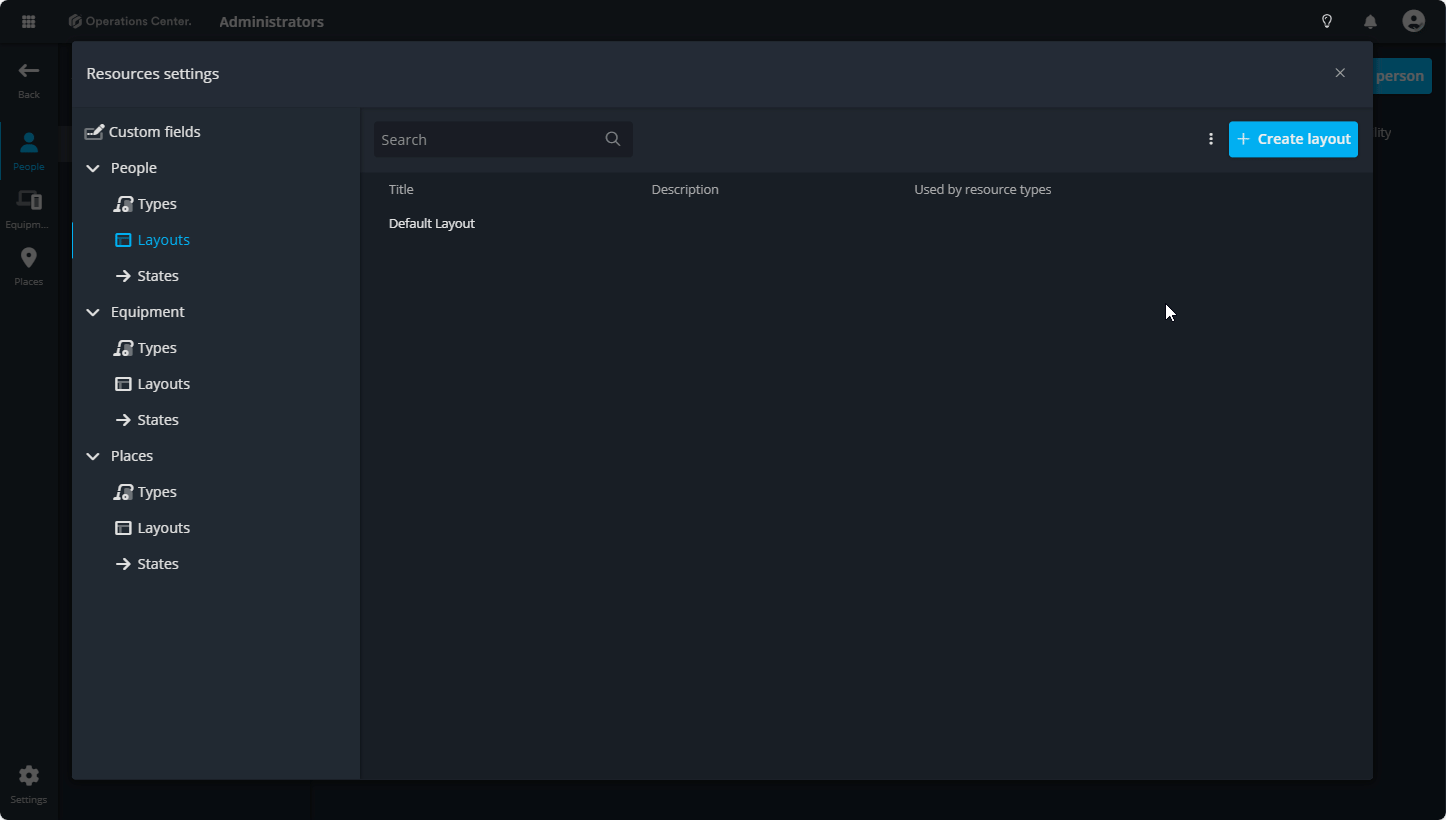
To create a new layout, follow these steps:
- Open the resource settings popup.
- Navigate to the layouts section within the category you want to modify (People, Equipment, or Place).
- Click + Create Layout and give it a title, along with an optional description.
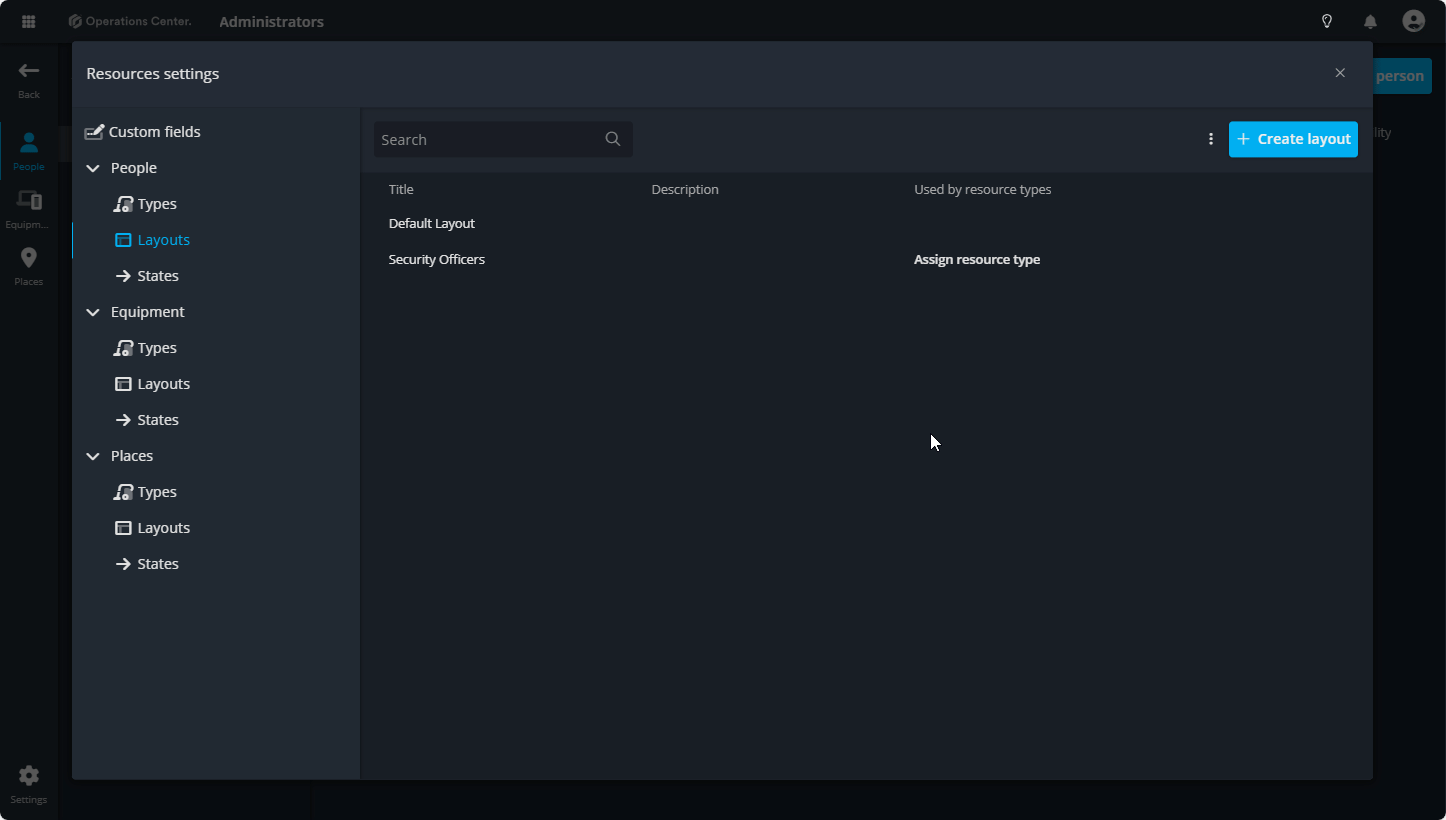
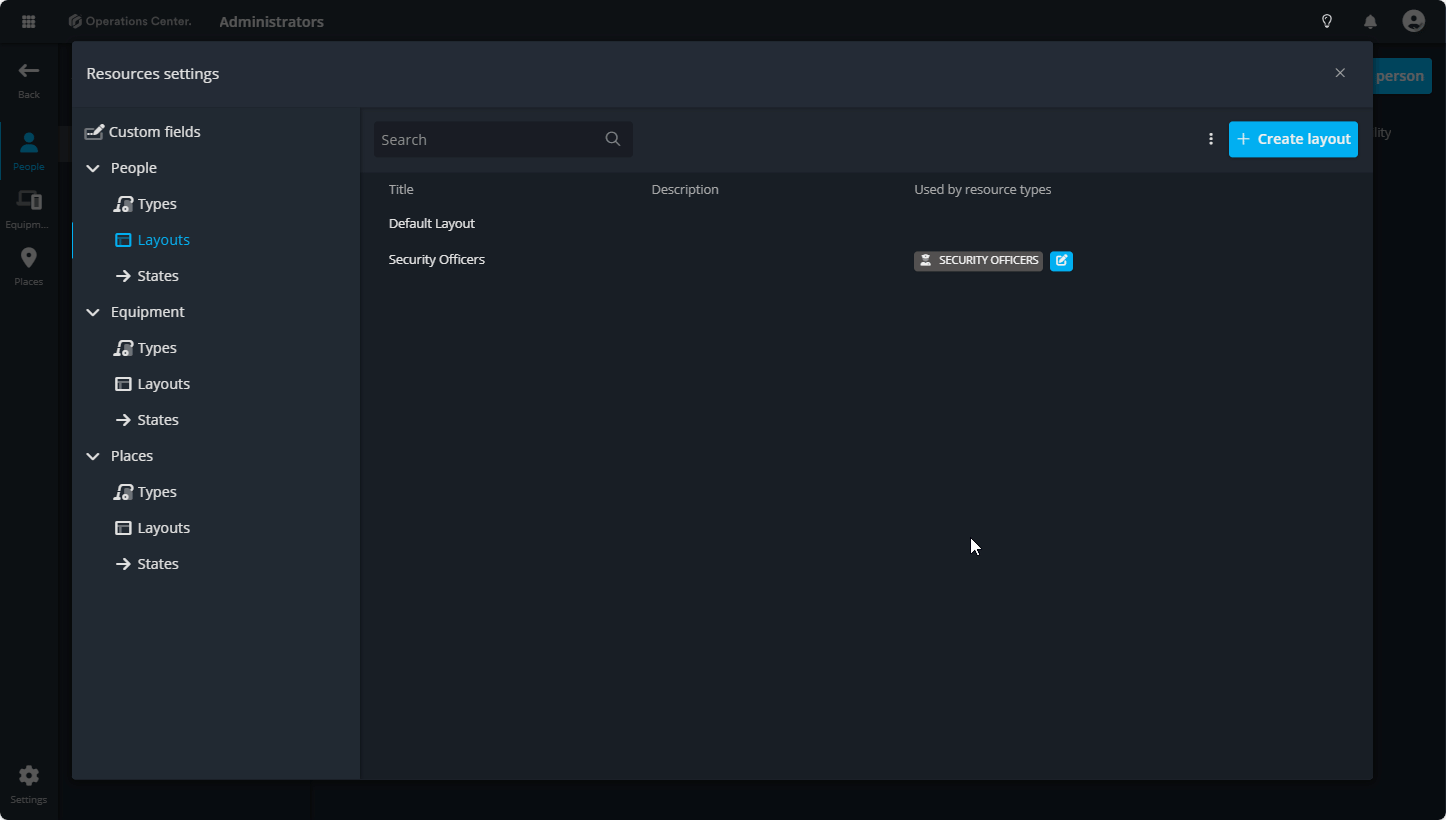
The next step is to define which resource types will use the new layout. For example, if you've created a "Security Officers" type within the People category, you'll want to assign this layout to that type. To do so, click on Assign Resource Type. This allows you to select one or multiple resource types to follow the layout you've customized.
Customise layout
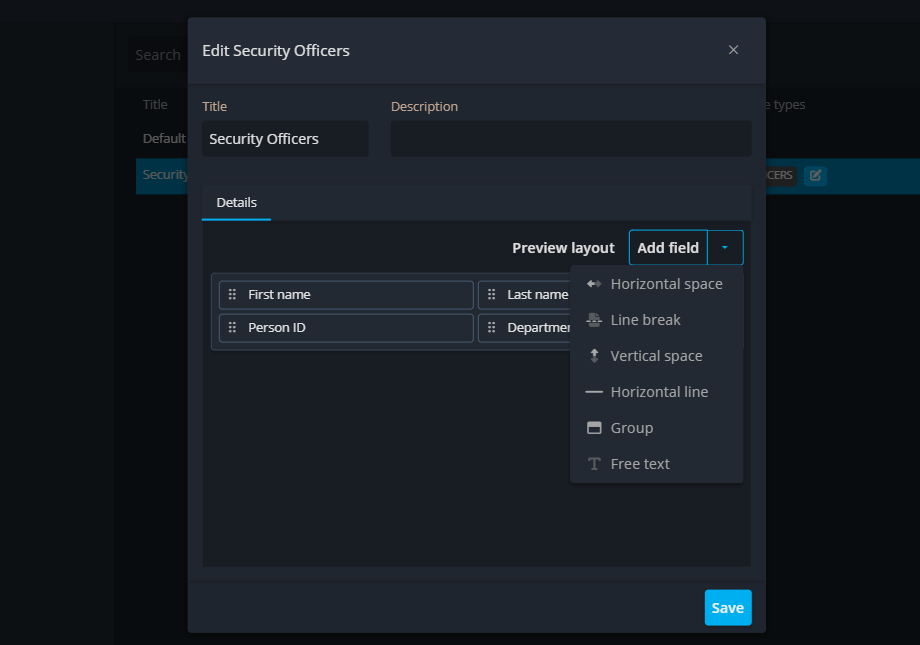
Now that you've created your new layout and assigned the relevant resource types, let's move on to customizing it to ensure that the necessary fields are available and displayed.
Click on your newly added layout or hover over it to reveal the edit option. Click on it, and a new popup will appear. In this popup, you can modify the title and description if necessary. More importantly, you'll have access to the Add Fields option, which allows you to start adding the relevant fields that should be displayed for the assigned resource types.
The Add Field option allows you to select from the available fields. Using the dropdown next to it, you can add different types of fields, such as horizontal lines, line breaks,group, and more, depending on your needs. This flexibility ensures that you can customize the layout to capture the most relevant information for your resource types.
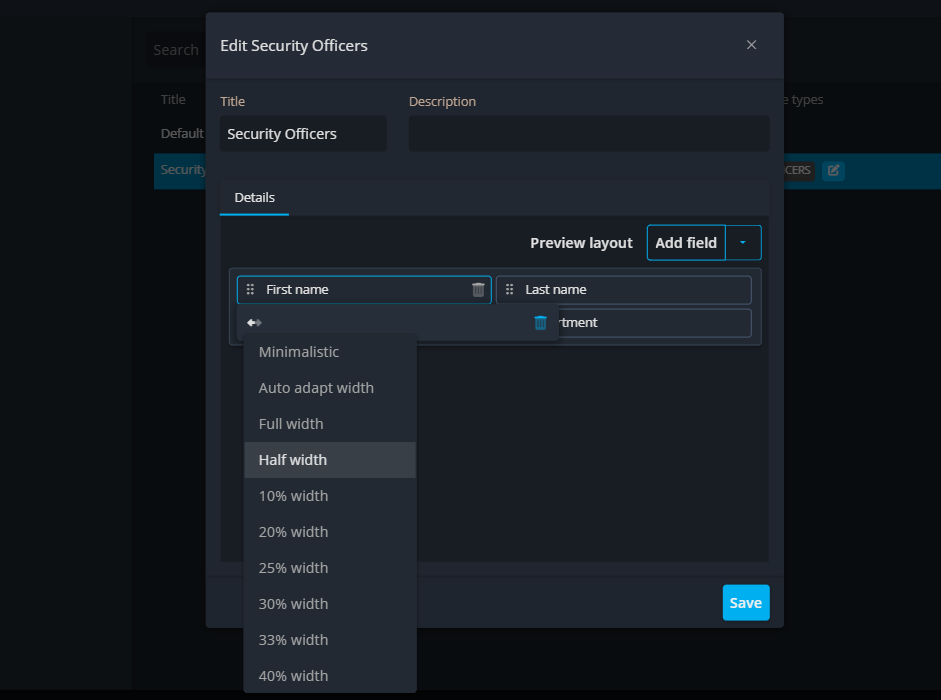
Edit fields
Click on the fields to adjust their width settings. You can configure the fields to display in full width, at 50%, set them to auto-adapt, and more. If you wish to remove a field, simply click on the trash icon next to it. This gives you full control over the layout and appearance of your resource types.
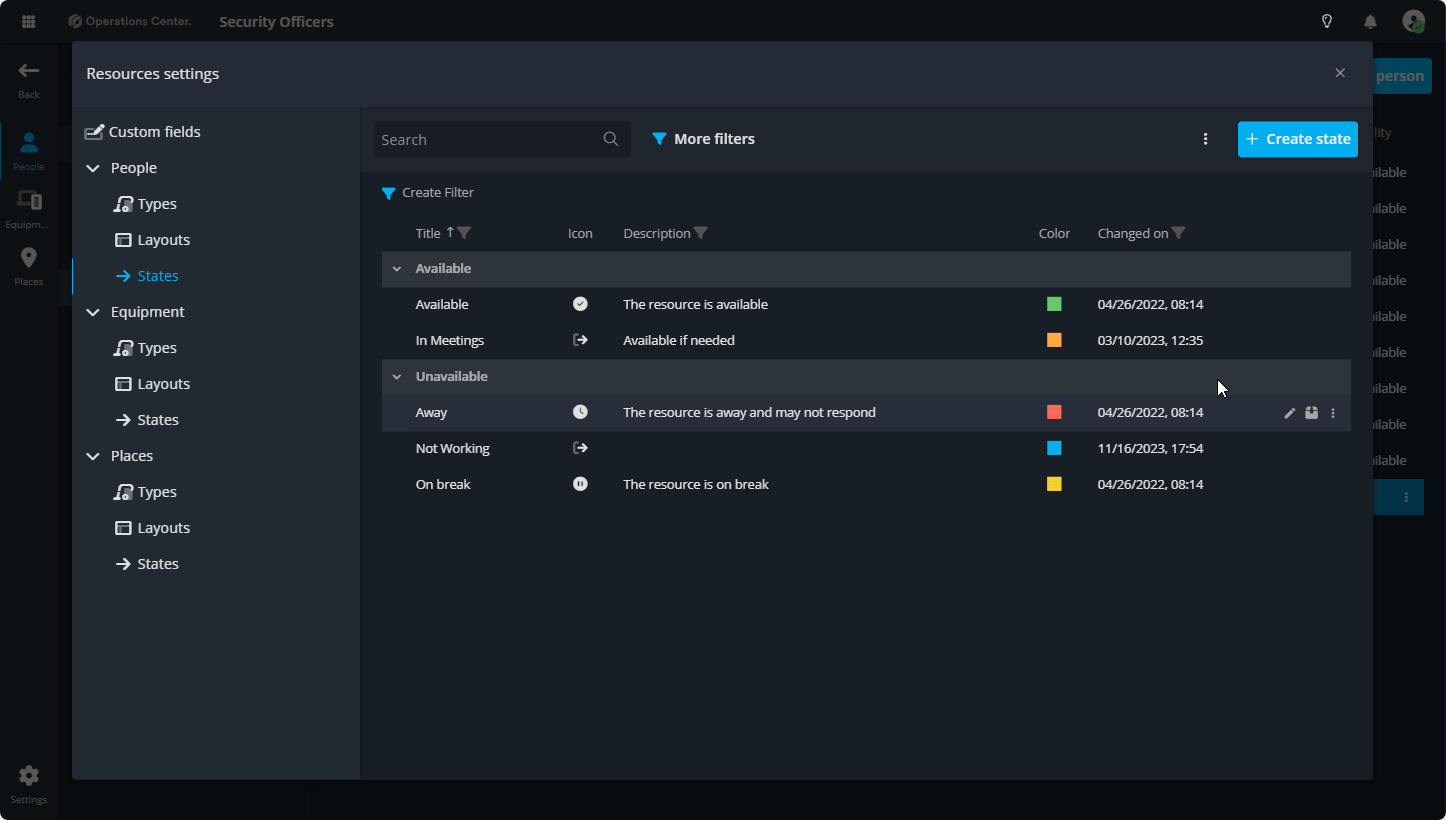
3. States
Resource states help track the status of resources across categories like people, equipment, and places. Whether marking people as 'Available' or 'On a Break,' equipment as 'Lost' or 'Missing,' or places as 'Closed,' states give clear visibility into resource availability.
To create a state, click the + Create button at the top. Give the state a title and an optional description, select a color and icon, and choose whether the state is available or unavailable.
Contact Support
If you have questions or need assistance, please reach out to our support team via OC-Support@genetec.com.