Build the report
All required data is now ready. We have set up the data sources, created relationships, and handled time zone adjustments. At this point, the report is still empty, but now we can start building it.
In the next steps, you will begin placing fields, structuring the layout, and shaping how the report presents your data. Everything we have prepared so far ensures that the report will display accurate and meaningful information—now it is time to make it usable and clear.
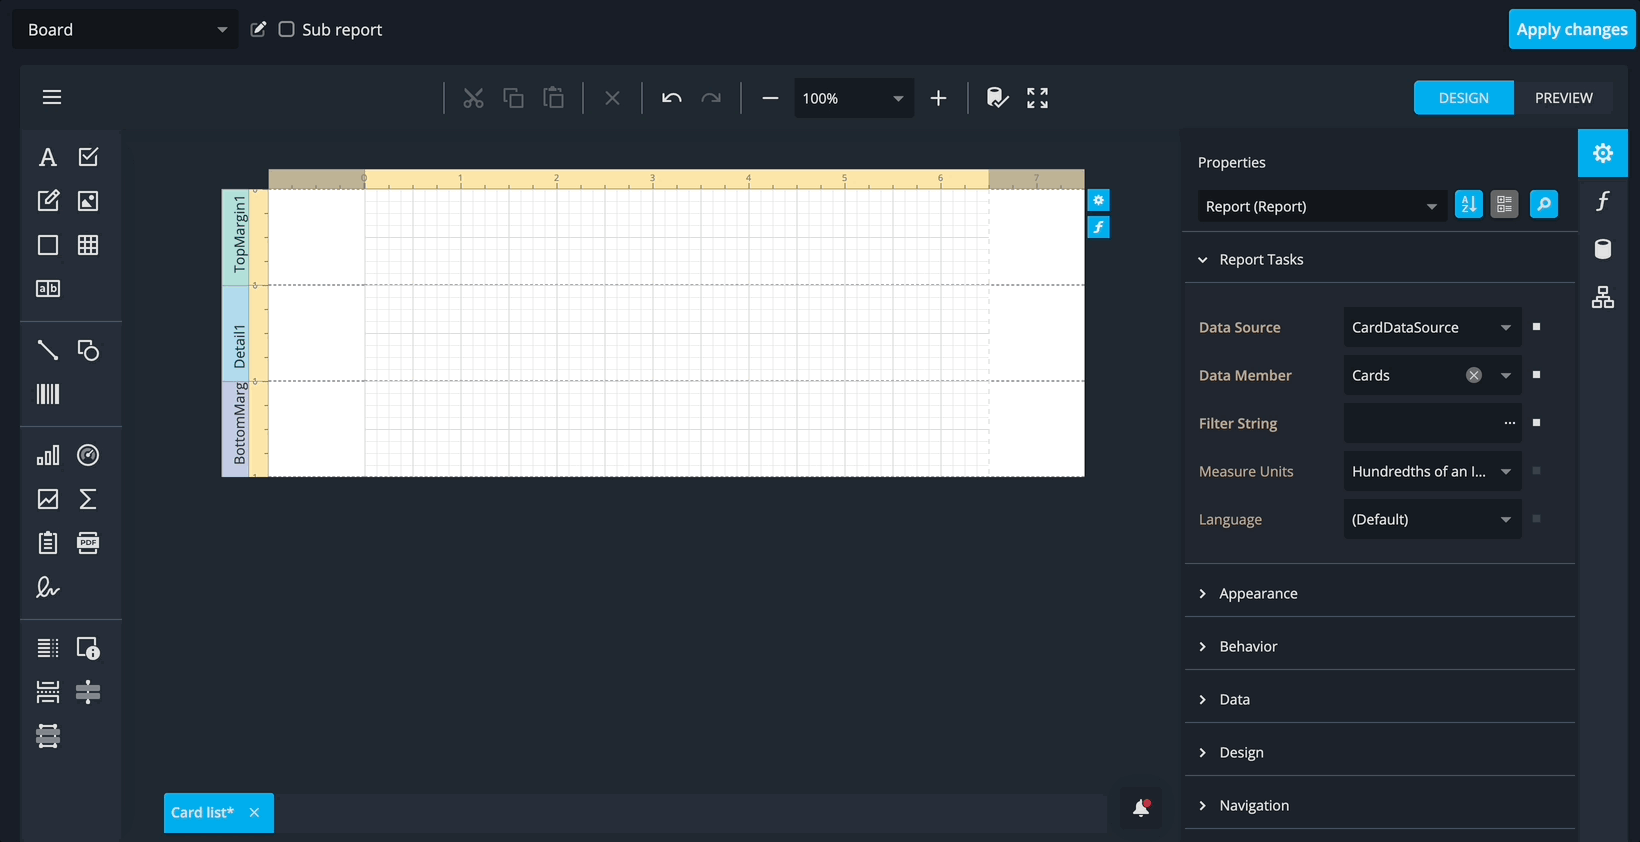
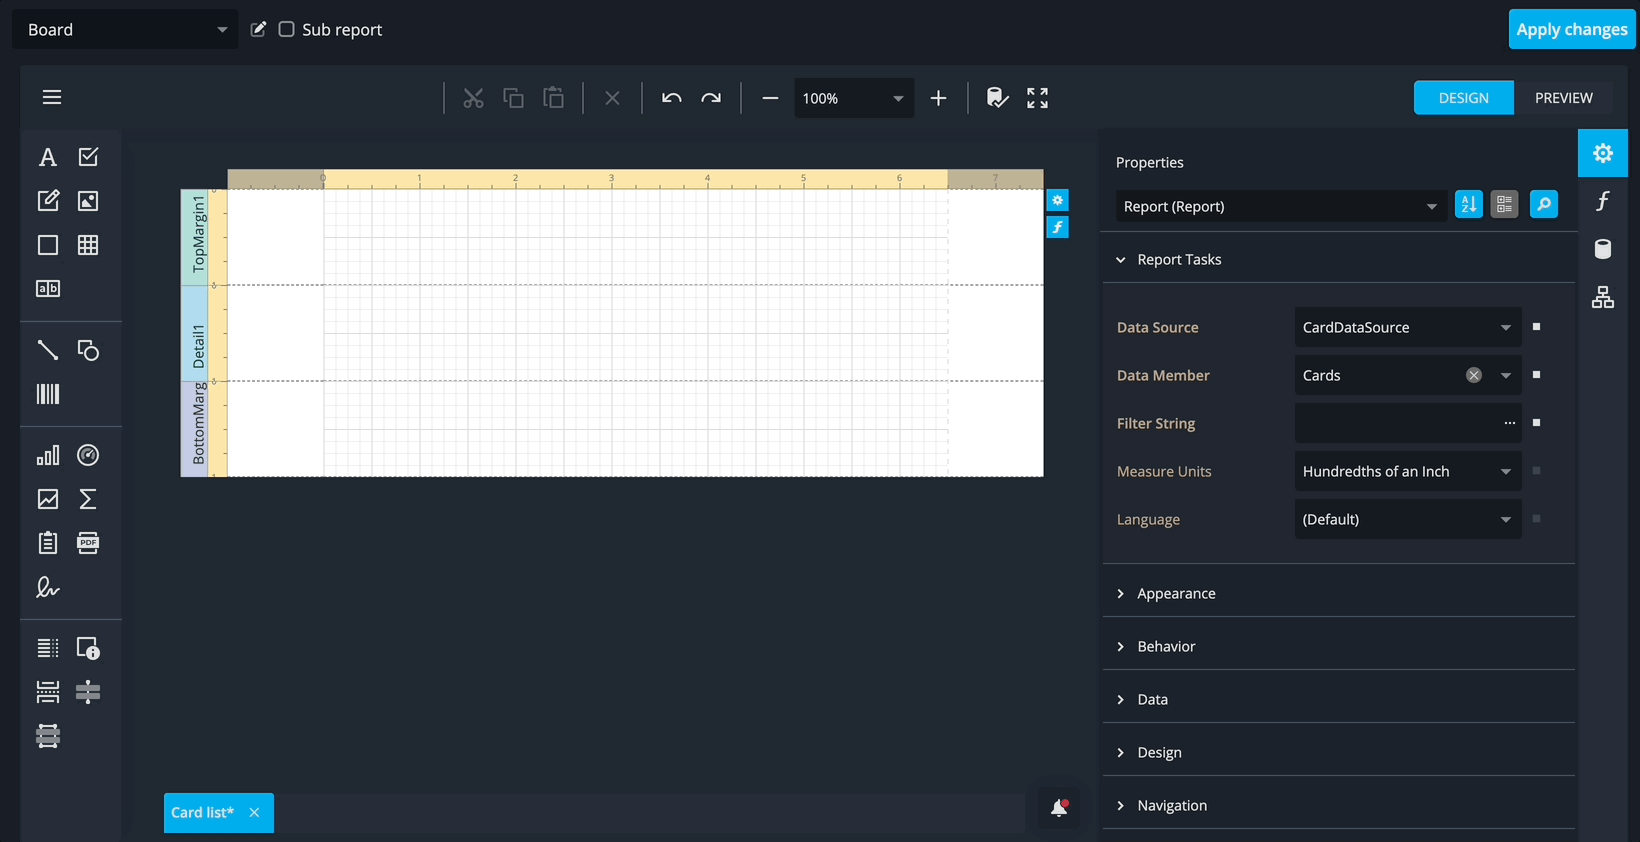
Step 1: Set the Data Member
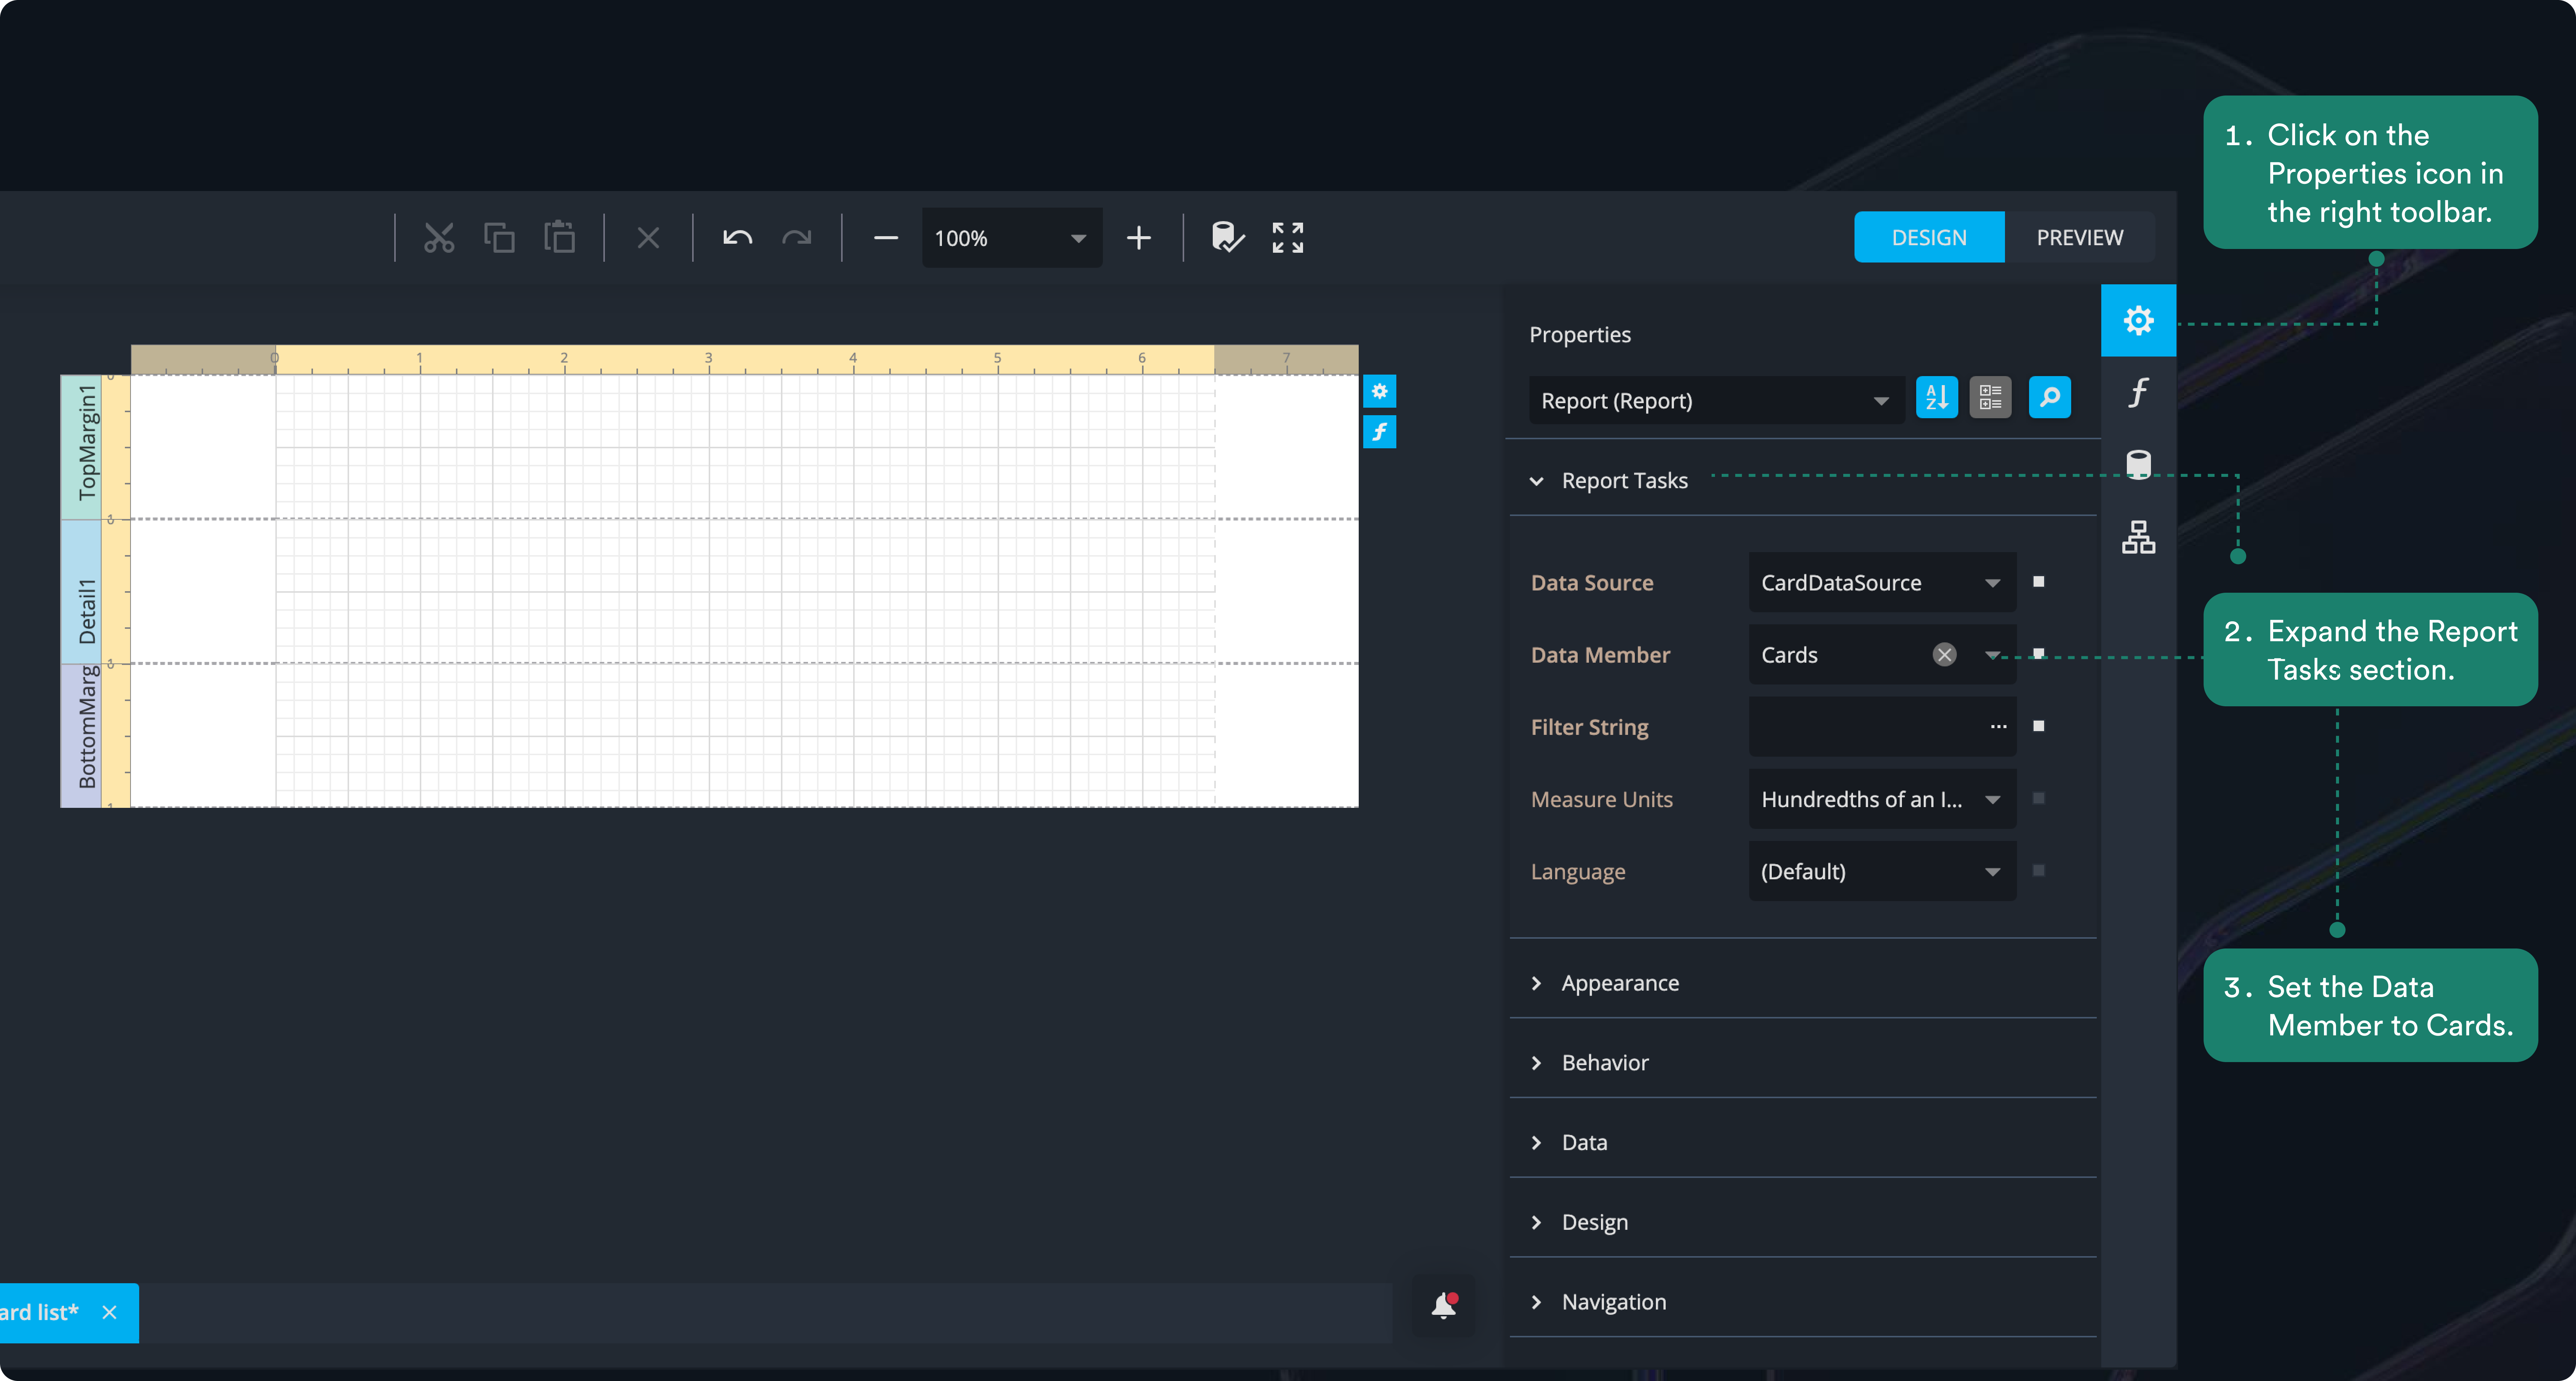
- Click on the Properties icon in the right toolbar.
- Expand the Report Tasks section.
- Set the Data Member to Cards.
2. Sort the report and add a header band
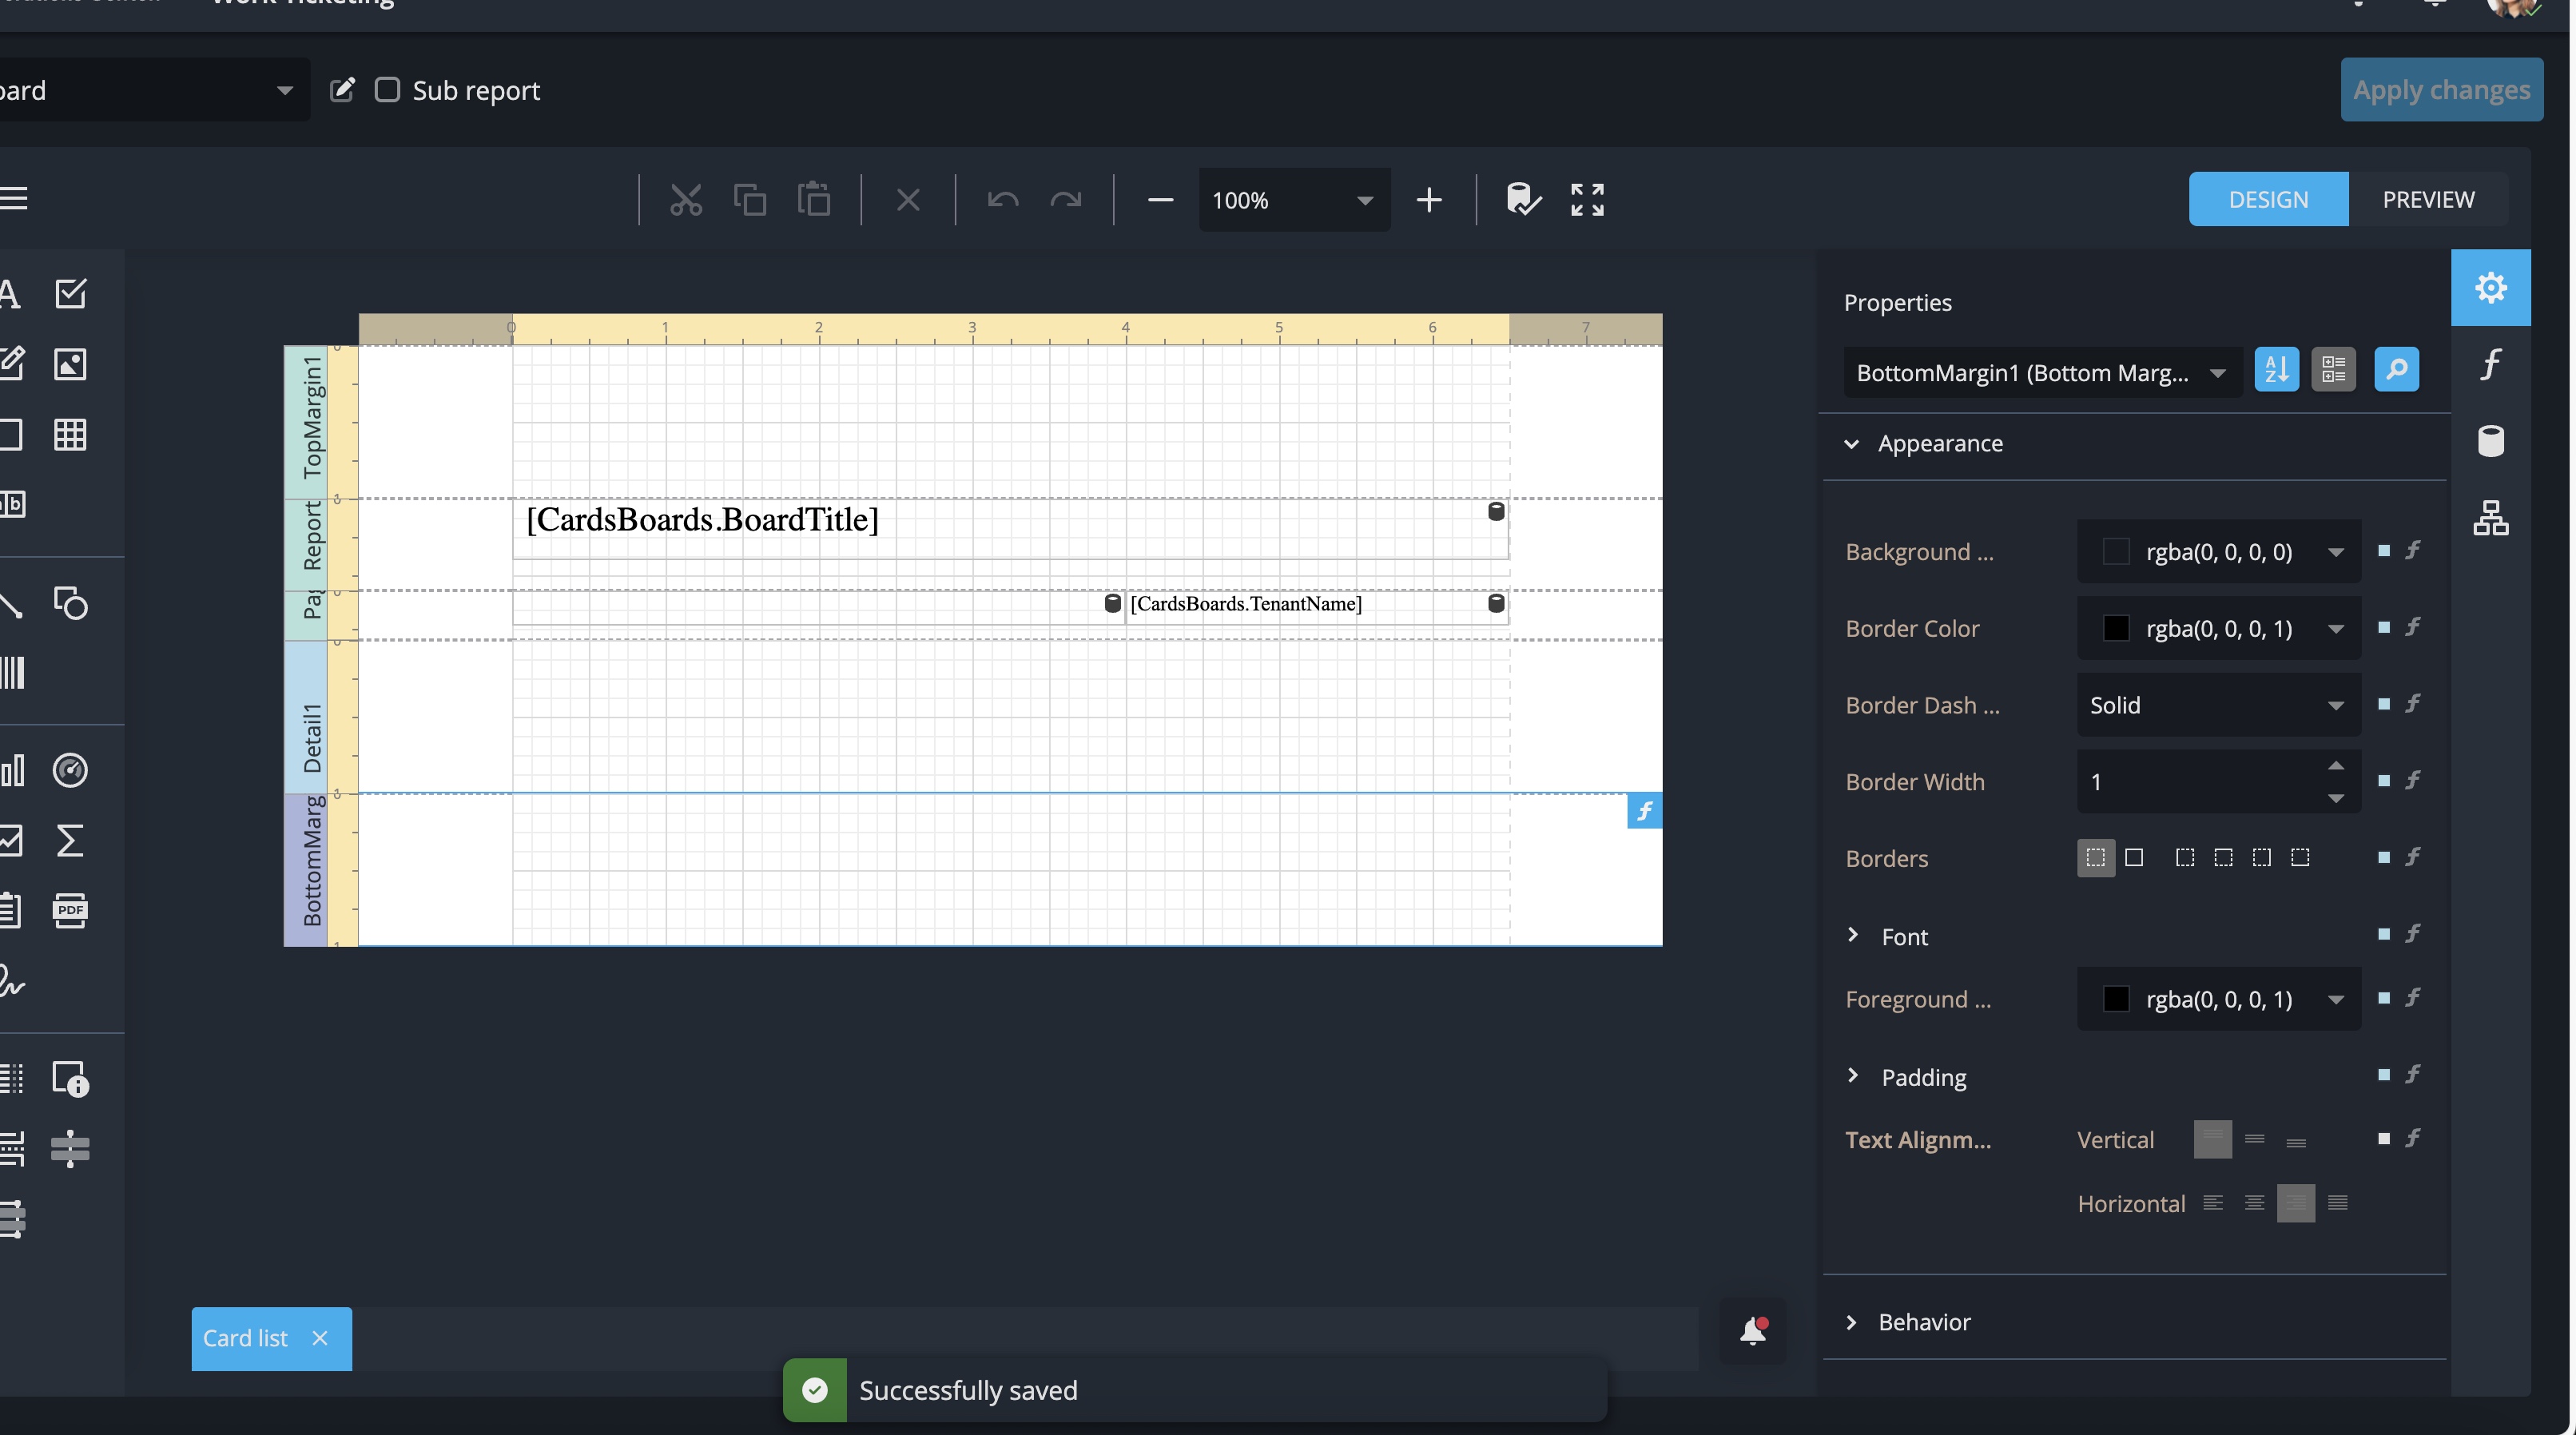
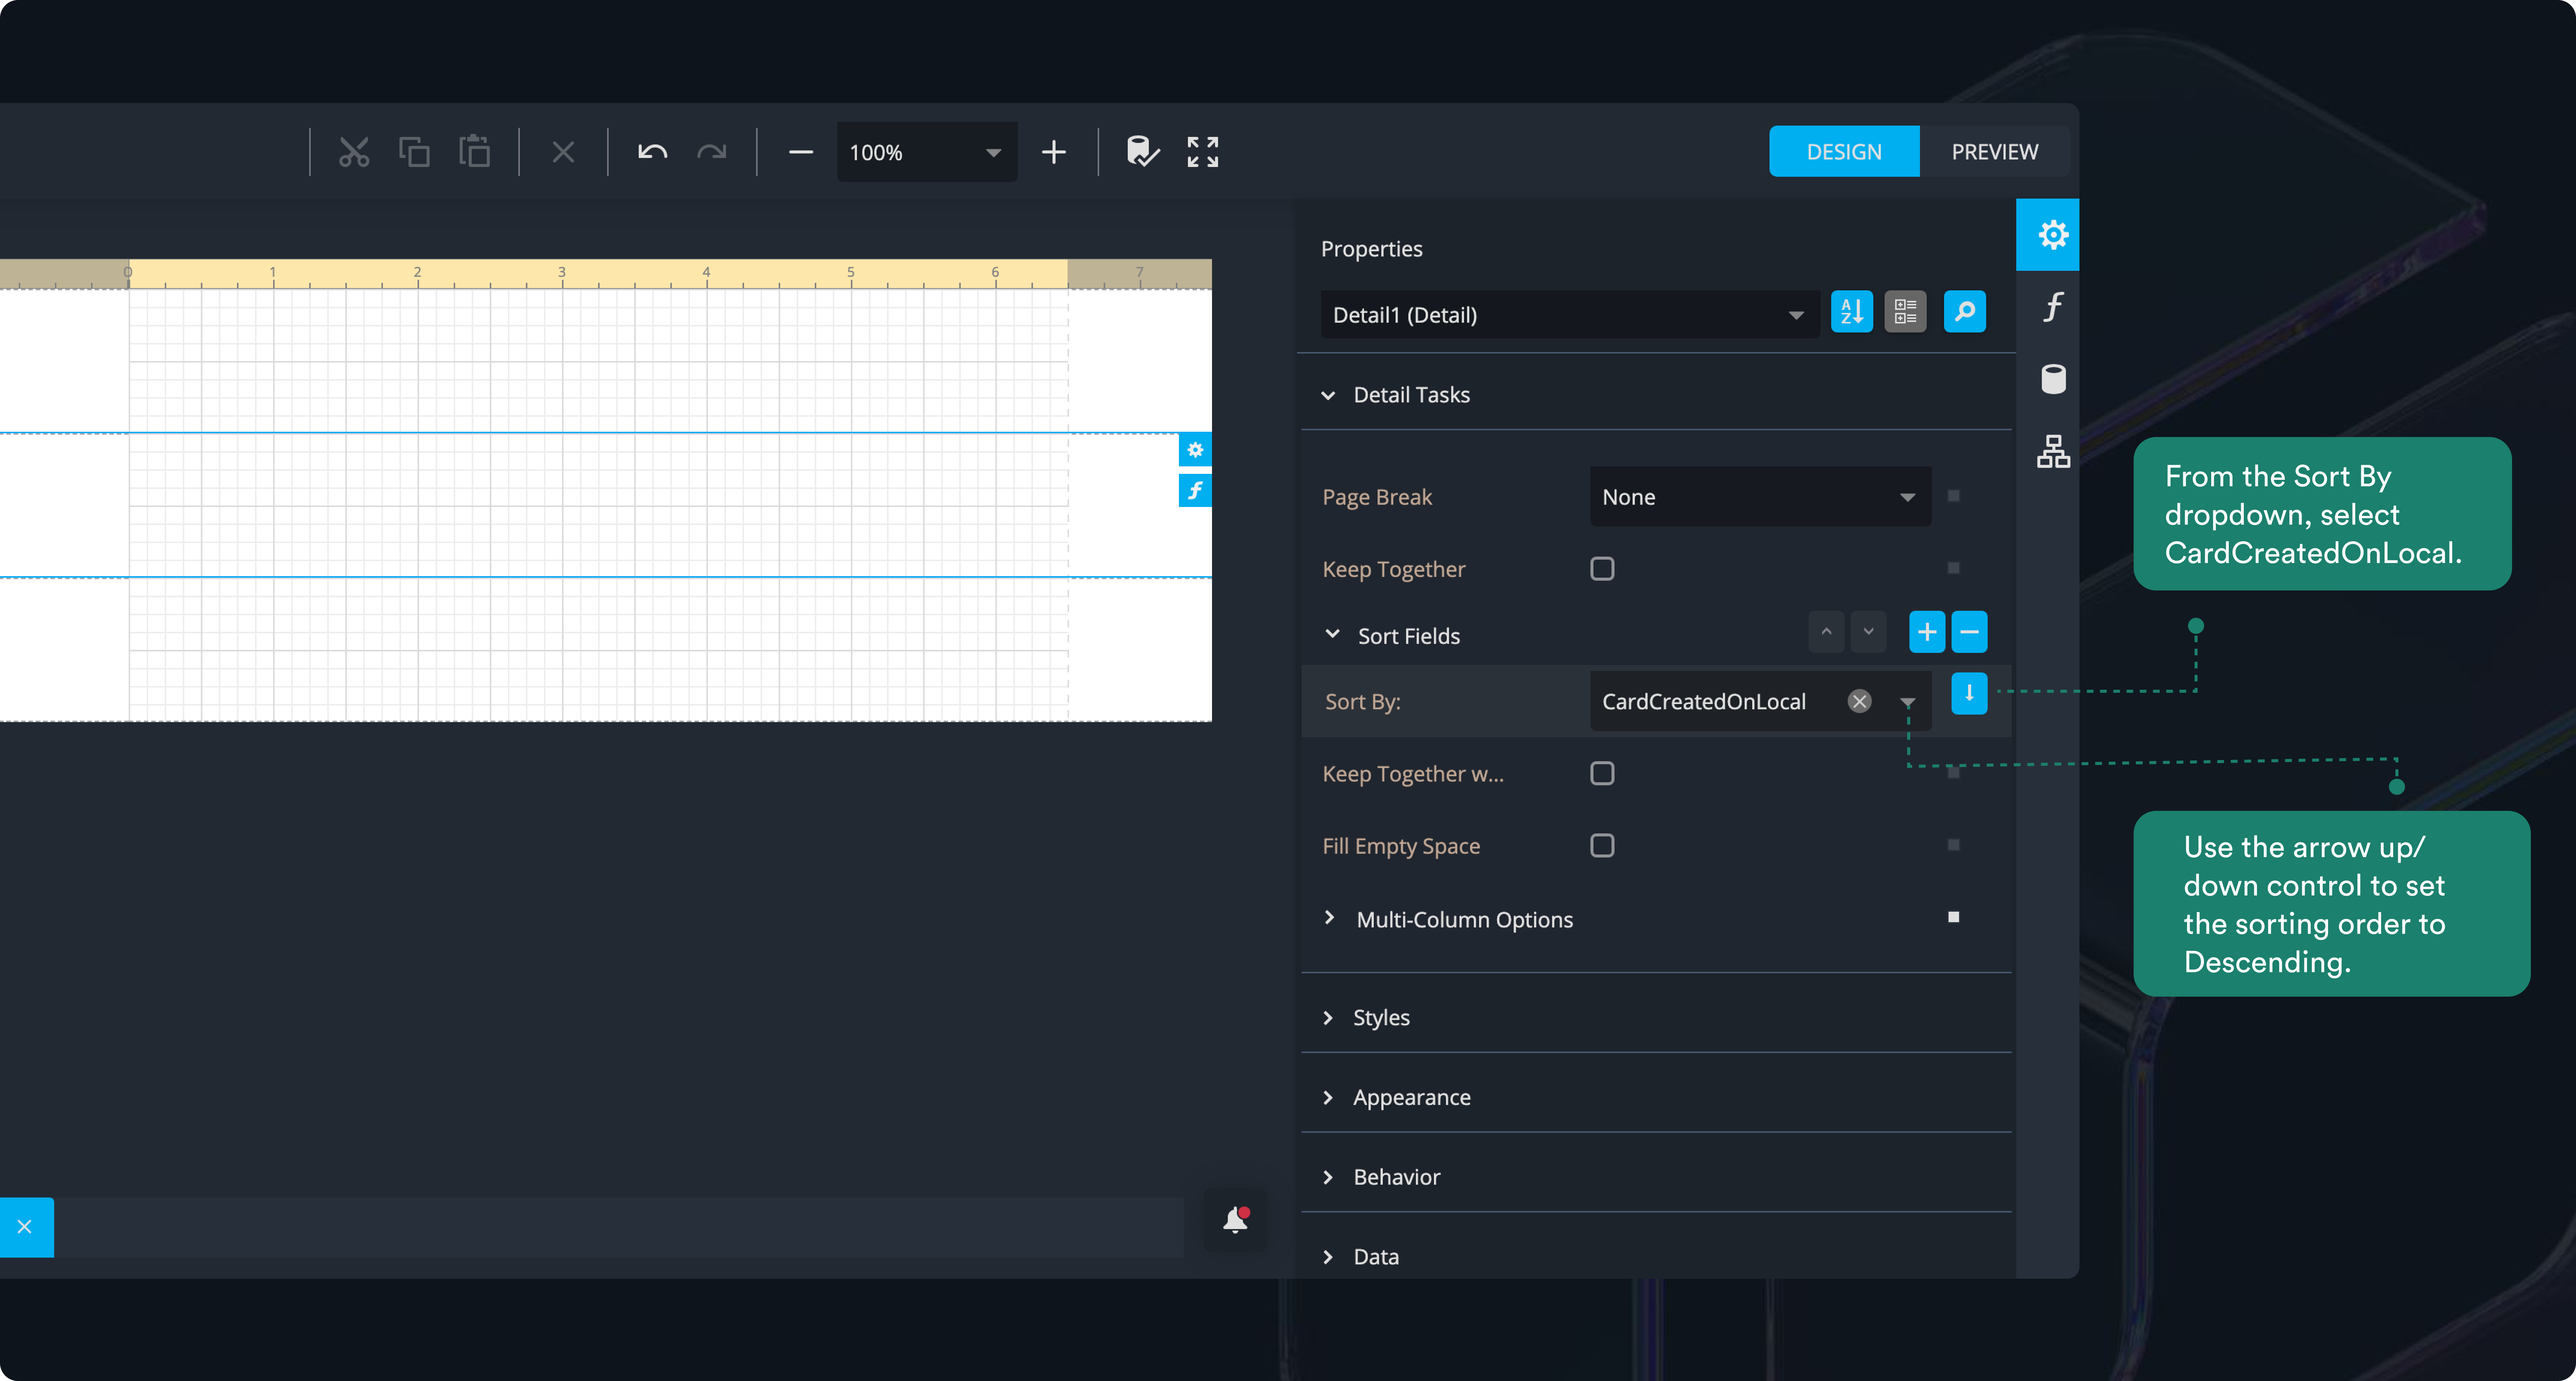
In the Properties panel (top dropdown), select the Detail1 band.
- Expand the Detail Tasks section in the side-panel.
- Open the Sort Fields property.
- Click the plus (+) button to add a sort field.
- From the Sort By dropdown, select CardCreatedOnLocal.
- Use the arrow up/down control to set the sorting order to Descending.
Now that sorting is applied, let’s add a header to the report:
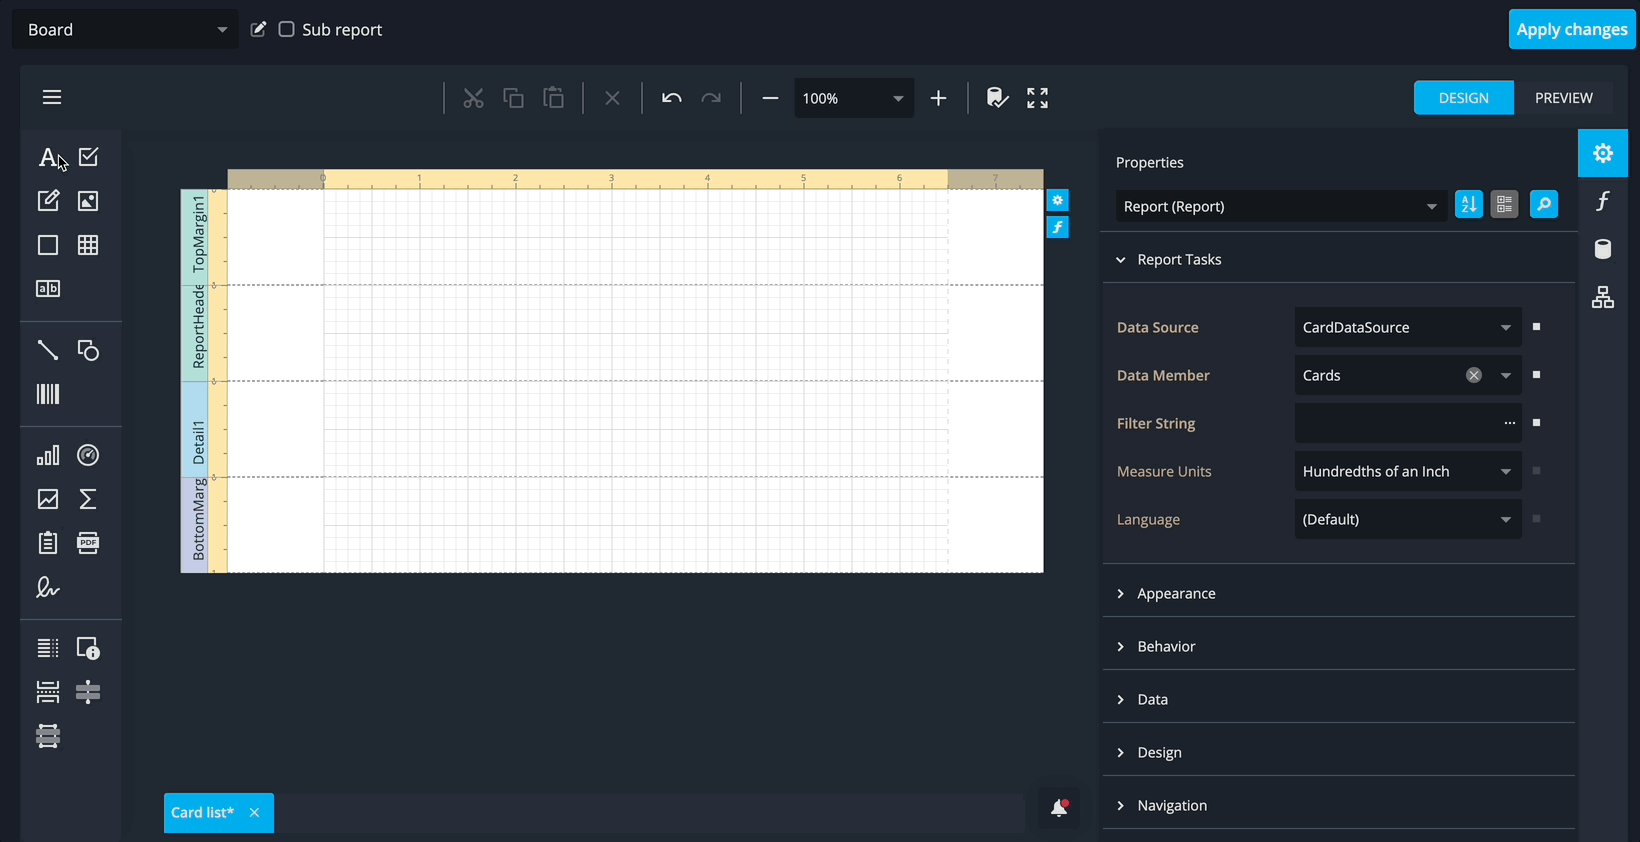
- Right click inside the report and select Insert Report Header Band.
This creates a Report Header band that appears once at the very top of the report—perfect for adding a report title or introductory information.
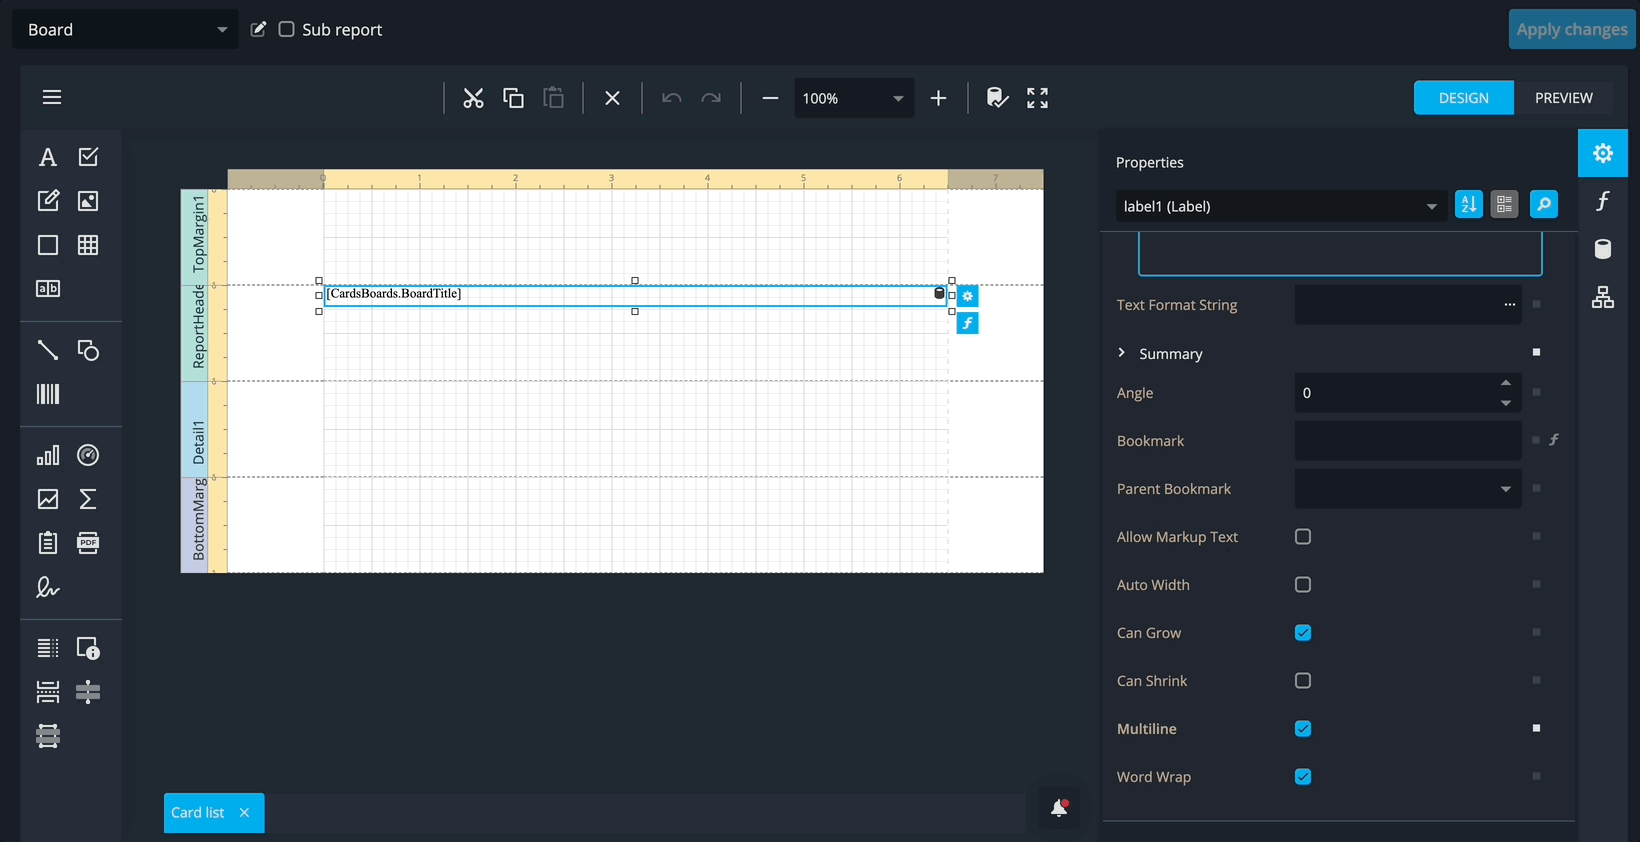
Step 3: Add a report title from the Board
- Drag the “A” label control from the left toolbar and drop it into the Report Header band. Use the drag handle on the right side to stretch it across the page until it snaps to the margin.
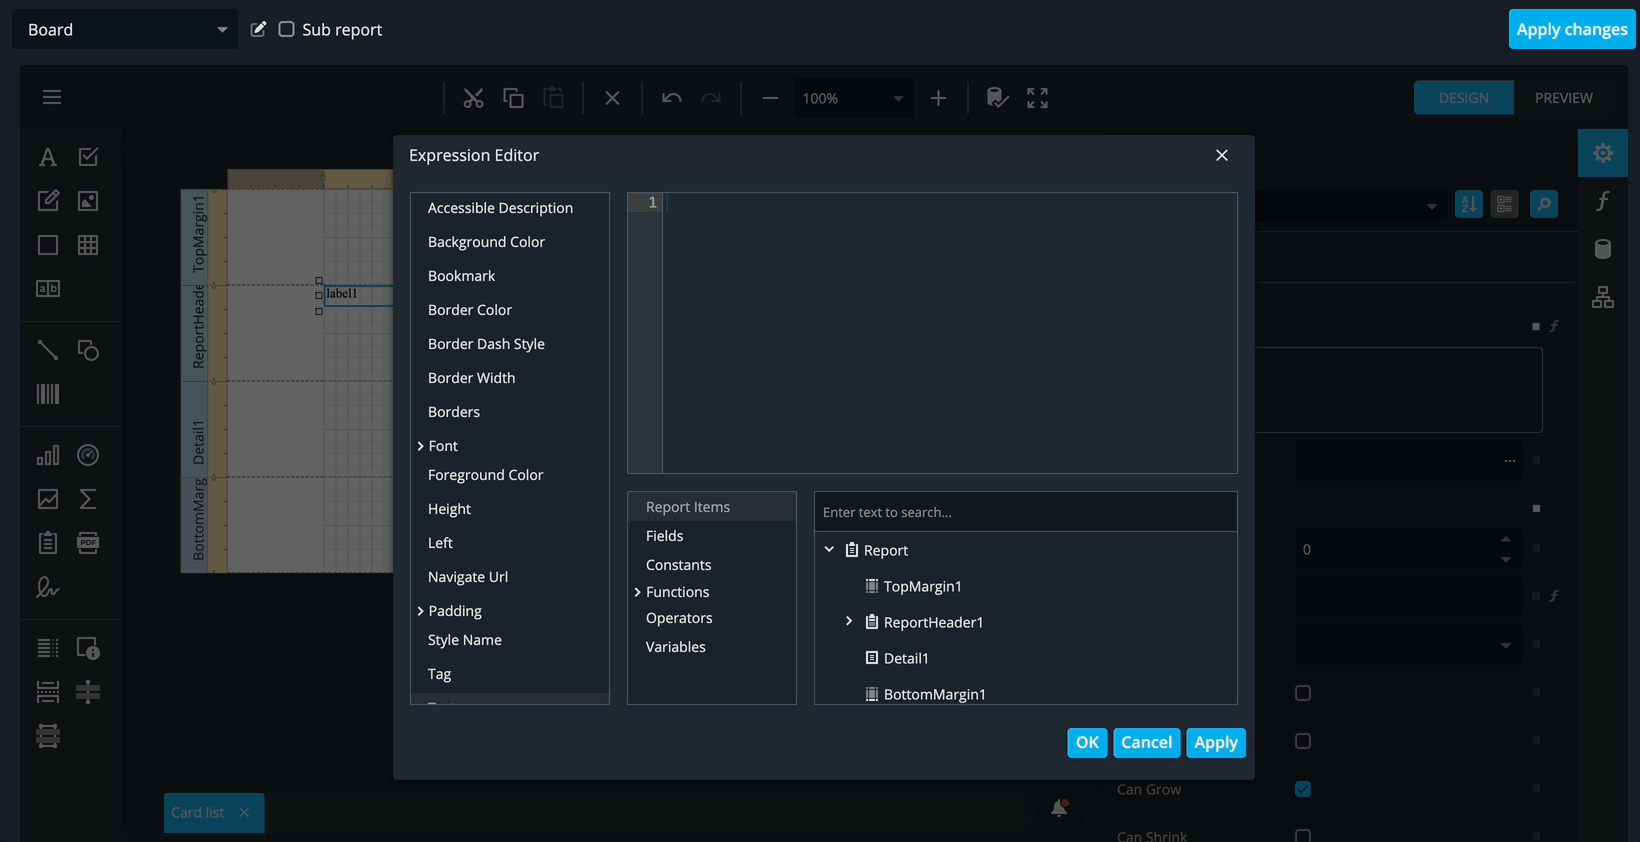
- Next, click the “ƒ” expression button beside the control to open the Expression Editor.
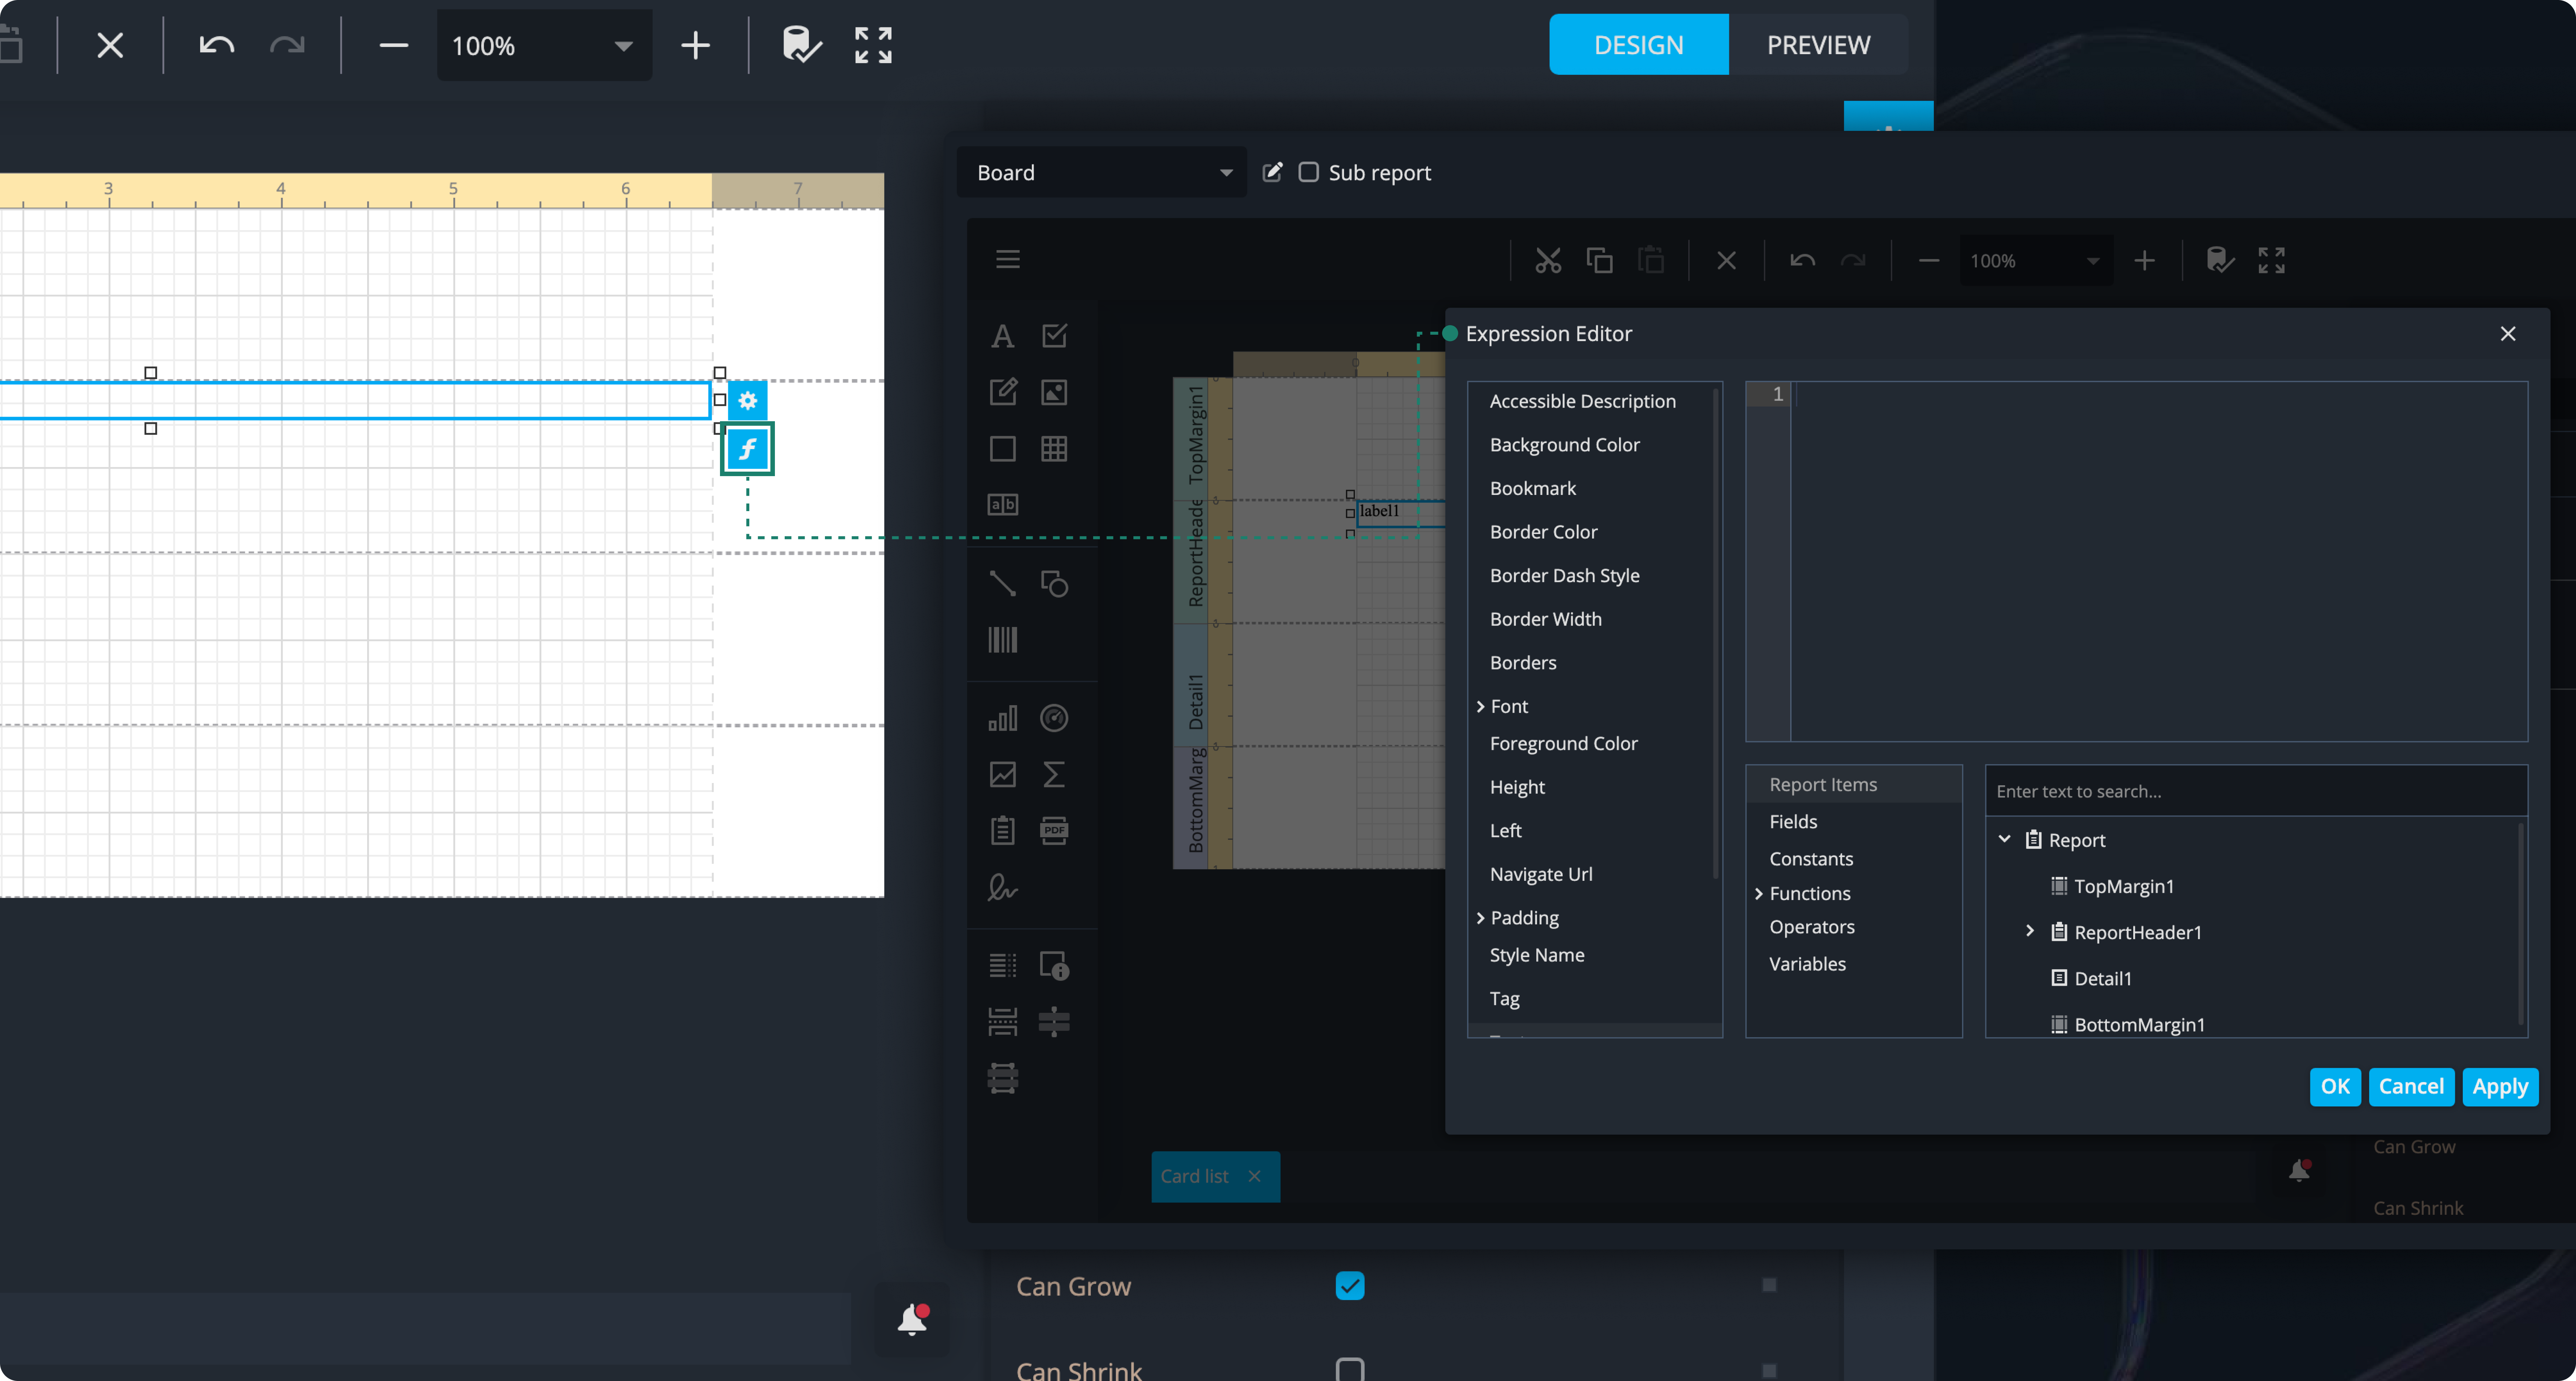
- Make sure Text is selected on the left, then expand Report Items → Fields, search for BoardTitle, and double-click it to insert the field into the expression. Confirm with OK to close the editor.
We are now styling the header of the report so it stands out and clearly shows the board’s title. This makes the report more readable and visually appealing.
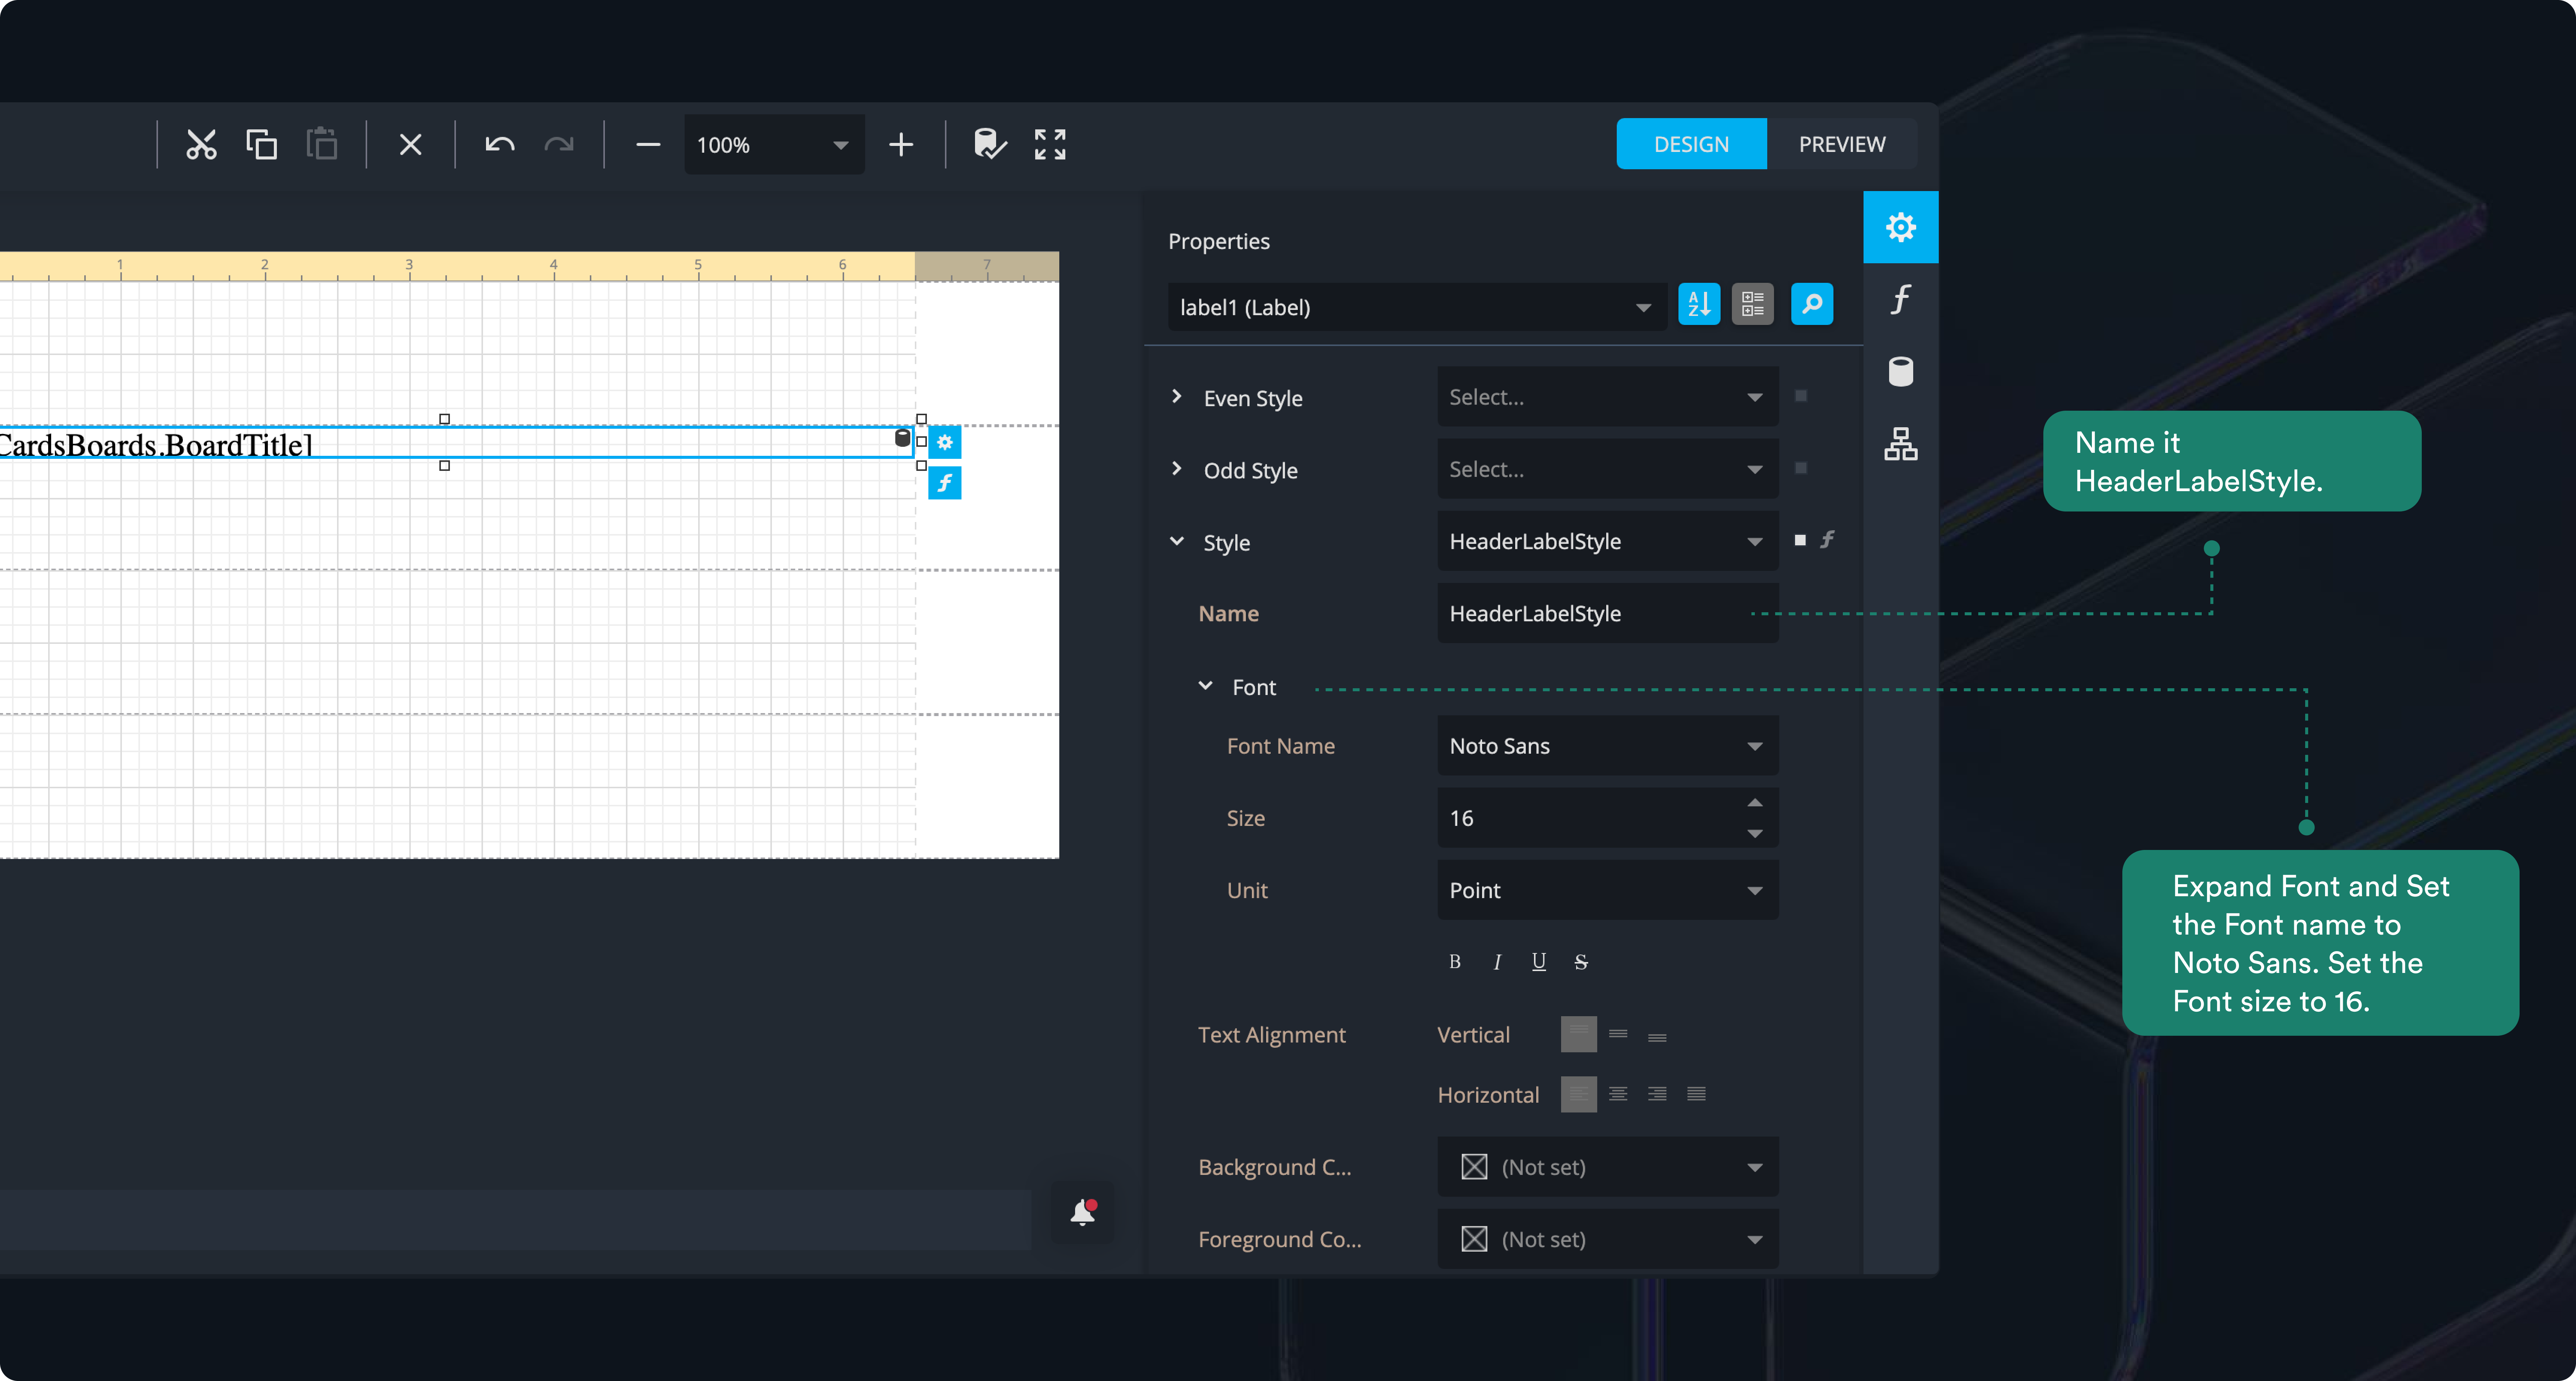
- Click on the BoardTitle control in the header section to bring up its properties on the side-panel. Scroll down and expand the Styles section and create a new style.
- Name it HeaderLabelStyle.
- Expand Font and Set the Font name to Noto Sans.
- Set the Font size to 16.
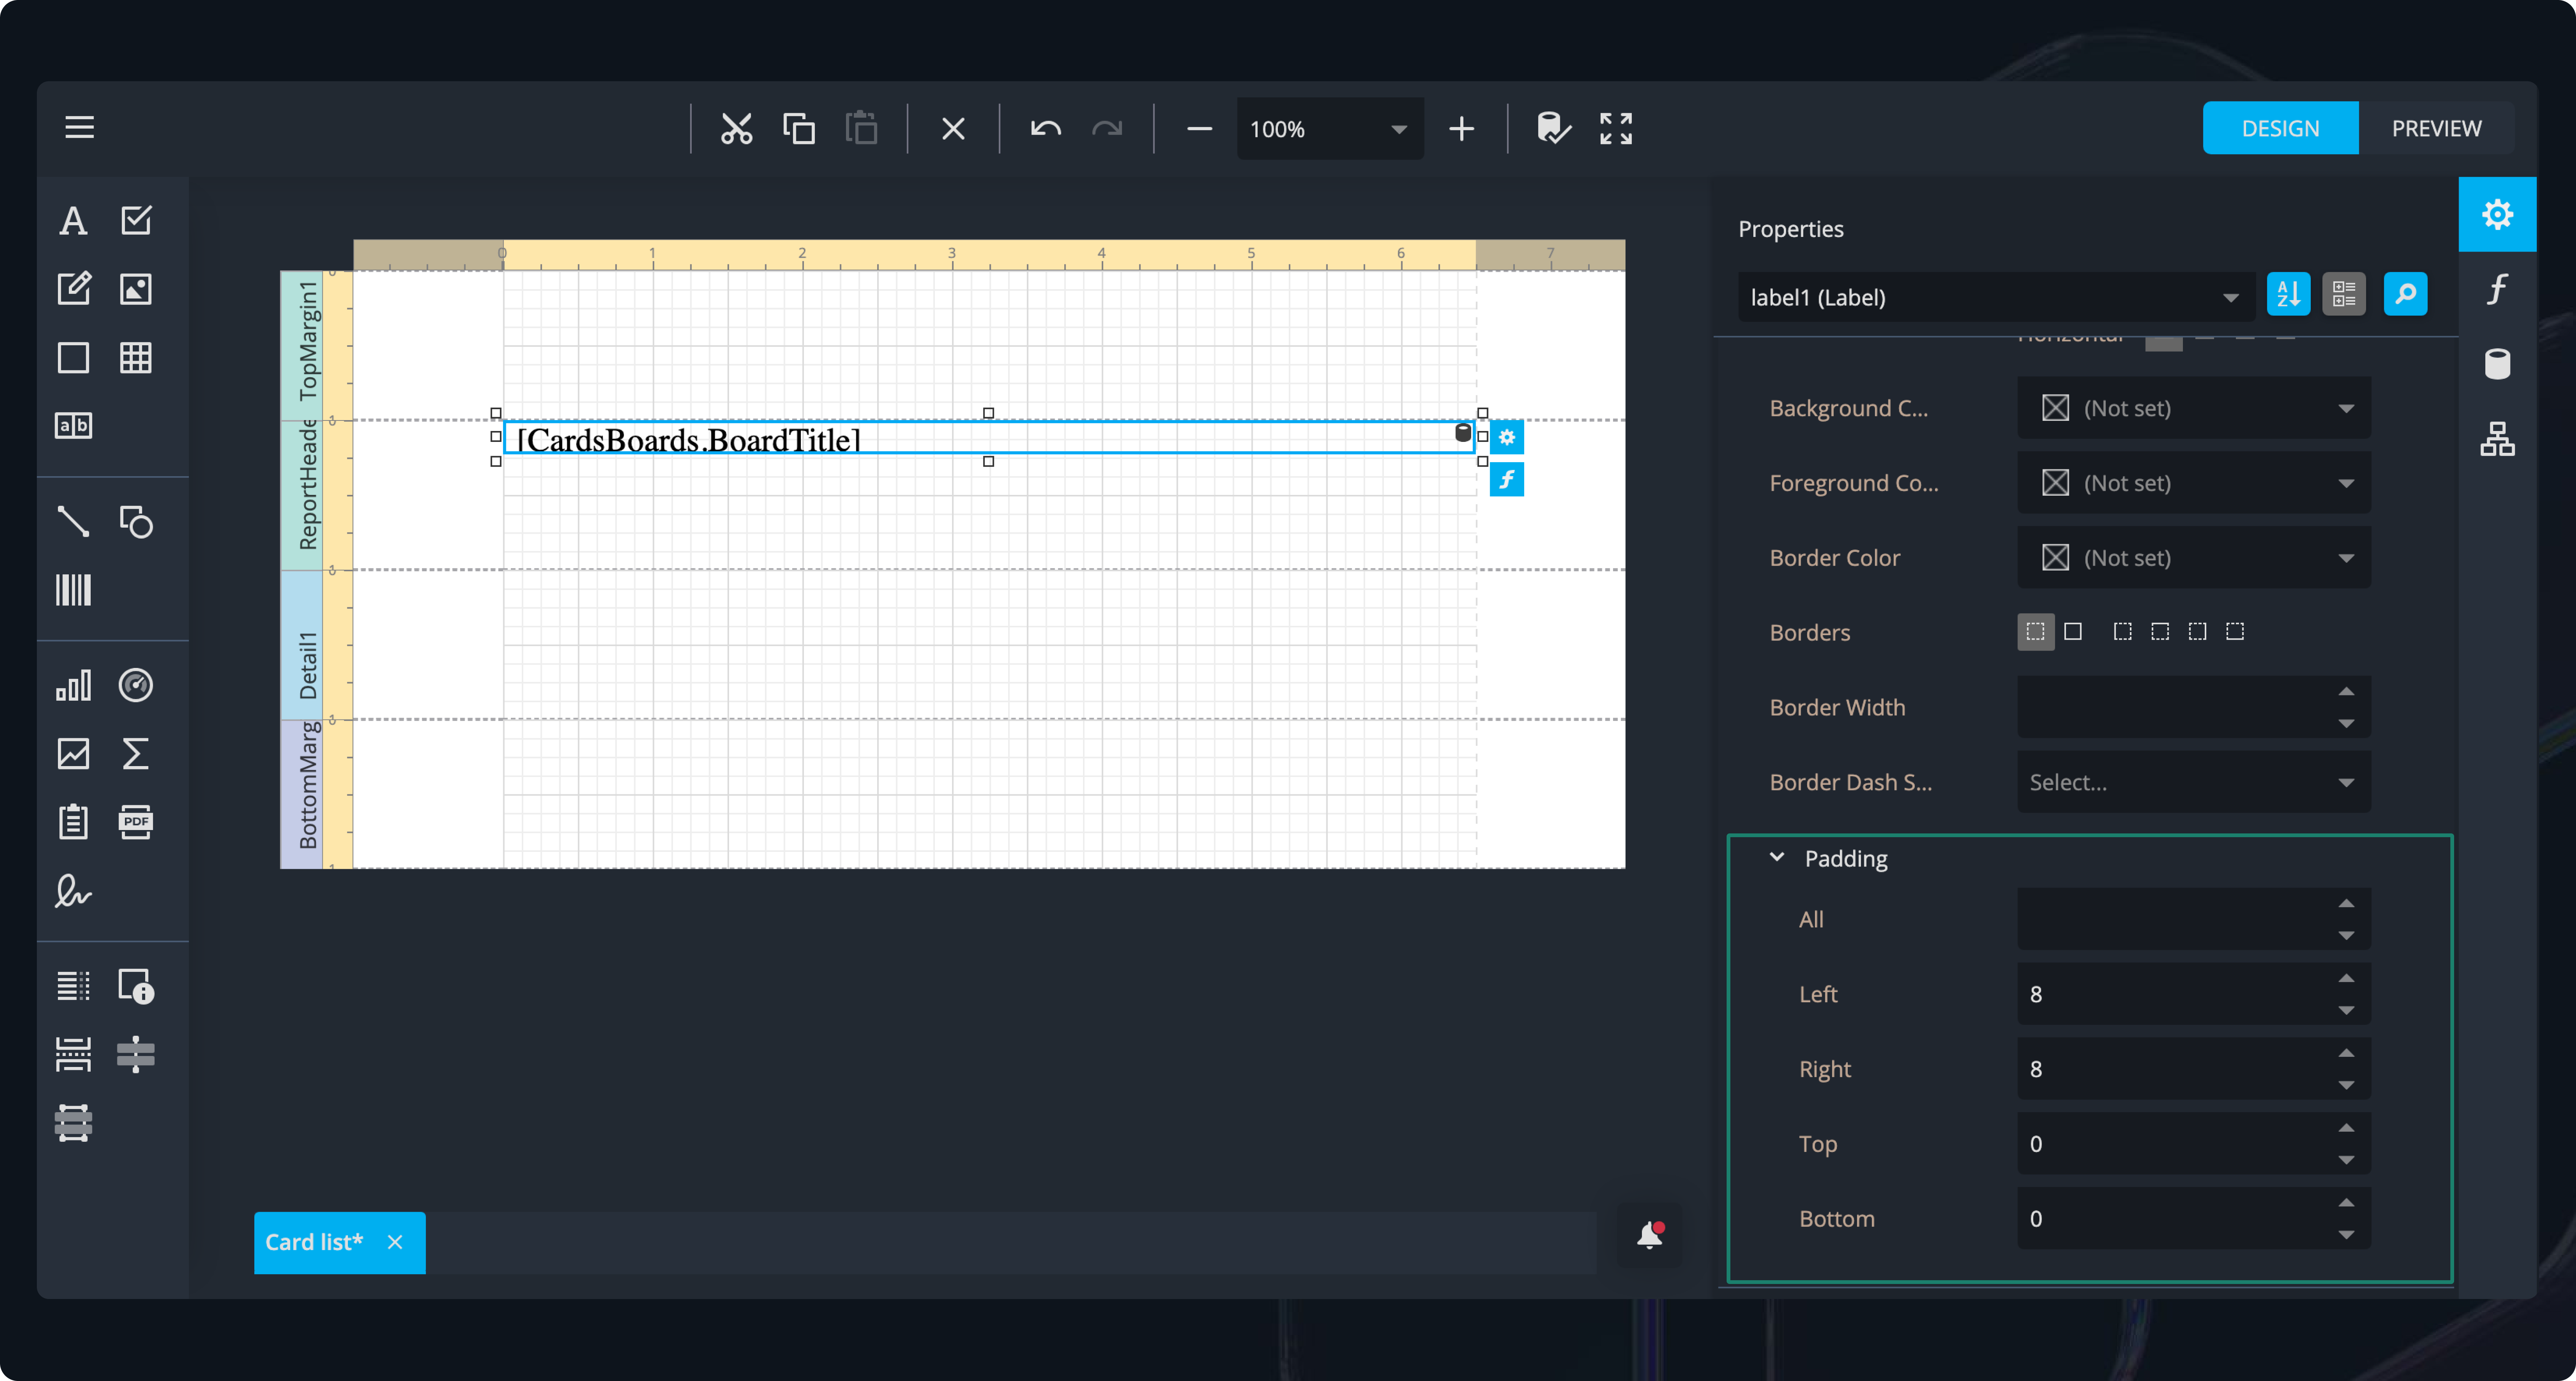
- Scroll down and expand Padding section
- Set left and right padding to 8.
- Top and bottom padding to 0.
Now, you can define the layout and name for the header control so it’s easy to identify and positioned correctly.
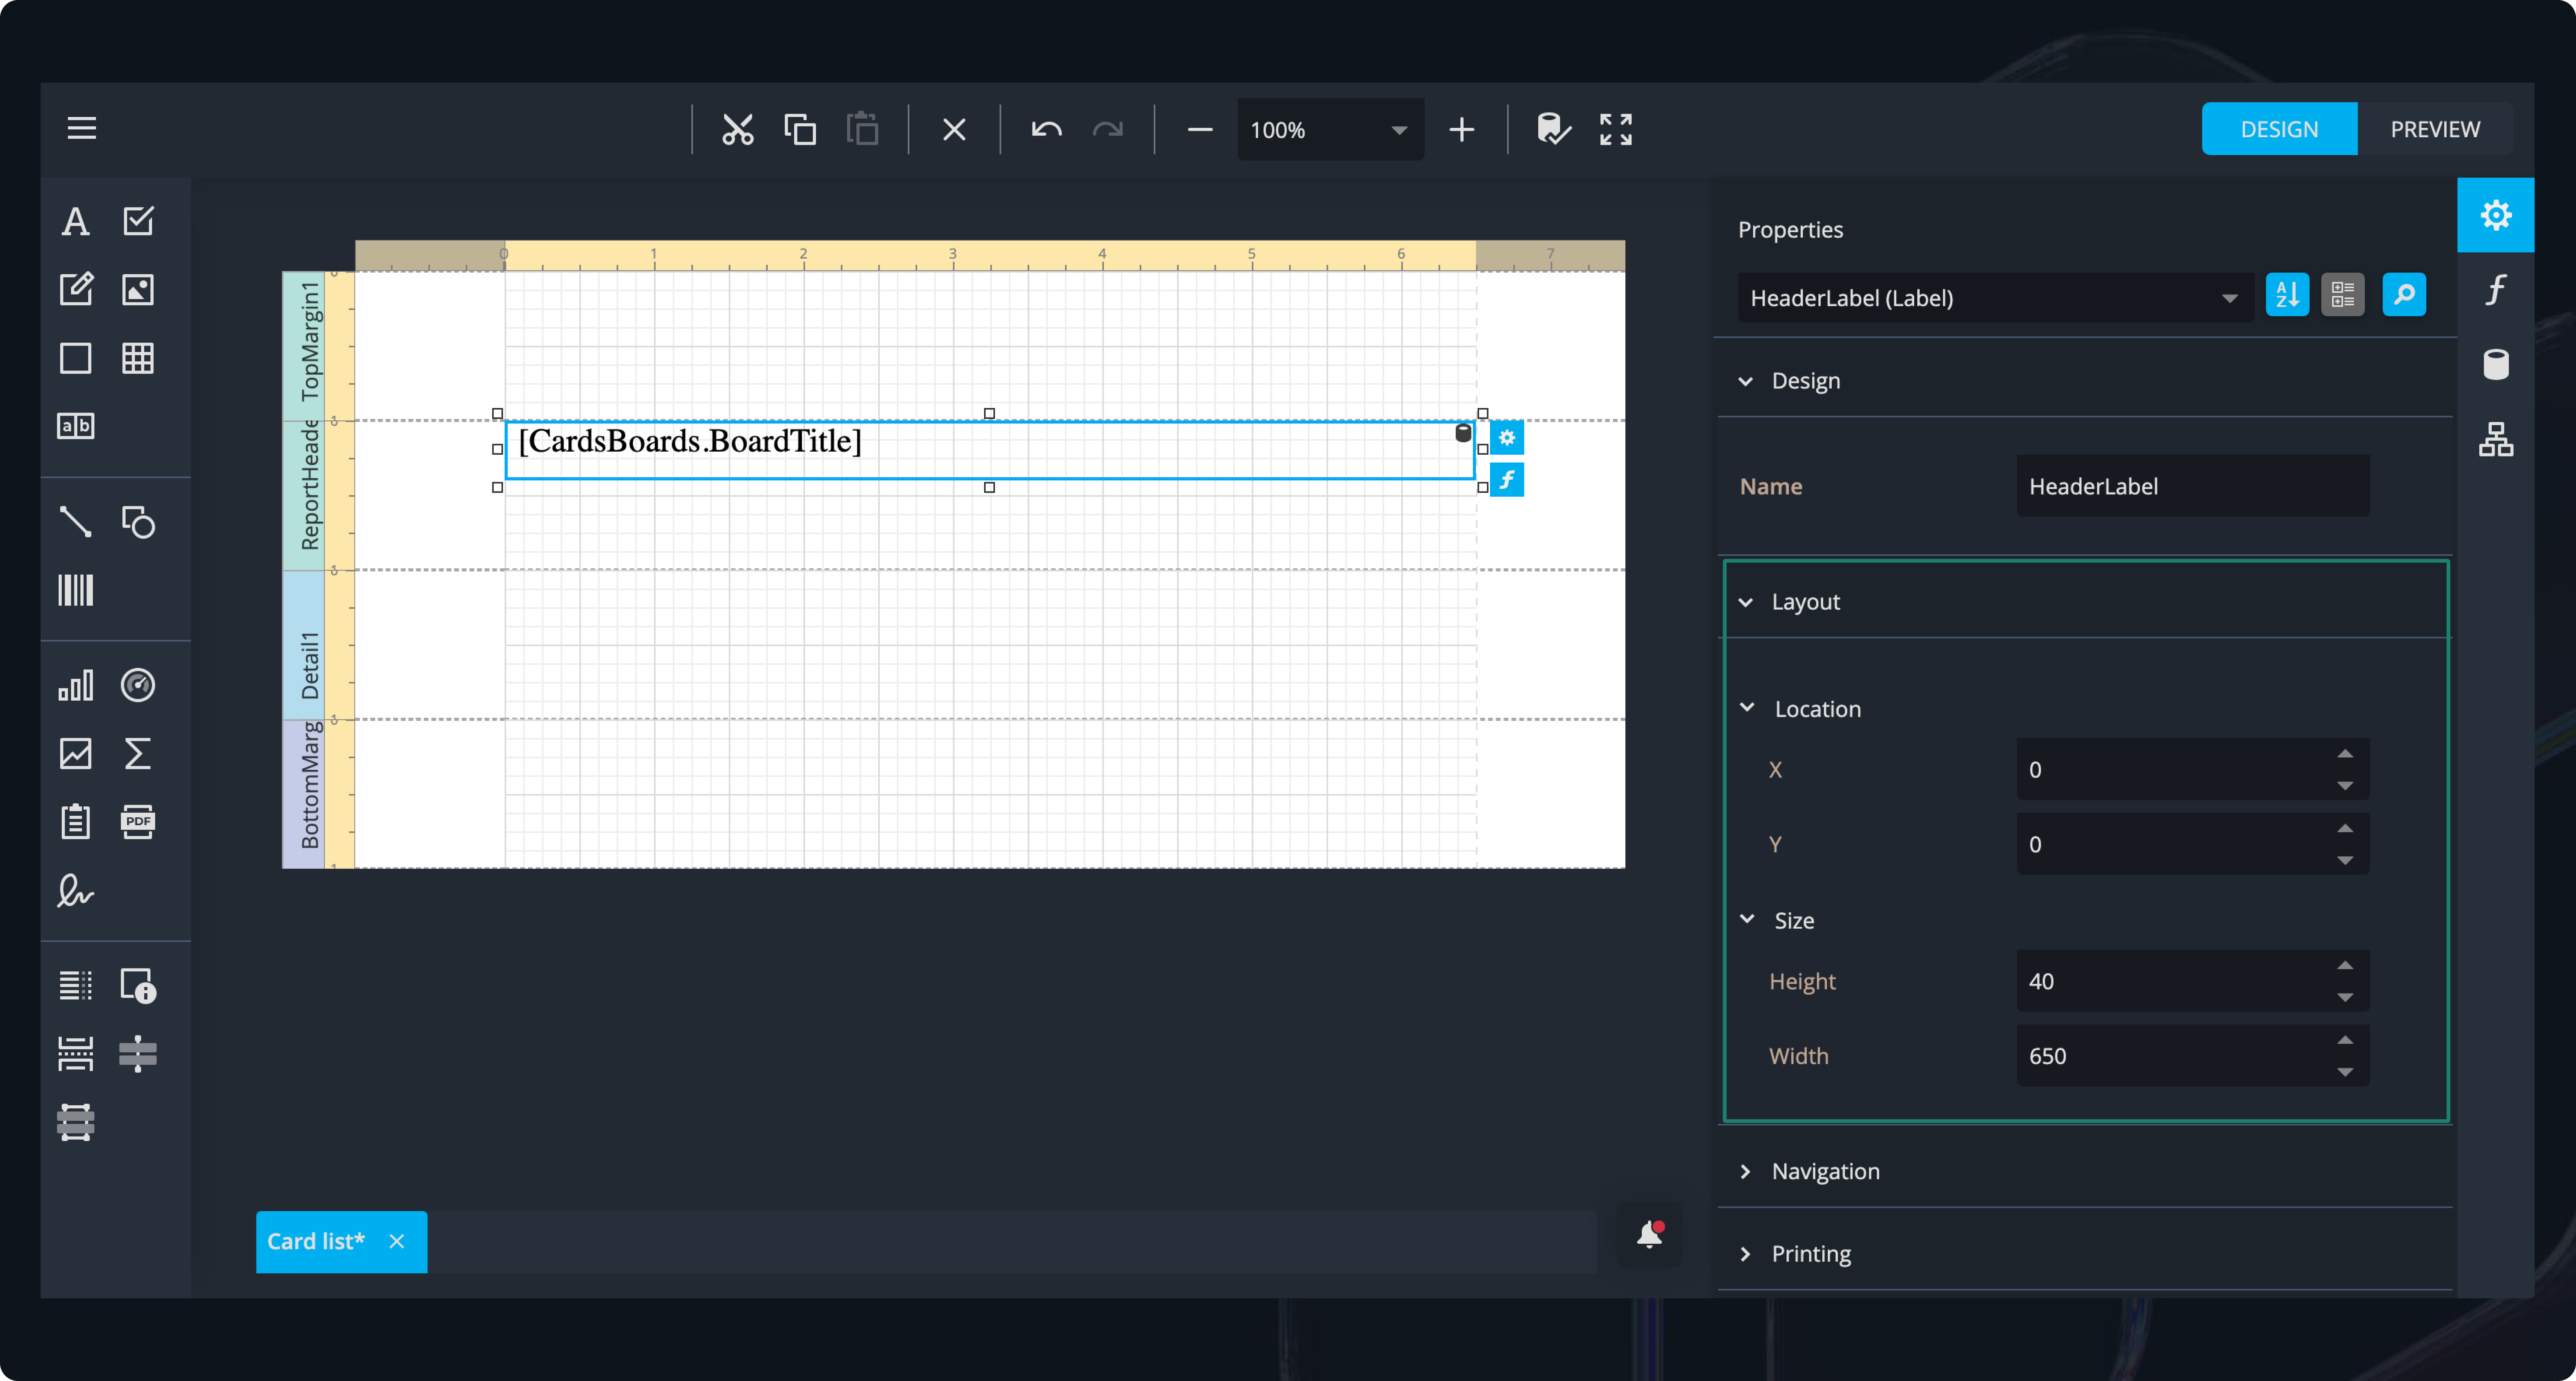
- Scroll down and expand the Design section near the bottom of the side-panel. Set the Name to HeaderLabel. Naming controls ensures they are easy to identify in more complex reports.

- Expand the Layout section under Design. Set Location X and Y to 0, Height to 40, and Width to 650.
- Select ReportHeader1 from the properties dropdown at the top of the side-panel. Scroll down to the Layout section and set Height to 60.
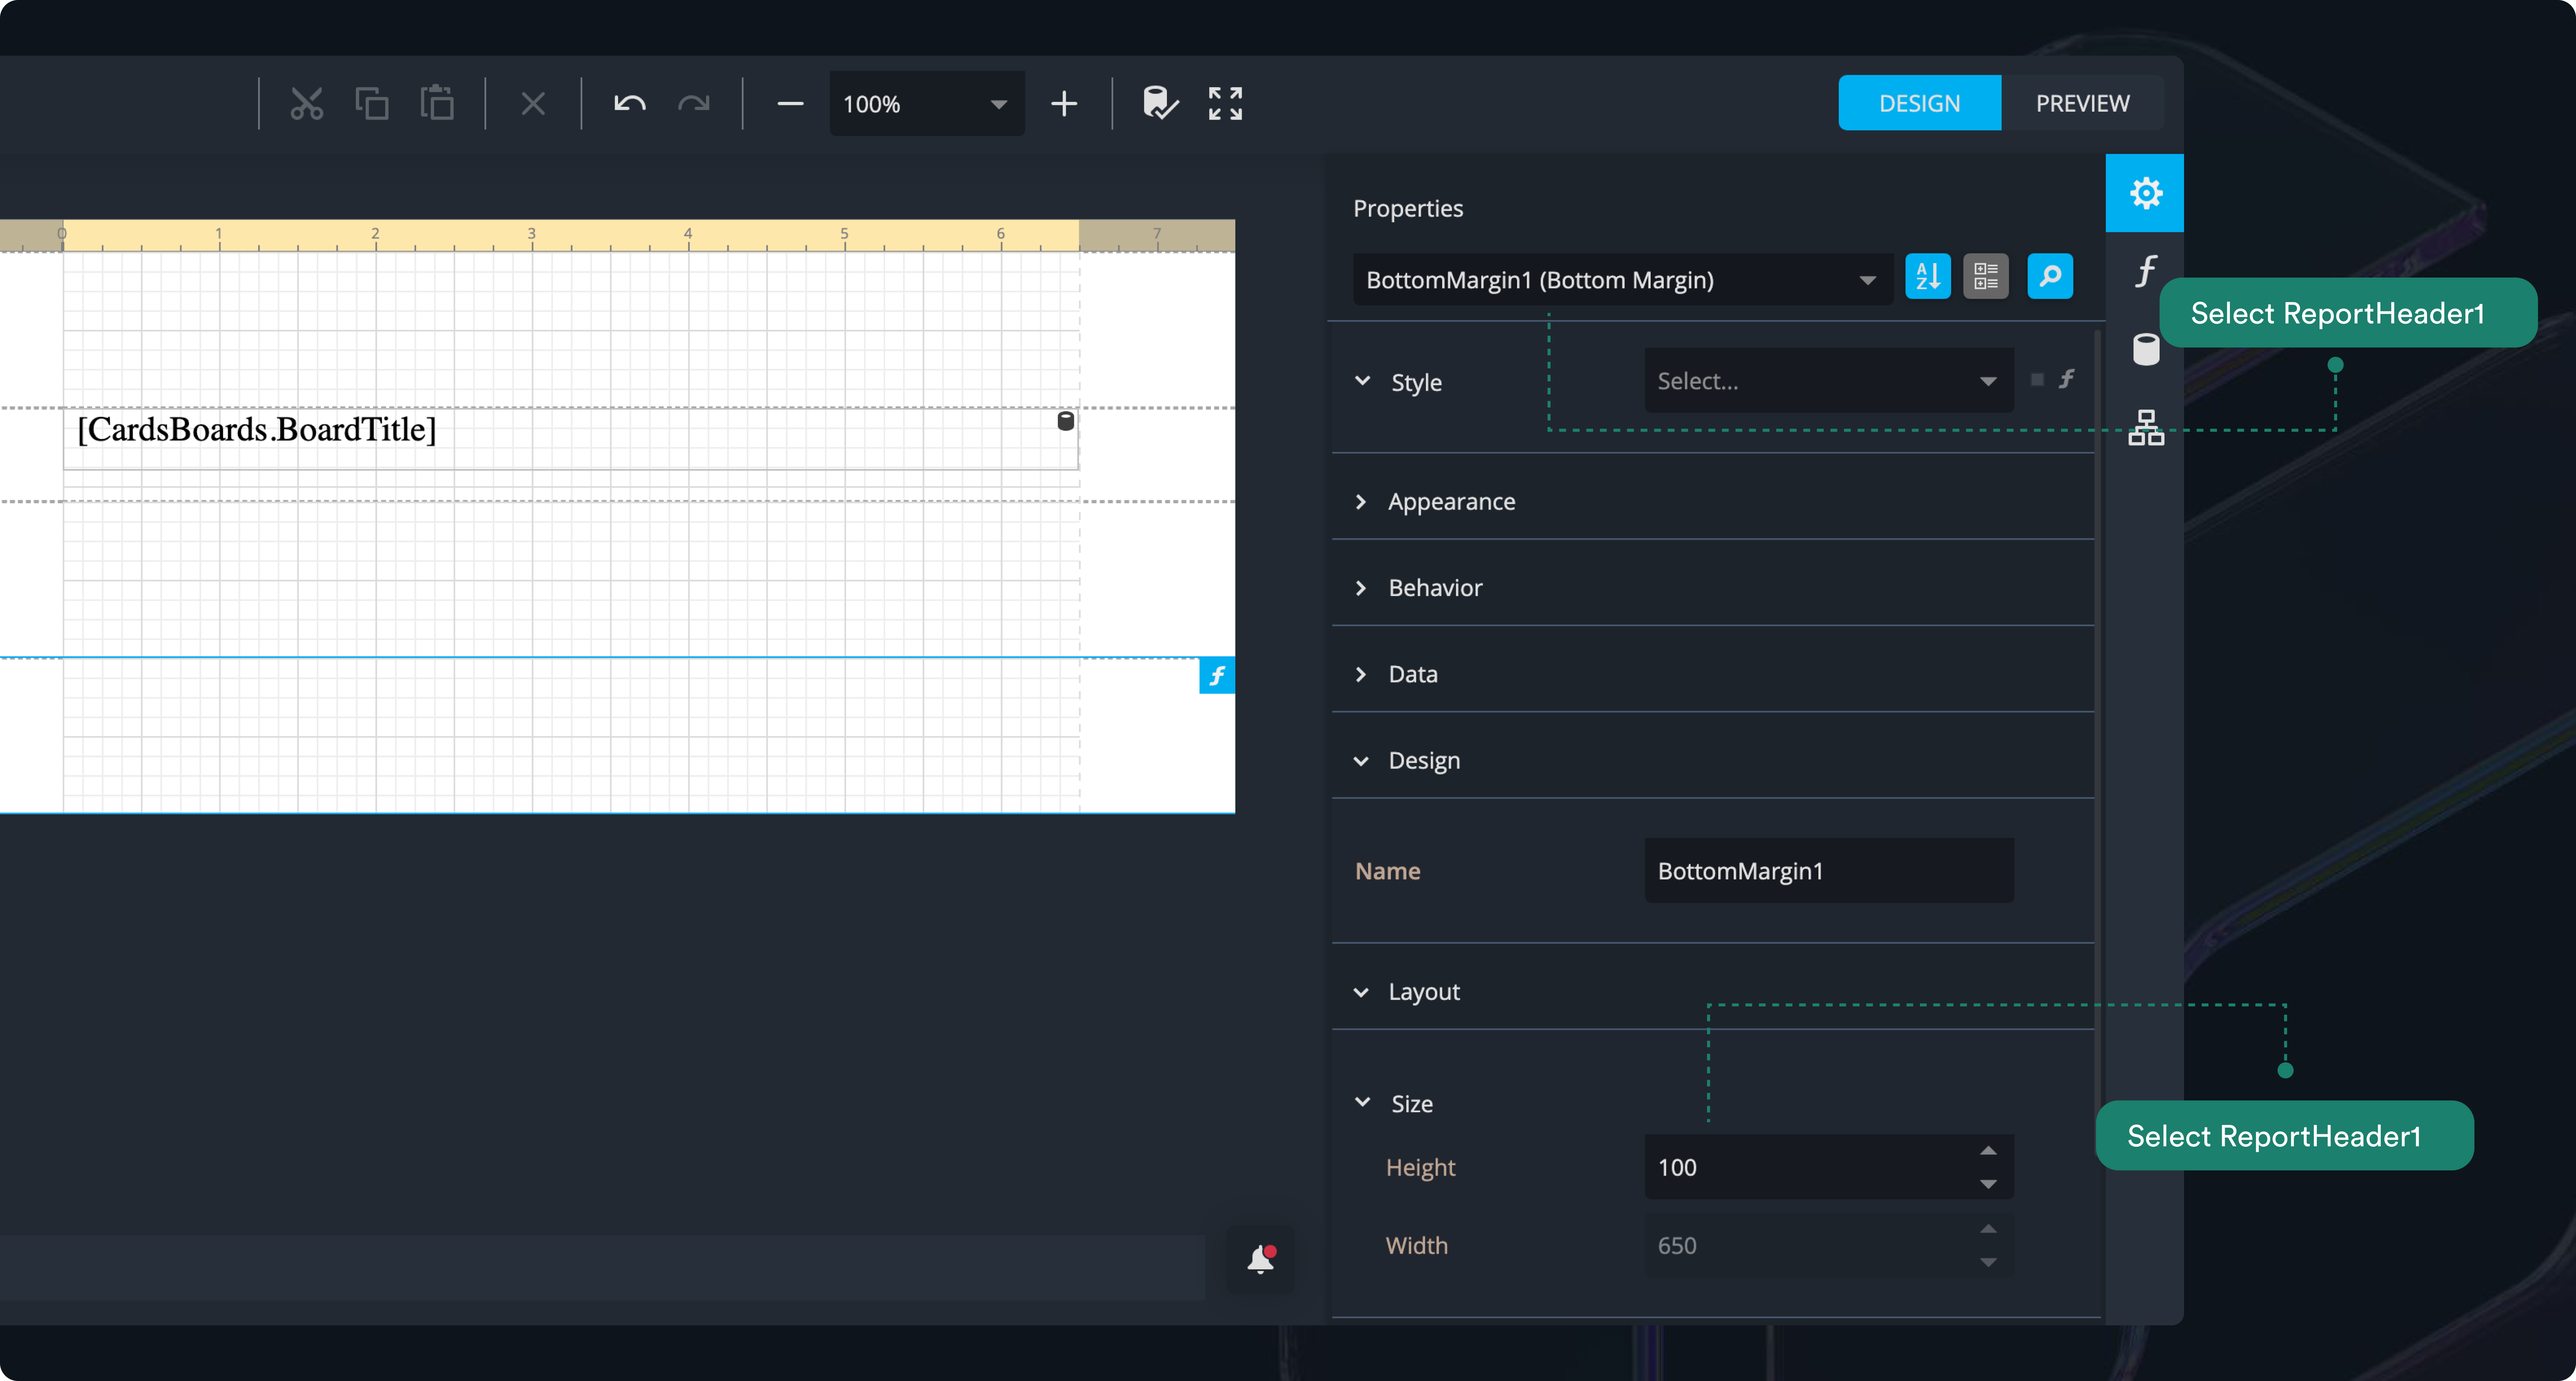
This increases the space between the board title and the controls below it, improving readability.
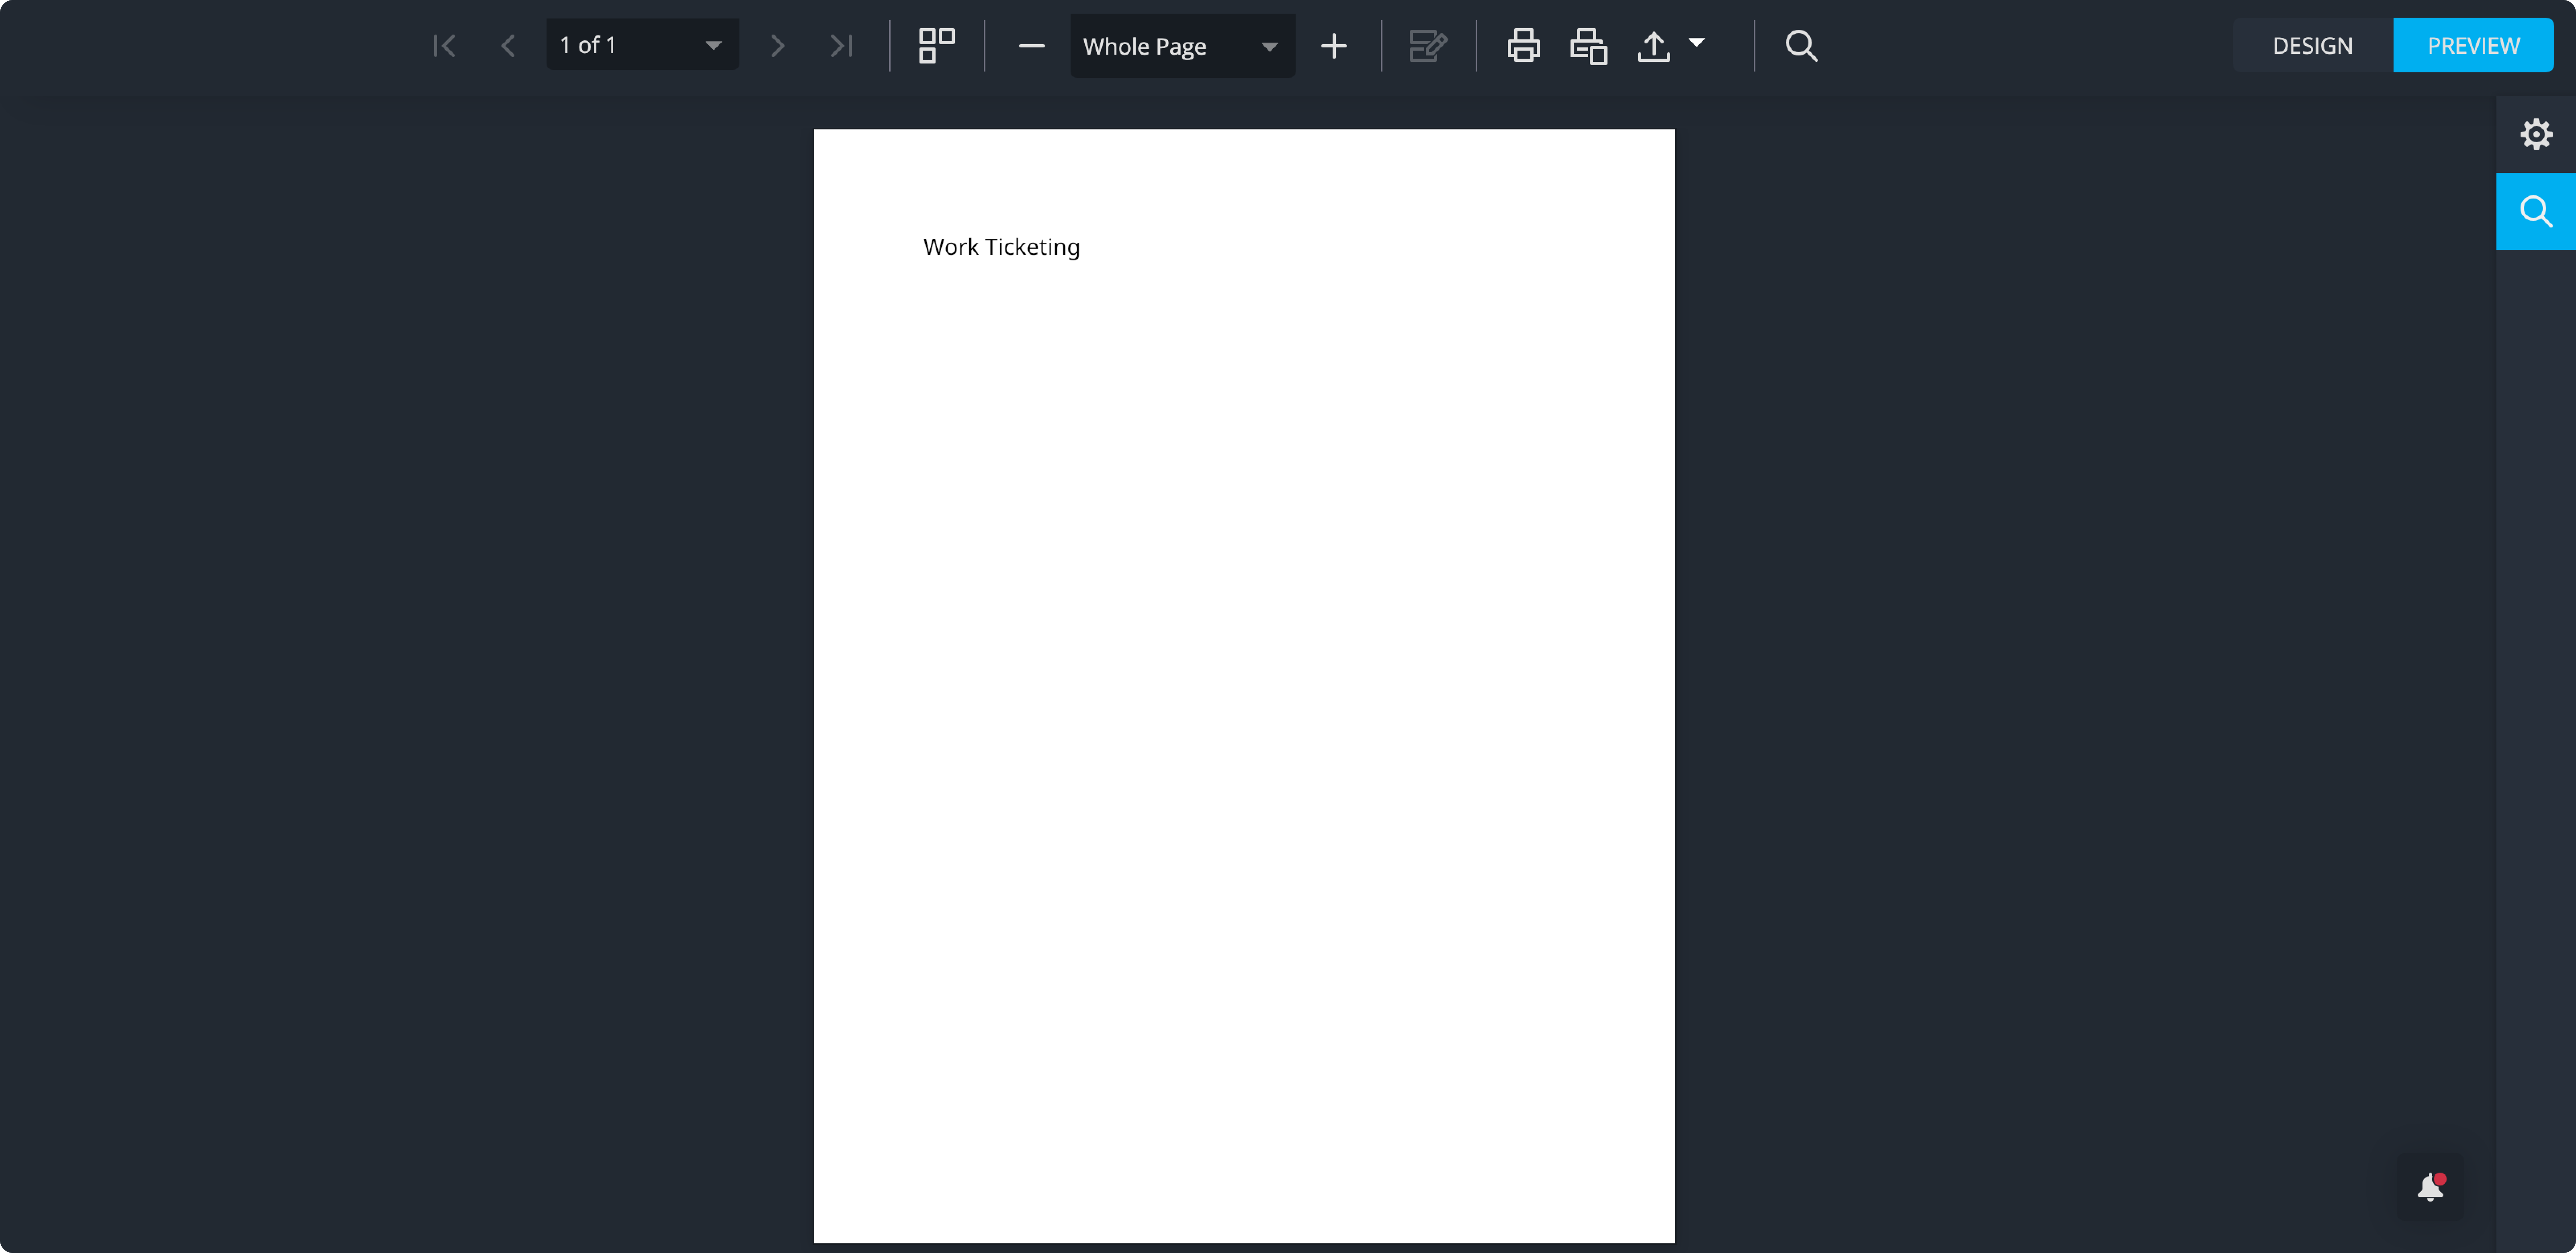
- You can click on PREVIEW to see the result of the changes to the HeaderLabel.
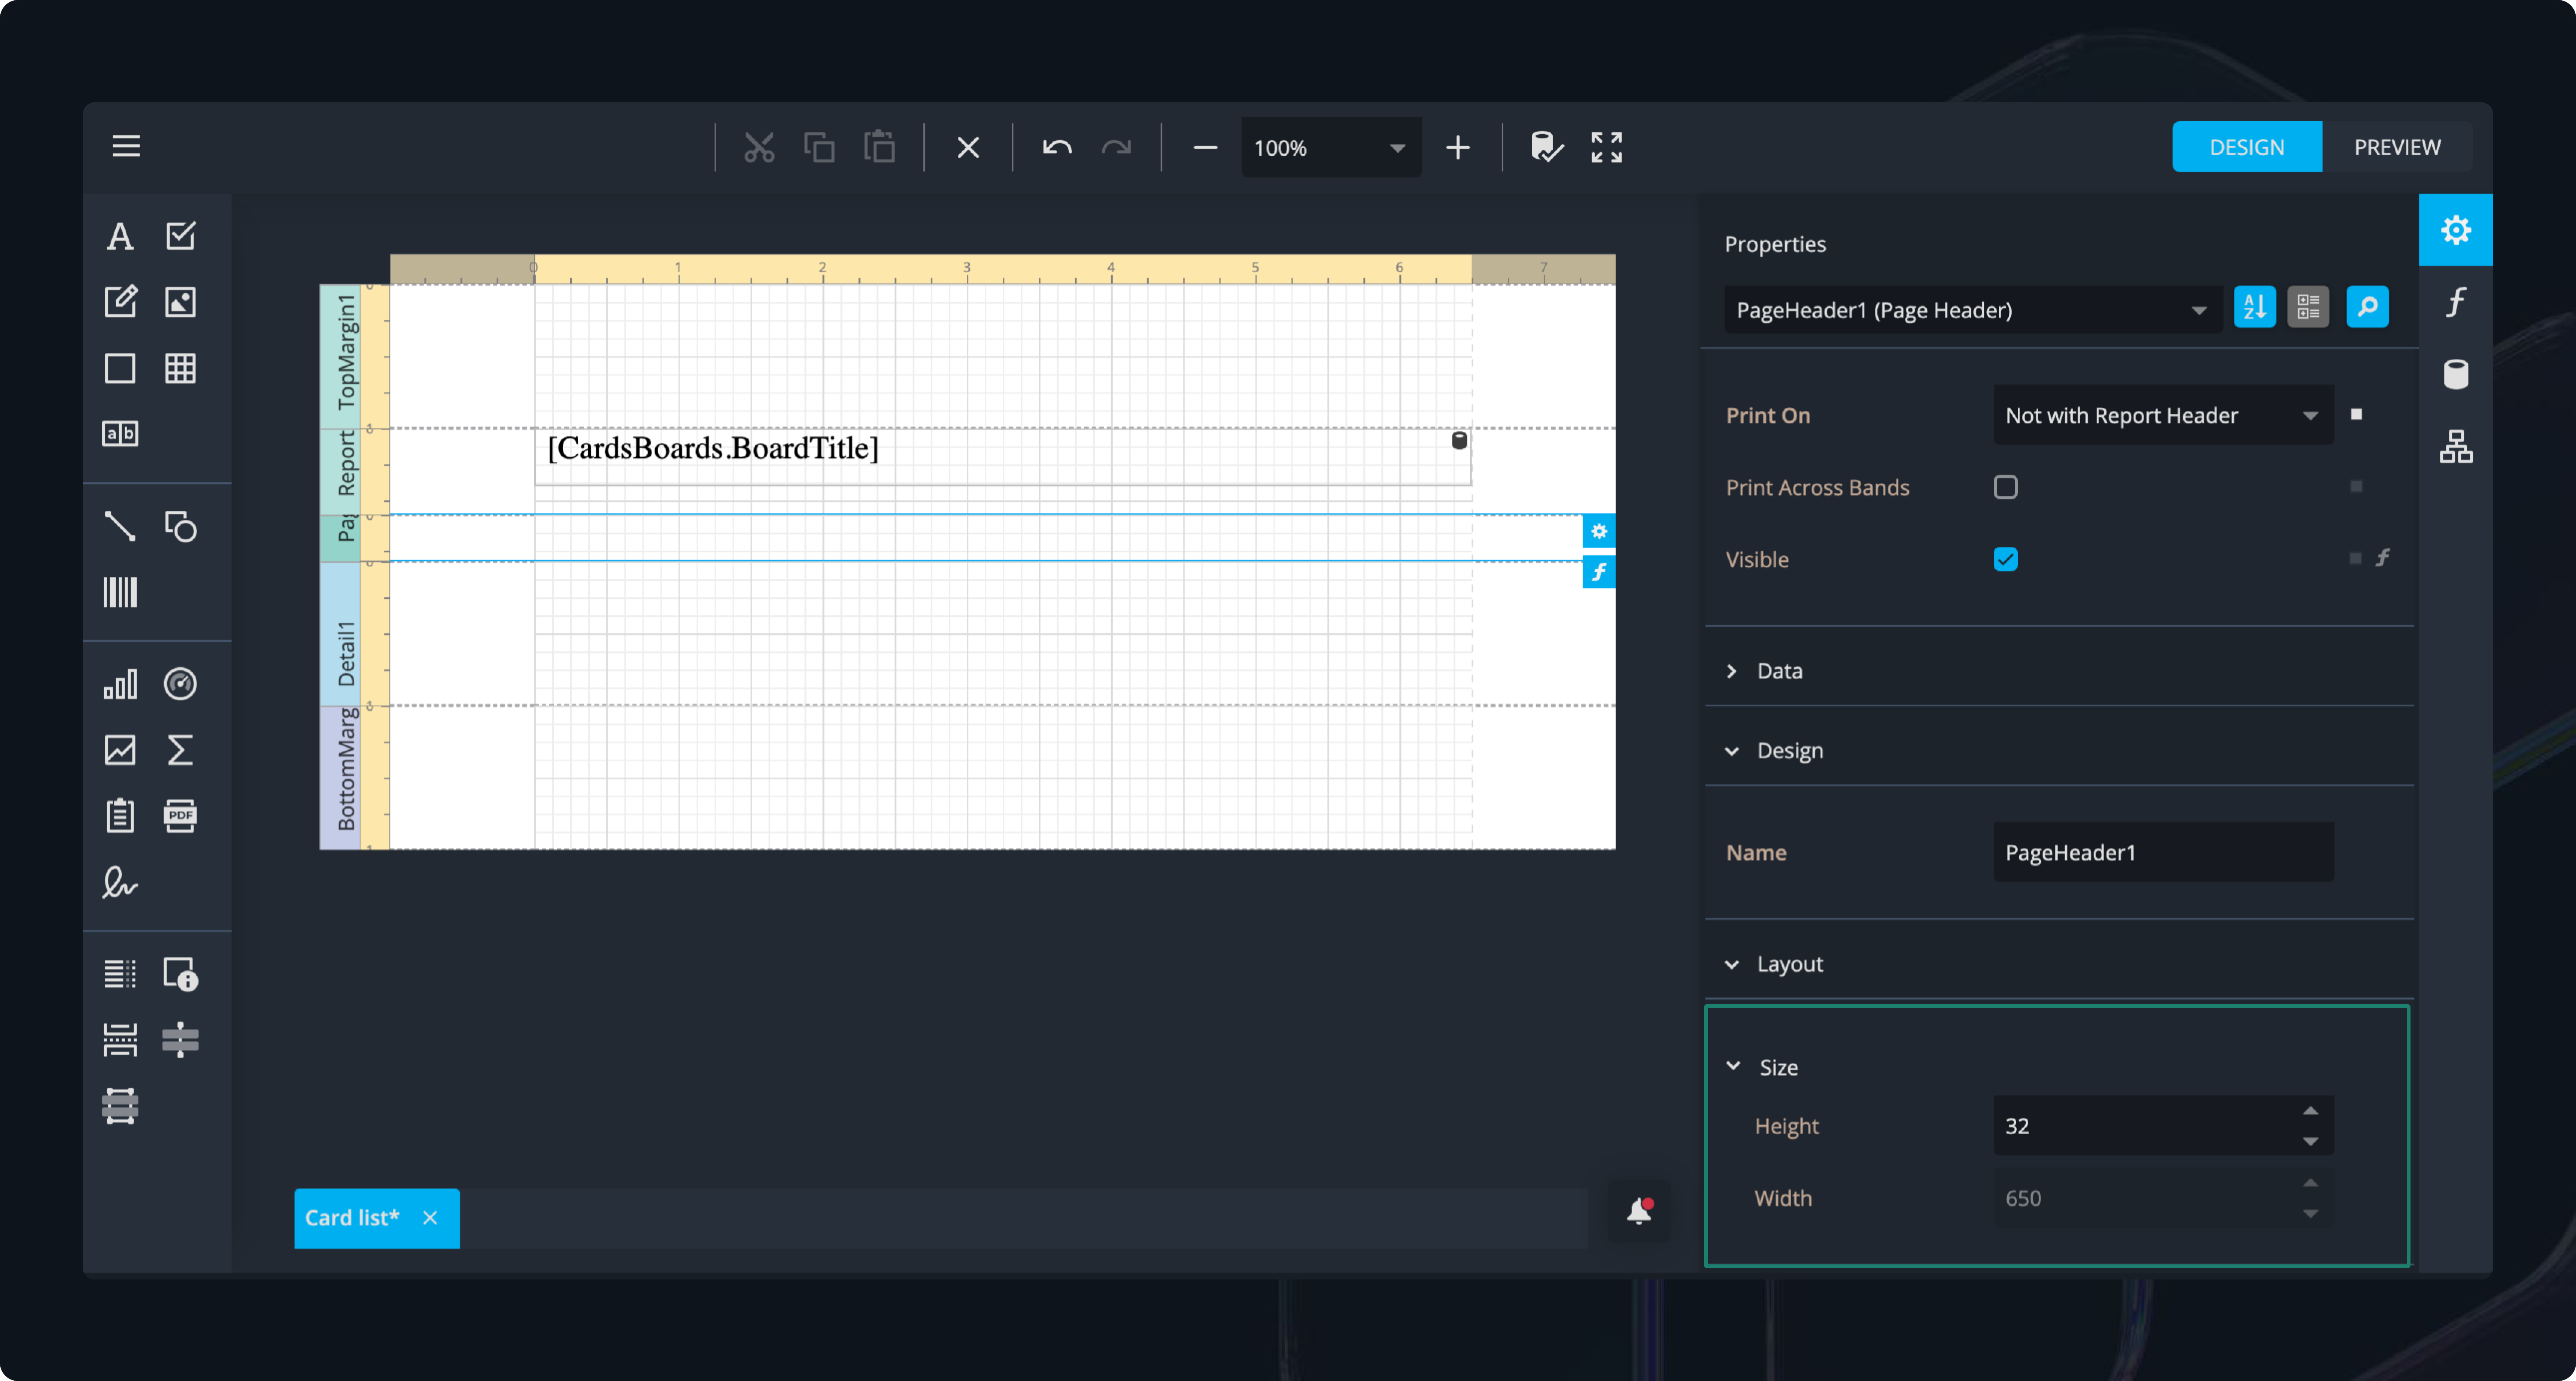
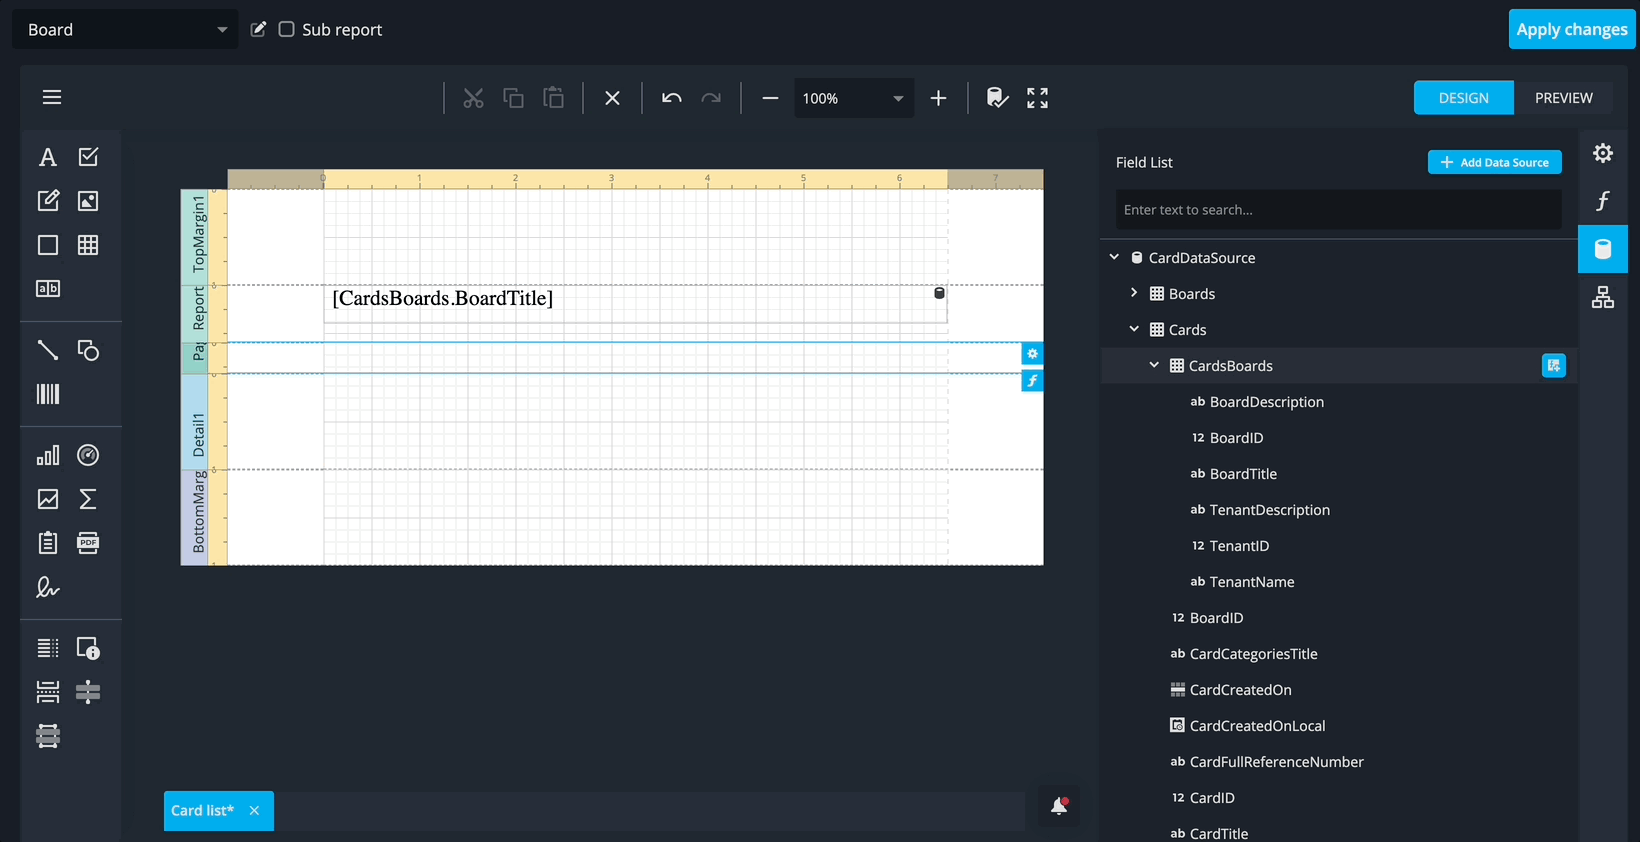
4. Add a Page Header Band
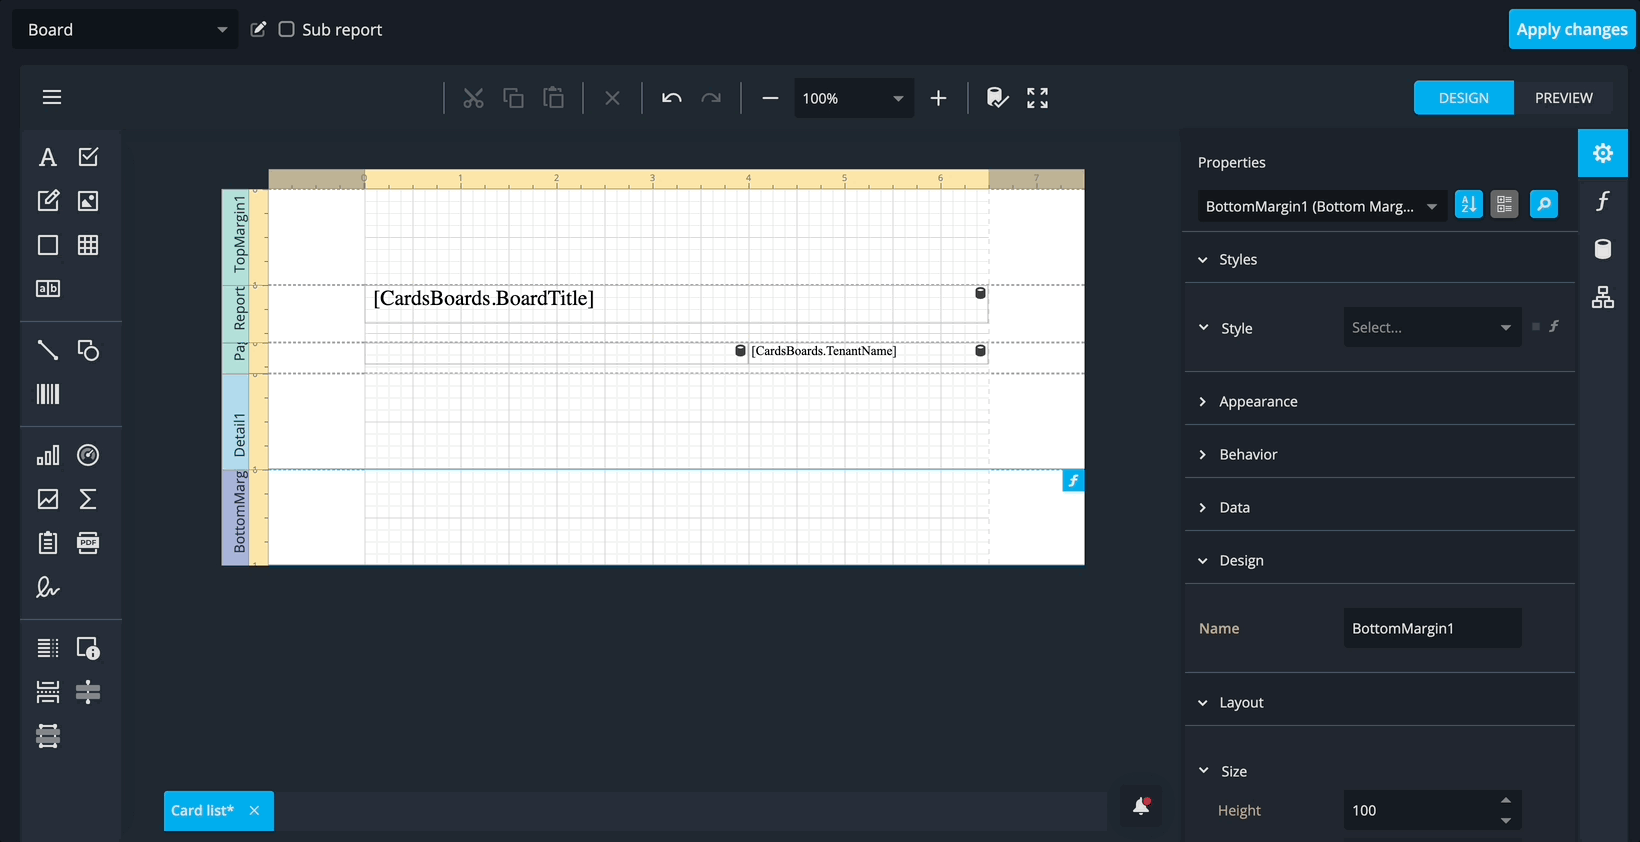
- Add a new page header on tip of Details1 - Click on it to modify its Behavior.

- In the Behavior section of the side-panel, set Print On to Not with Report Header. This ensures the page header does not appear on the first page.
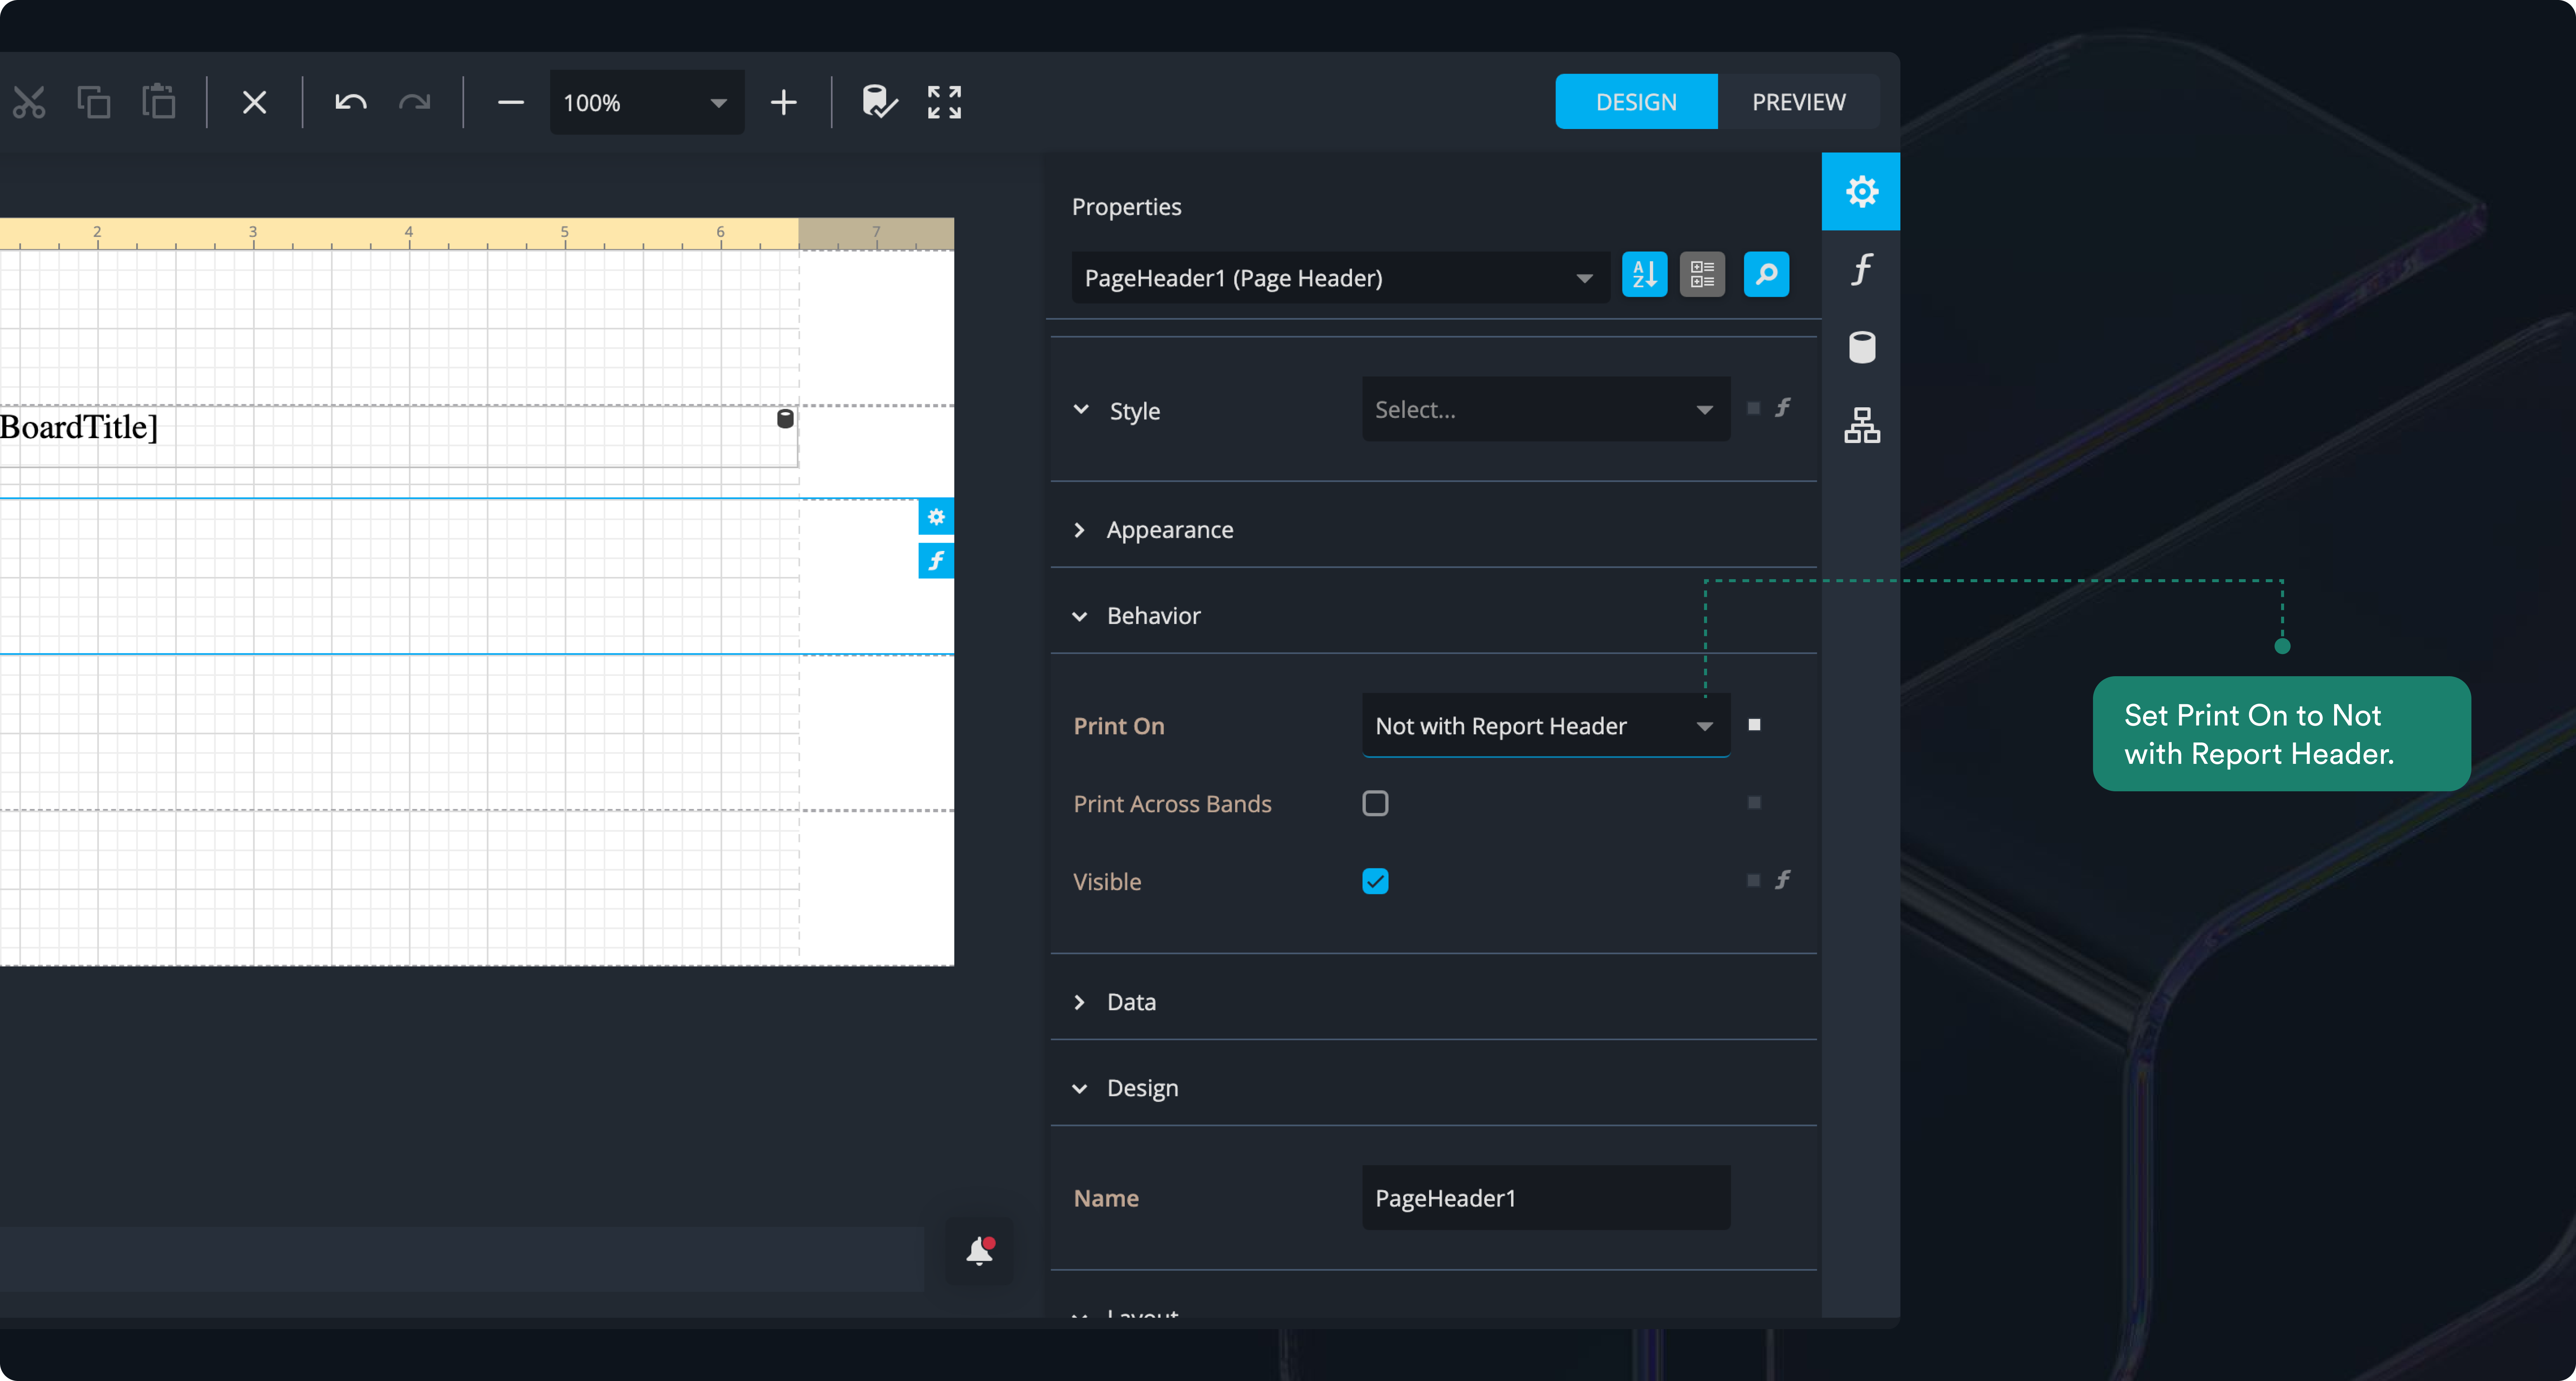
- In the Layout section, set the height to 32.
- Open the Field List on the right toolbar.
- Expand the Cards query.
- Expand the CardsBoards detail.
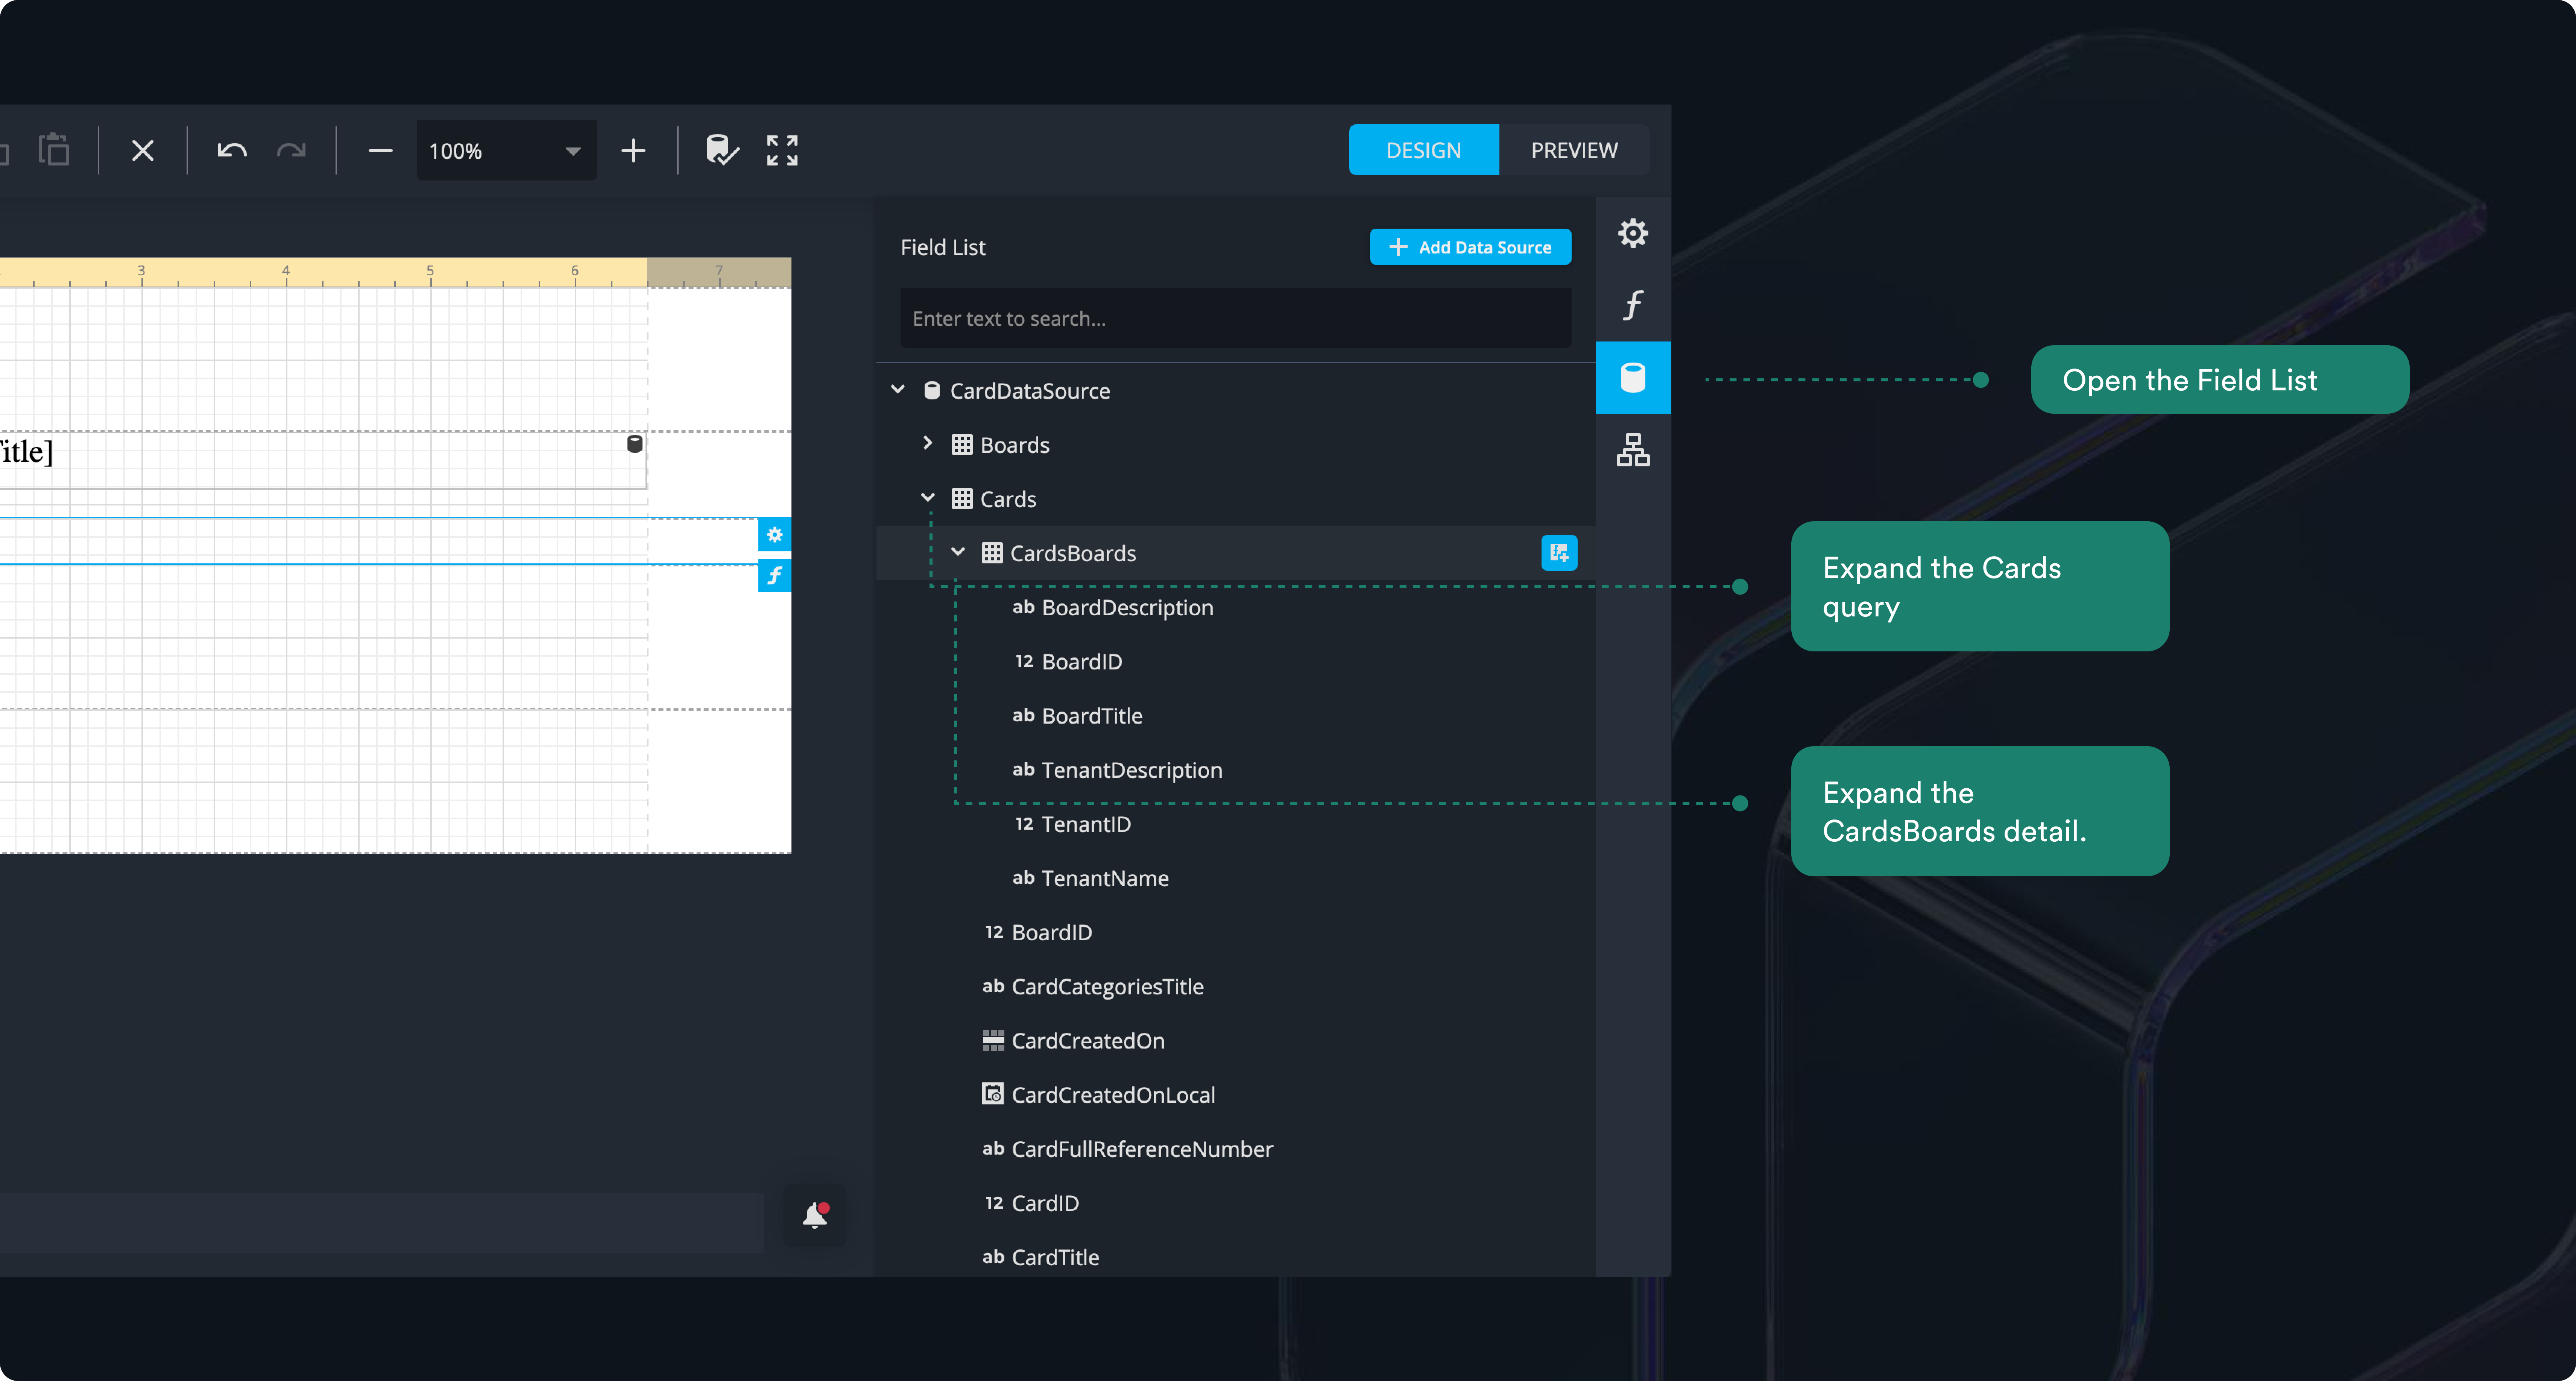
- Drag the BoardTitle and TenantName fields to the PageHeader1 band.
5. Style Page Header Fields
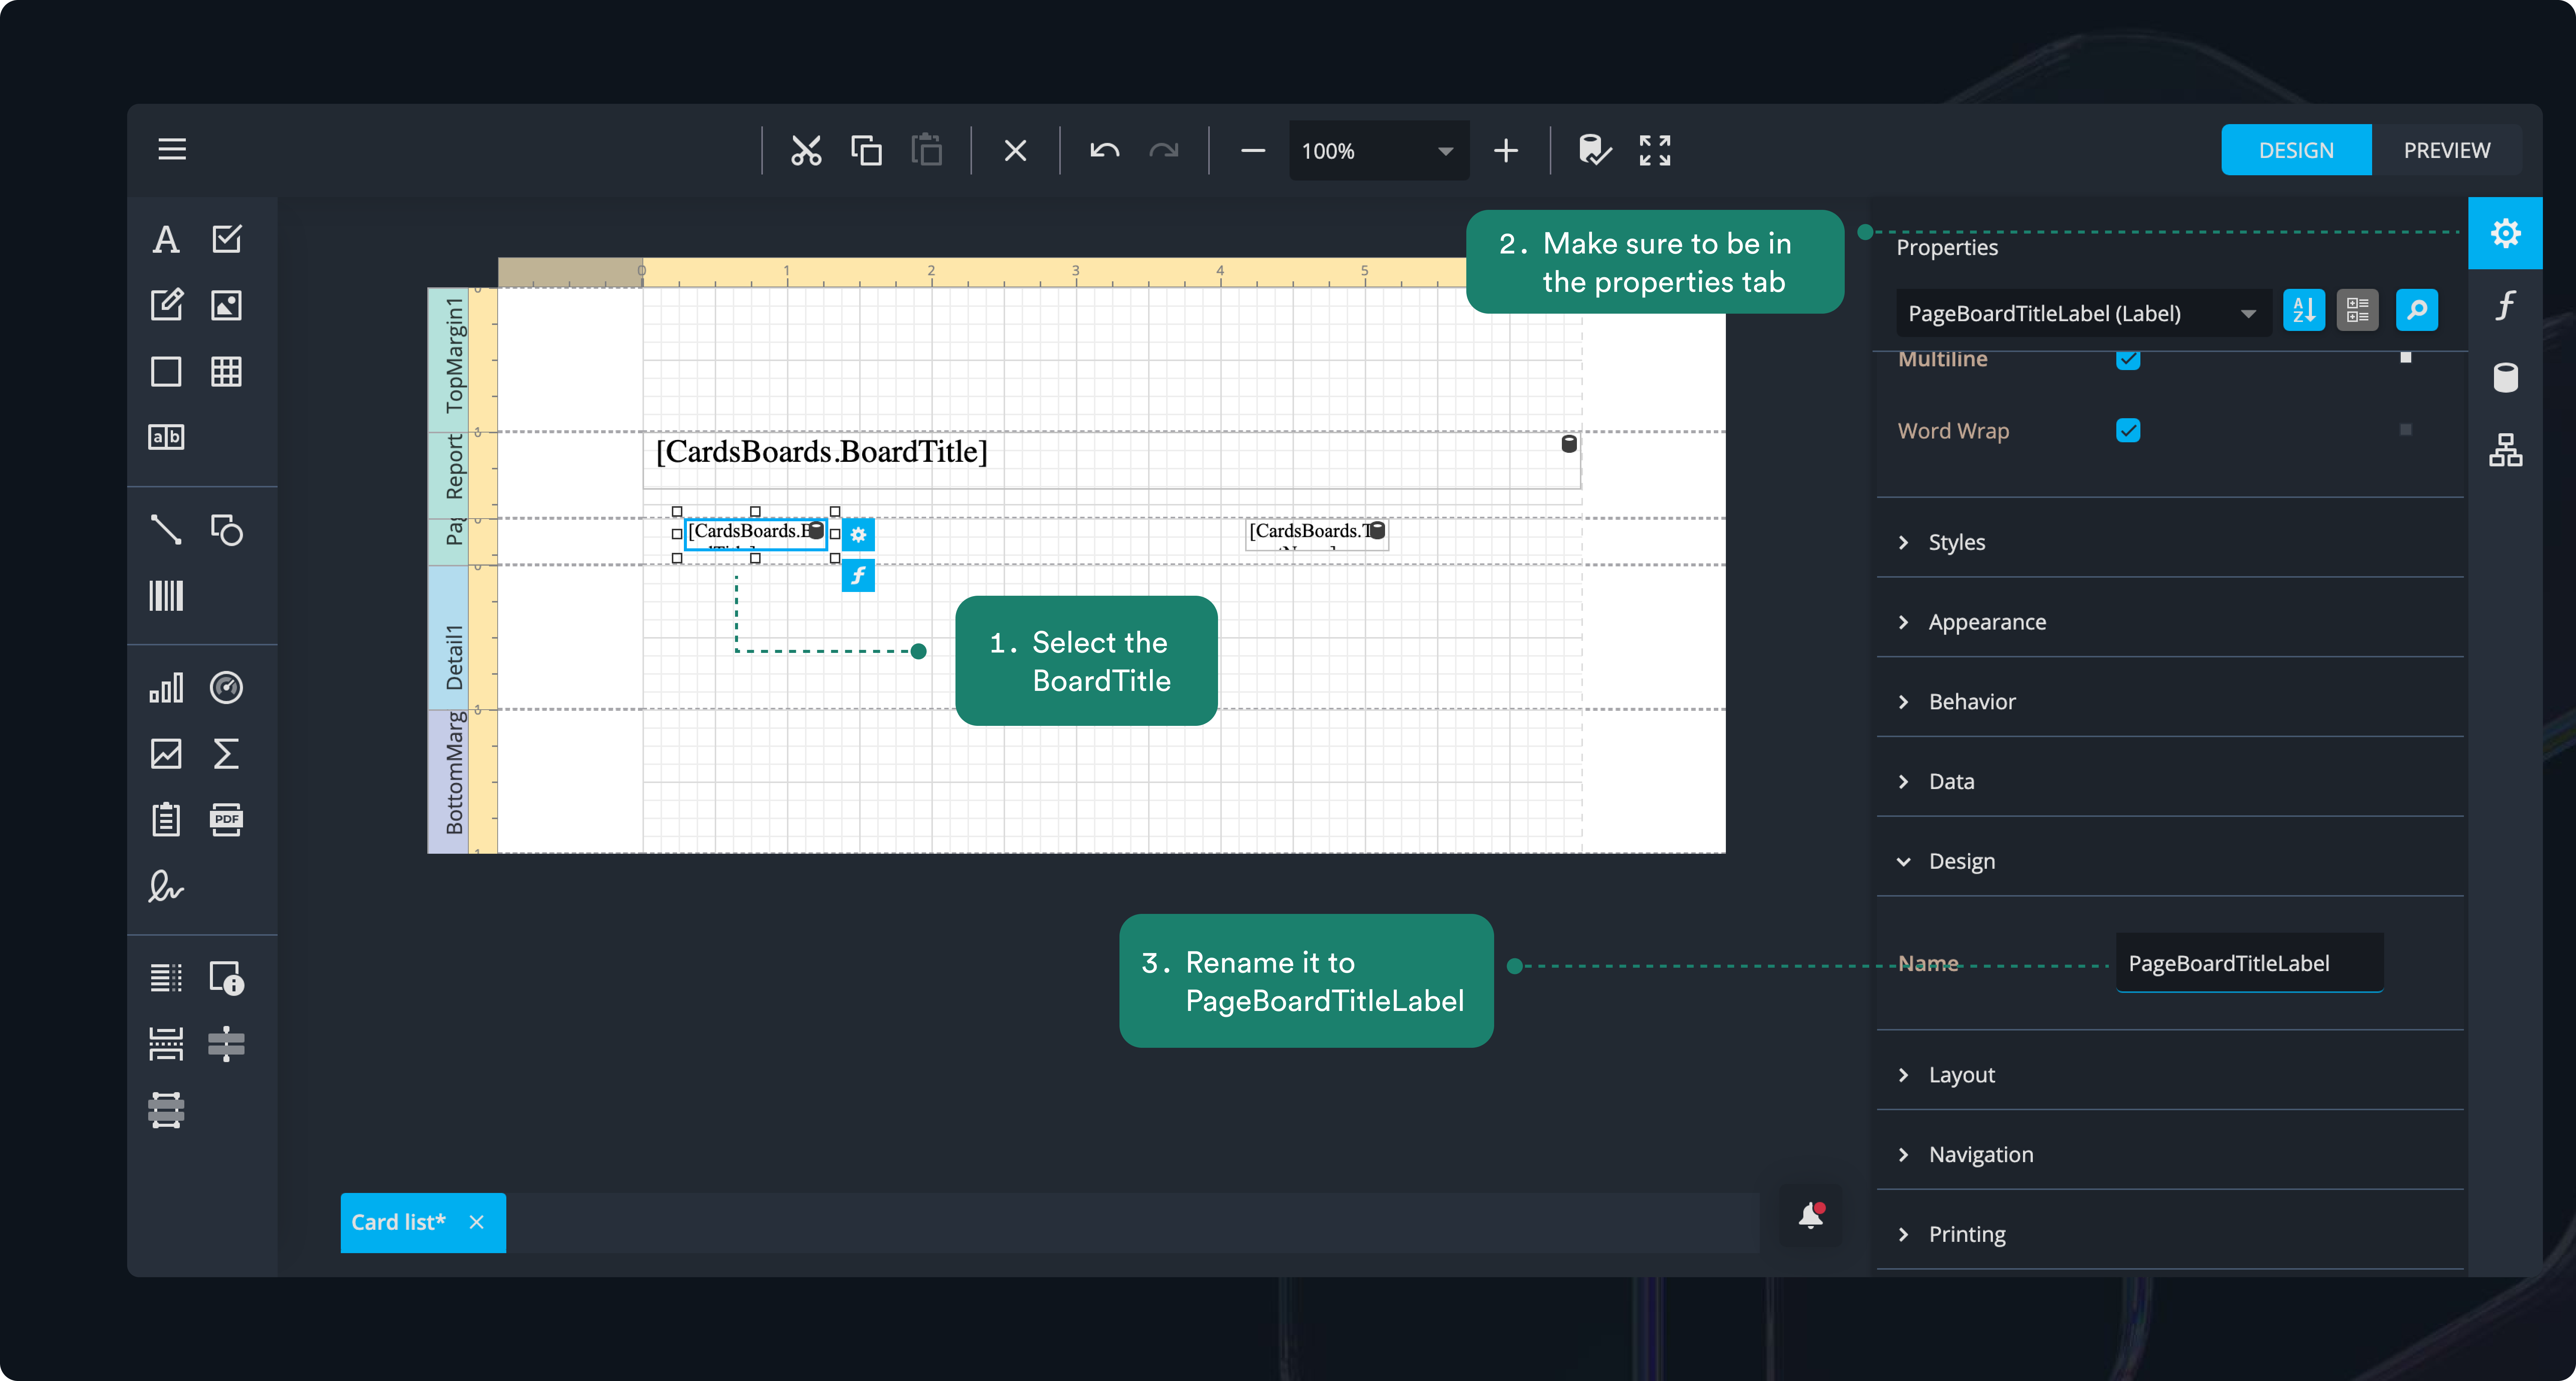
- Select the BoardTitle and in Properties, expand the Design section and set the name to PageBoardTitleLabel.
- Set the layout to: X = 0, Y = 0, Height = 23, Width = 400.

- Create a new style for PageBoardTitleLabel called PageHeaderLabelStyle. Set the font to Noto Sans, size 10.

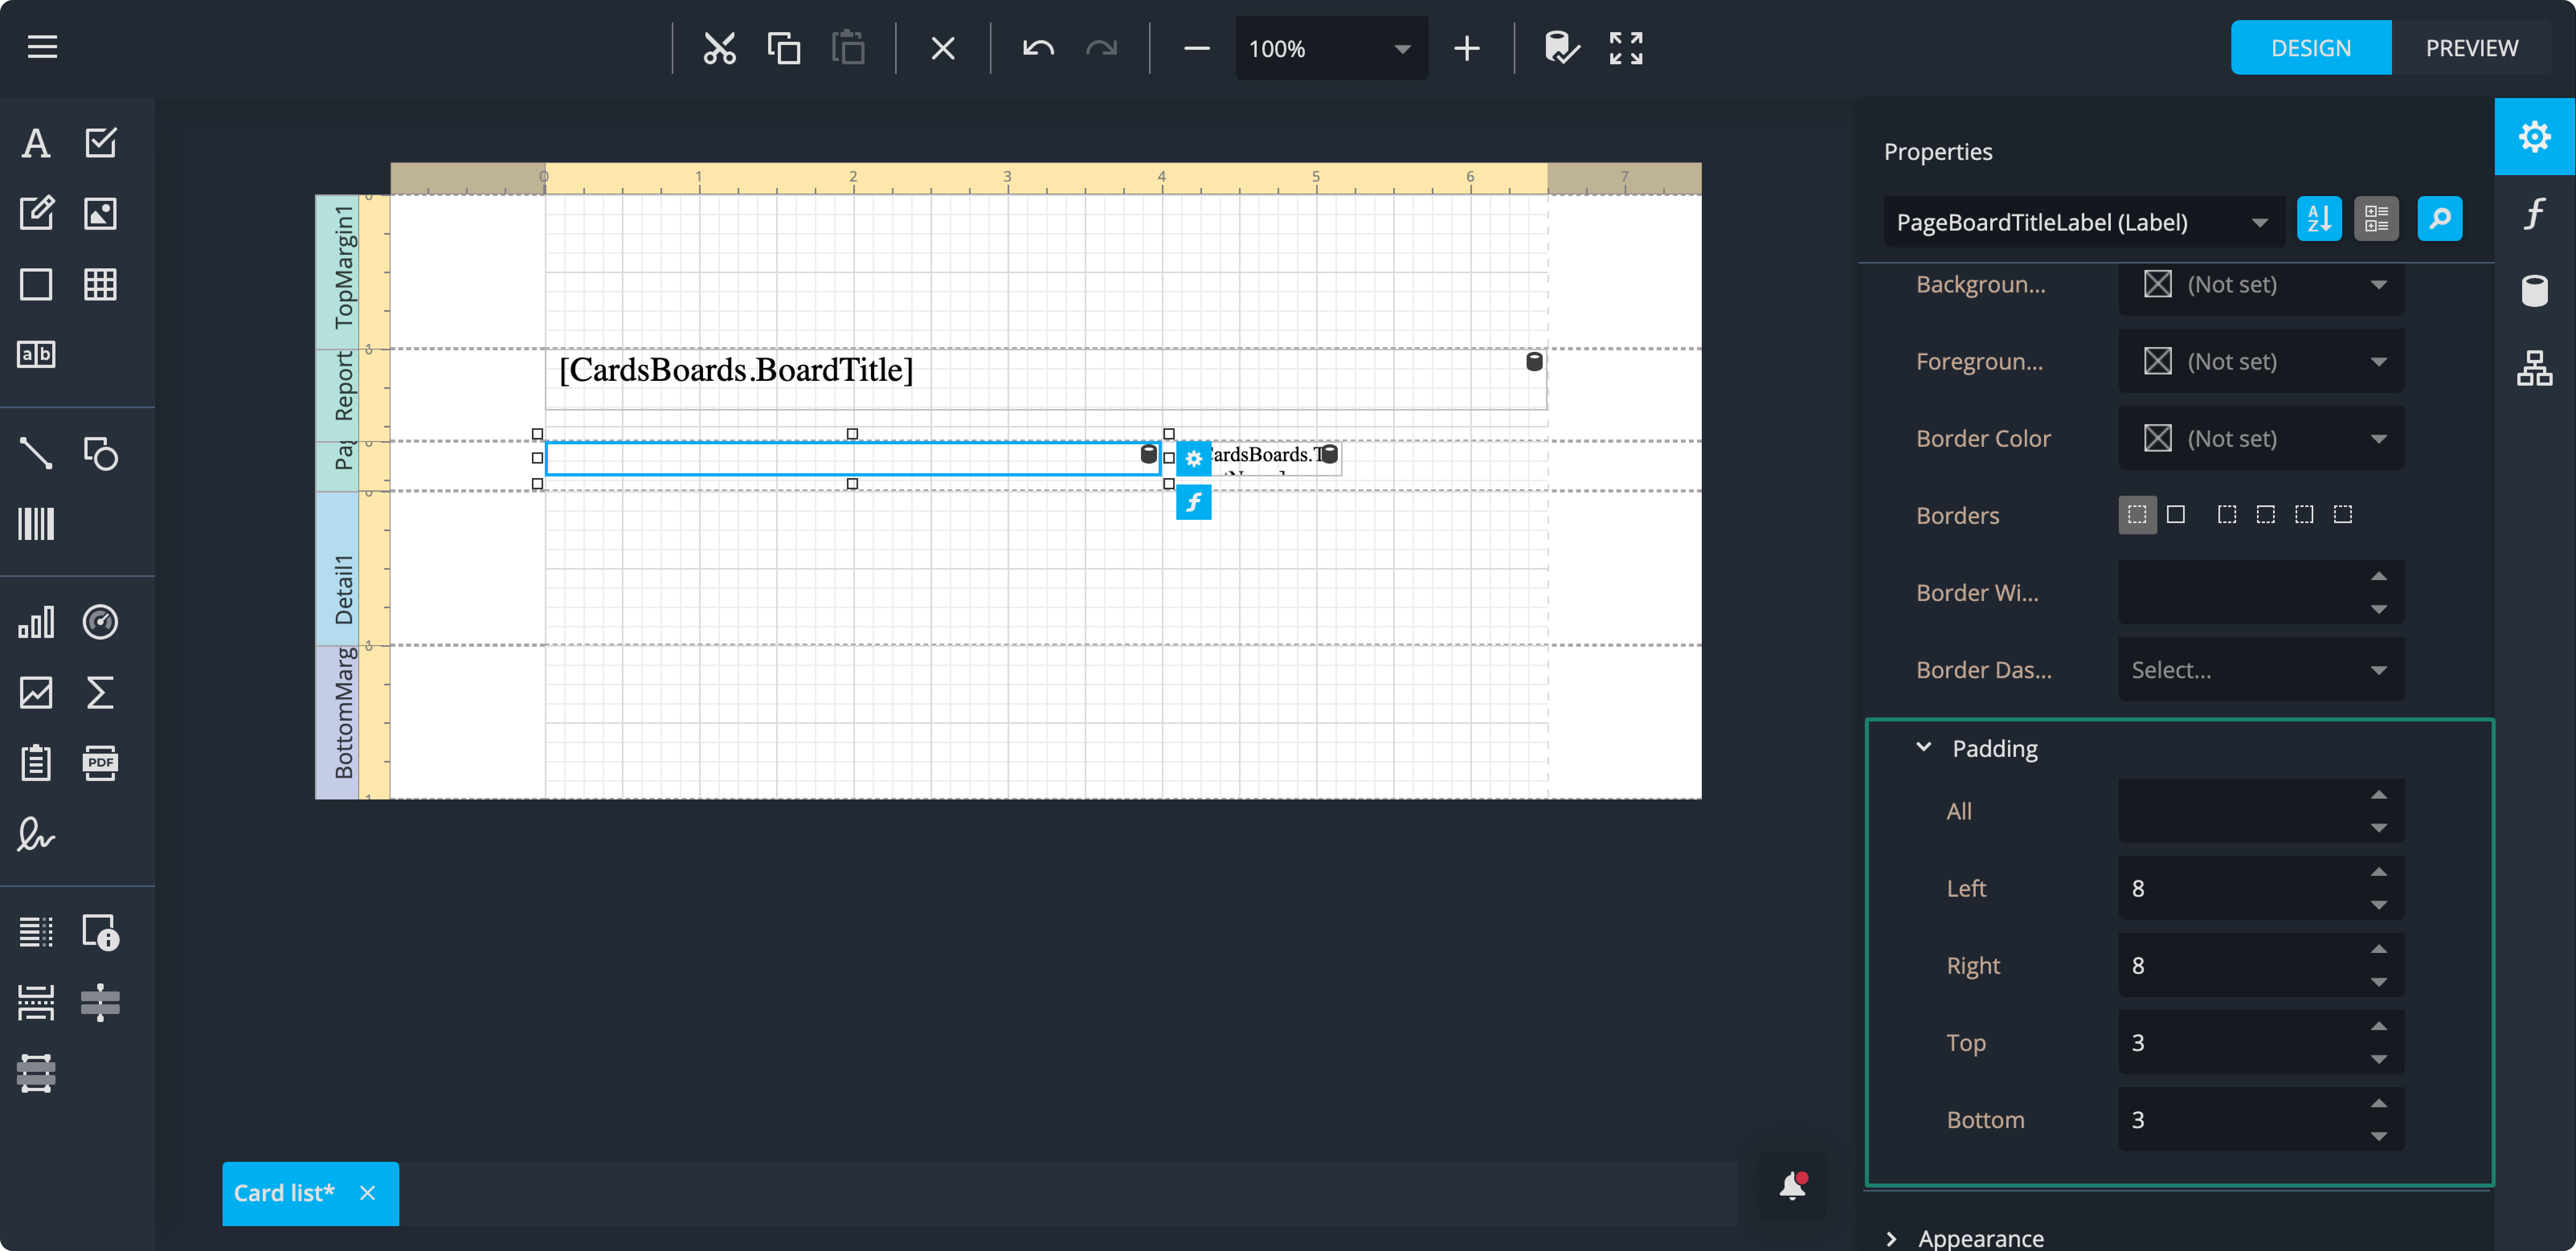
- Set the padding: Left 8, Right 8, Top 3, Bottom 3.
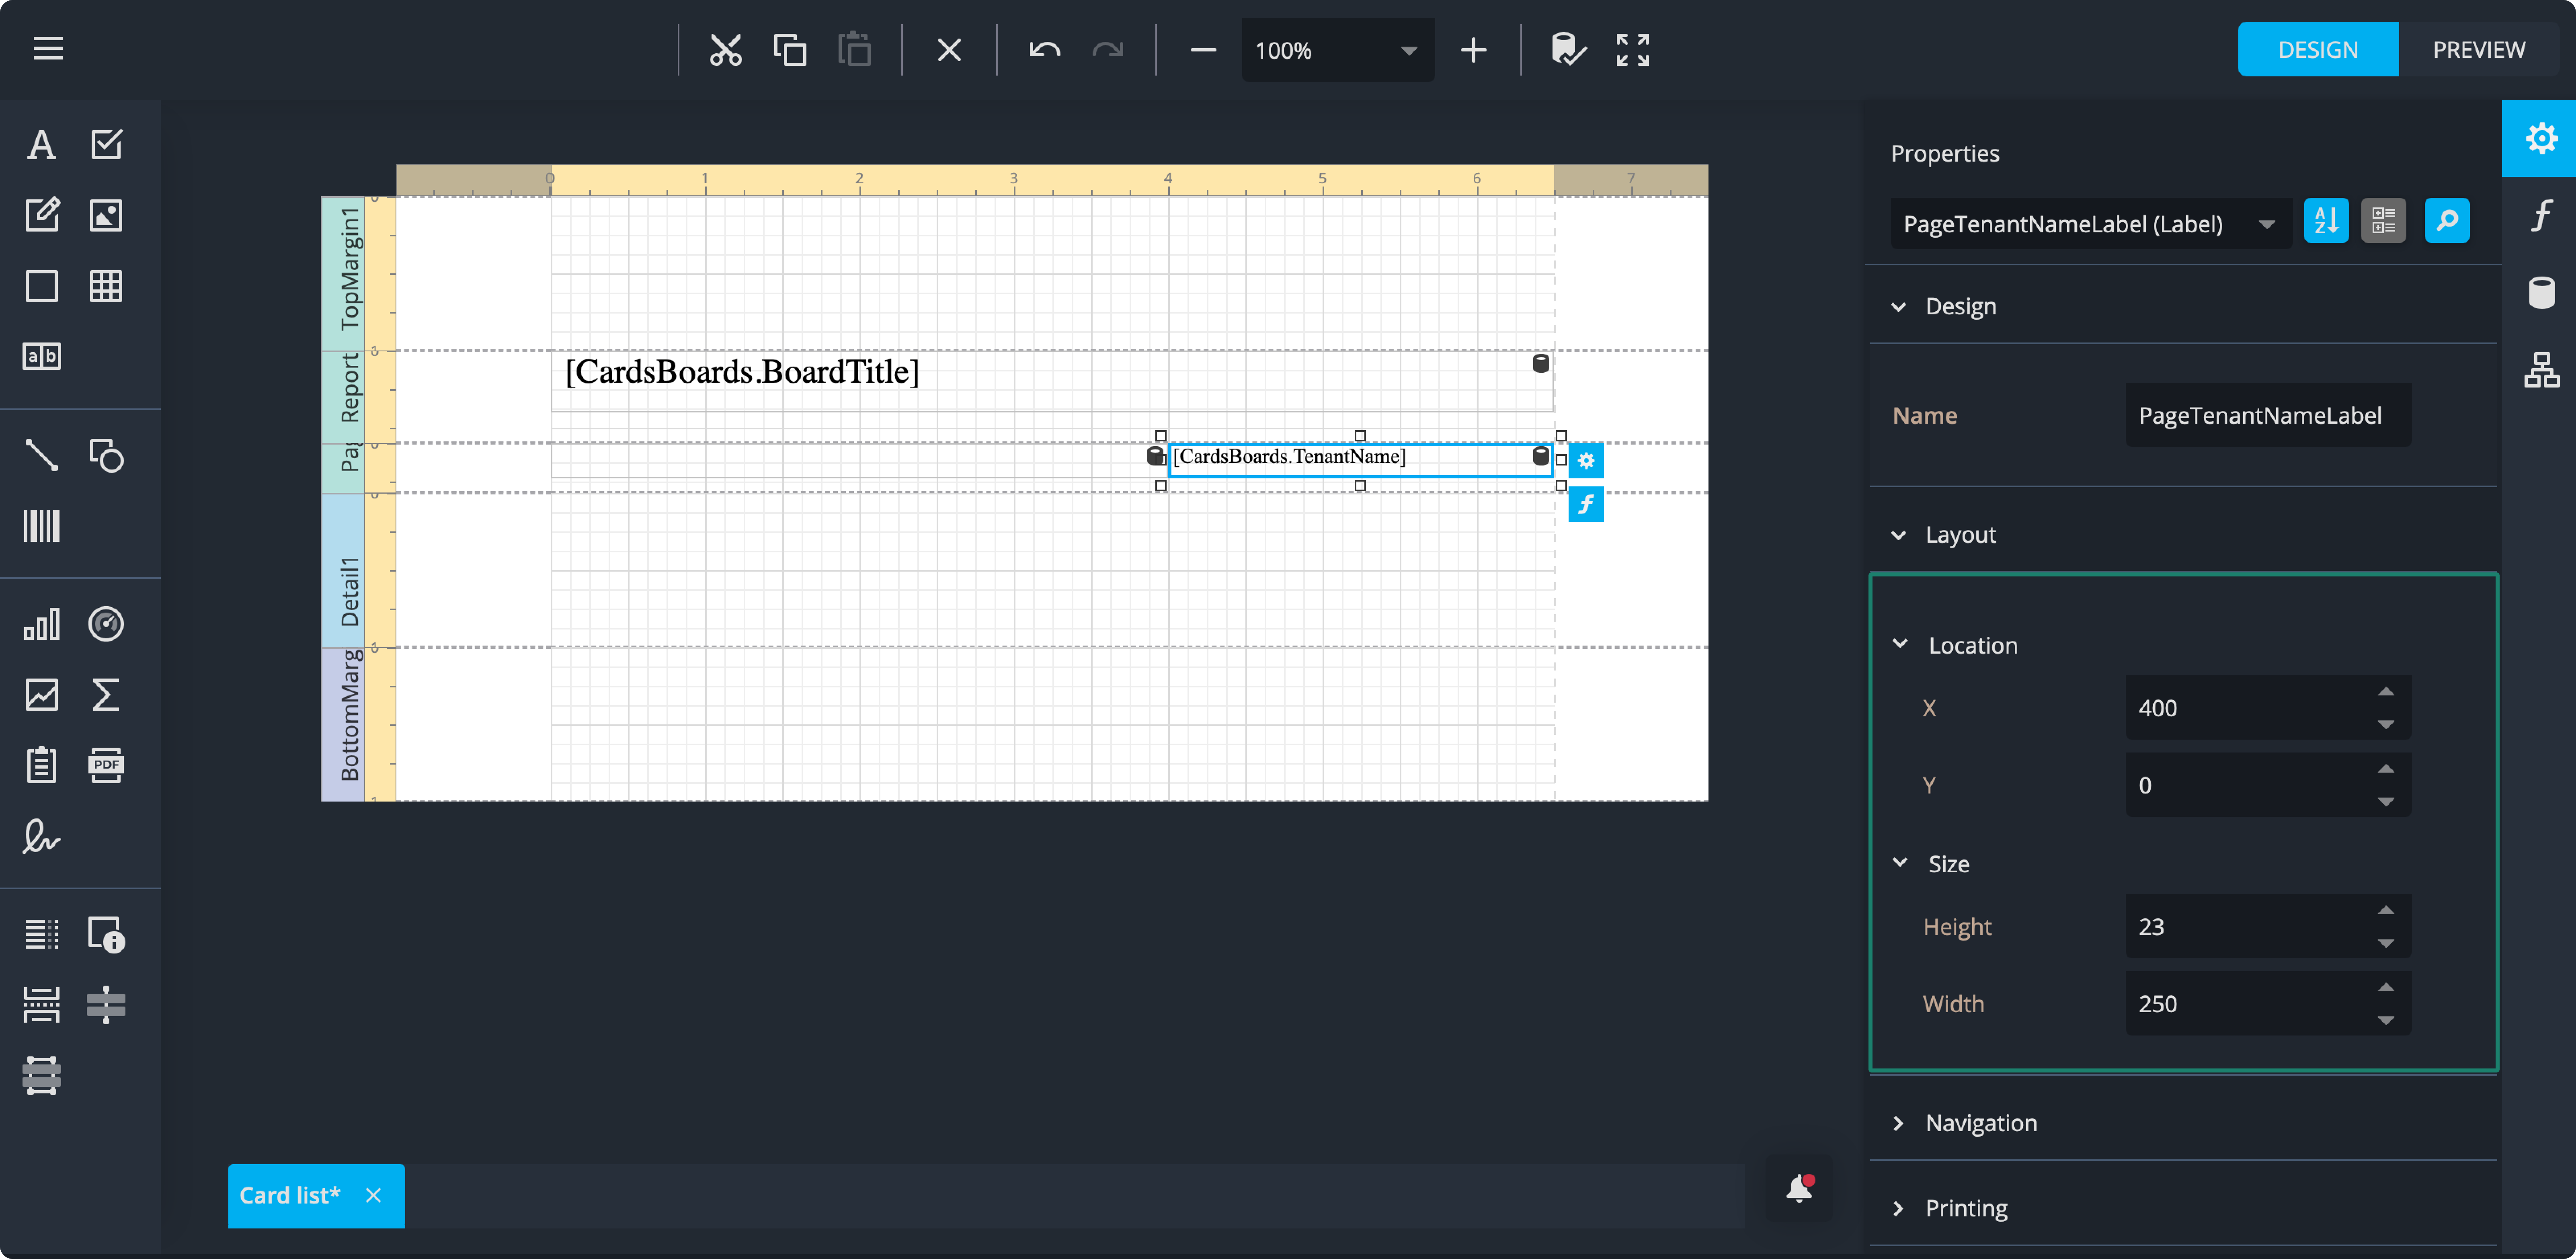
- Select the TenantName control and set the name to PageTenantNameLabel.
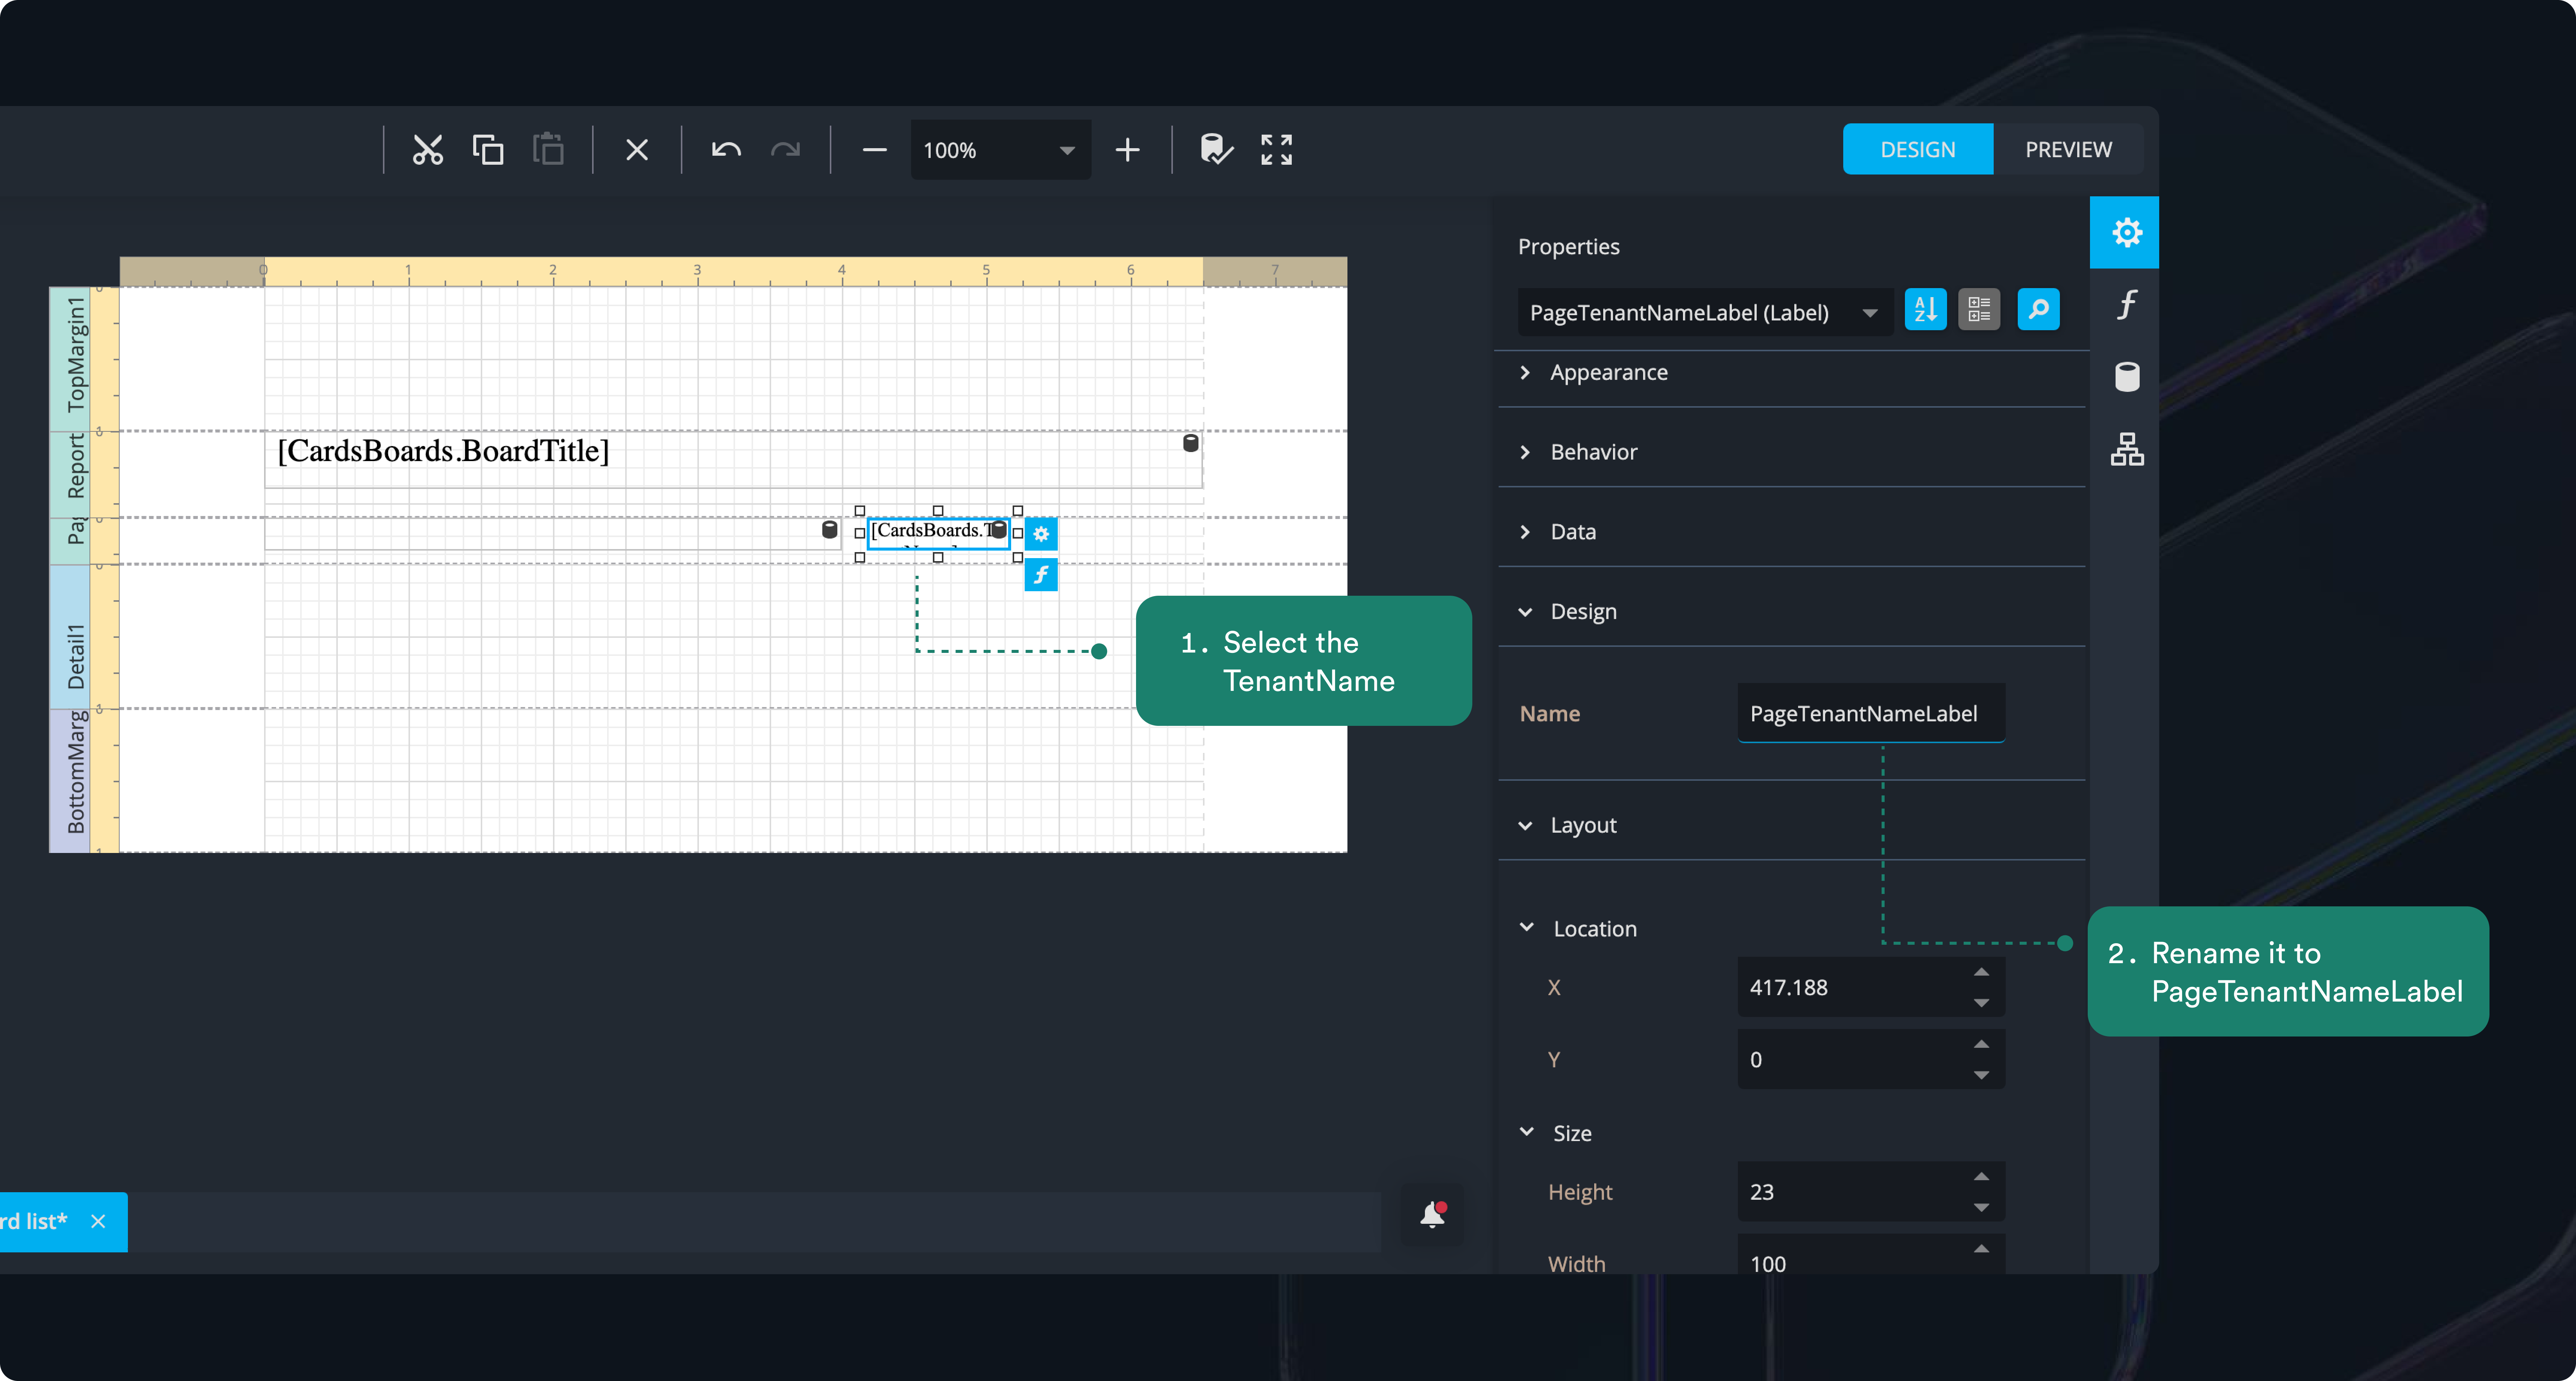
- Set the layout to: X = 400, Y = 0, Height = 23, Width = 250. Apply the PageHeaderLabelStyle to this control.
- Give it the PageHeaderLabelStyle.
- In the Appearance section (not the style section), set the Horizontal Text Alignment to Right aligned.
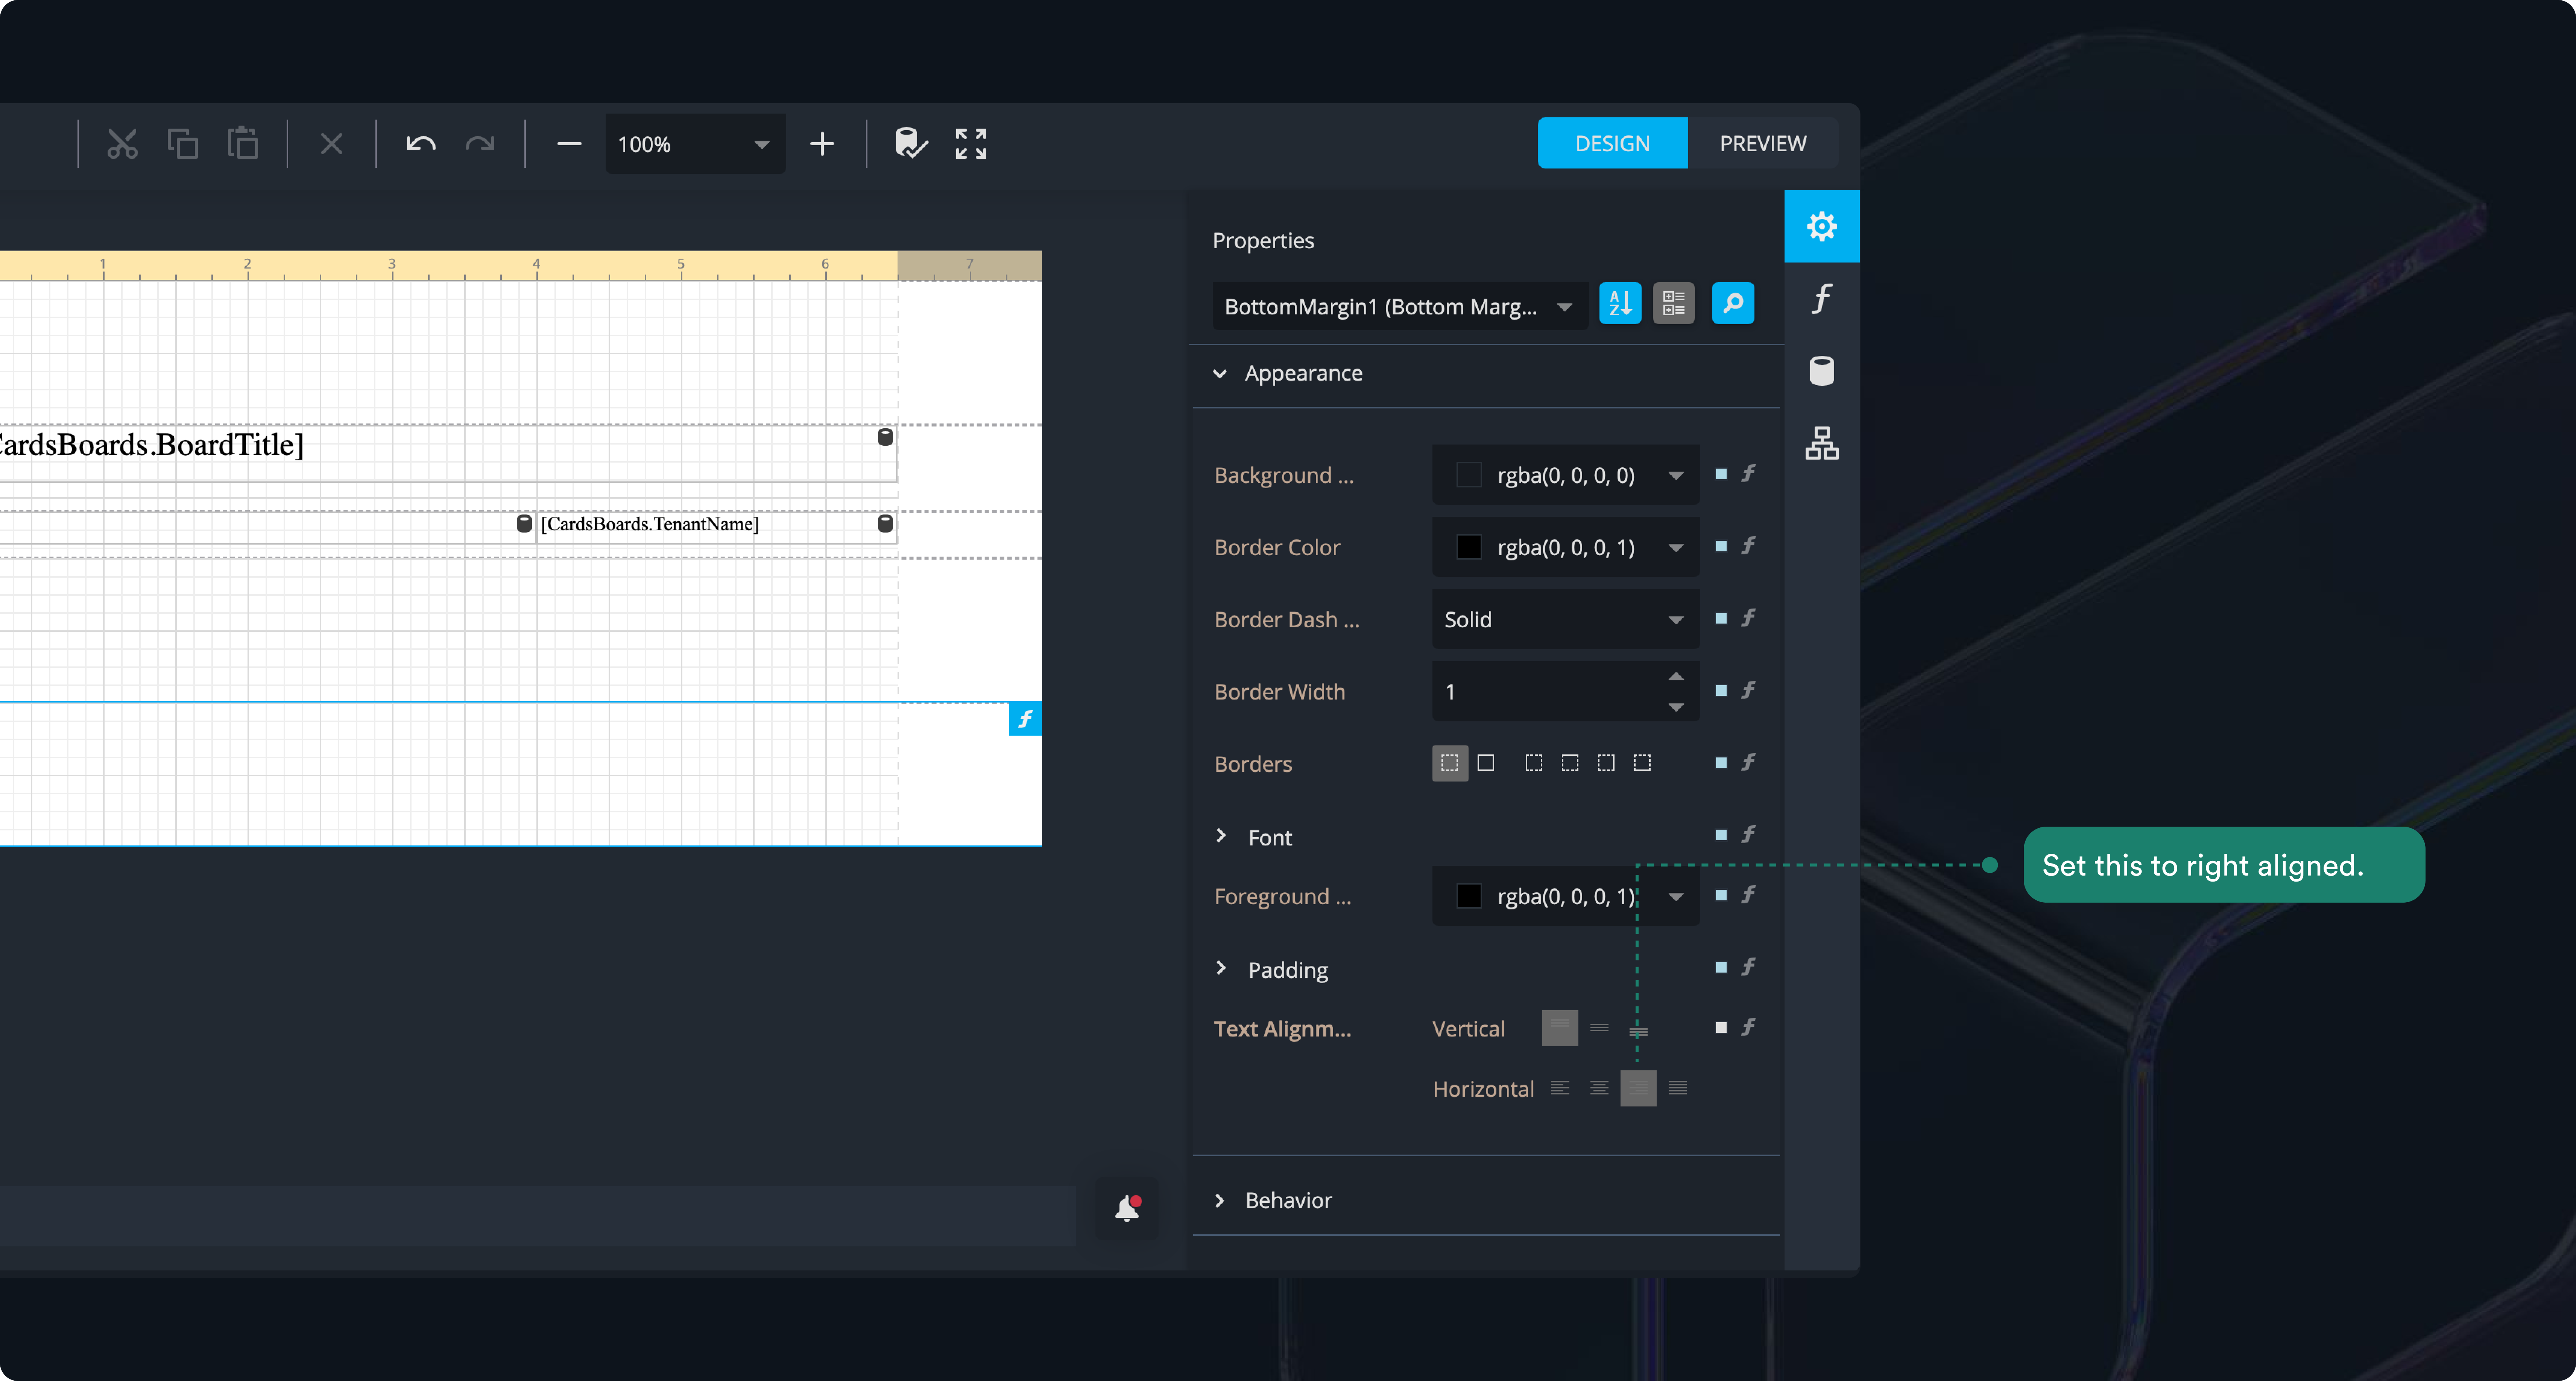
- Make sure to apply your changes.